Social Login Settings allow users to sign in or register on your platform using their existing social media accounts, such as Google and Facebook. This simplifies the login process, improves user experience, and can increase registration rates by reducing friction. You can enable or disable specific providers, configure app credentials, and manage integration settings securely within this section.
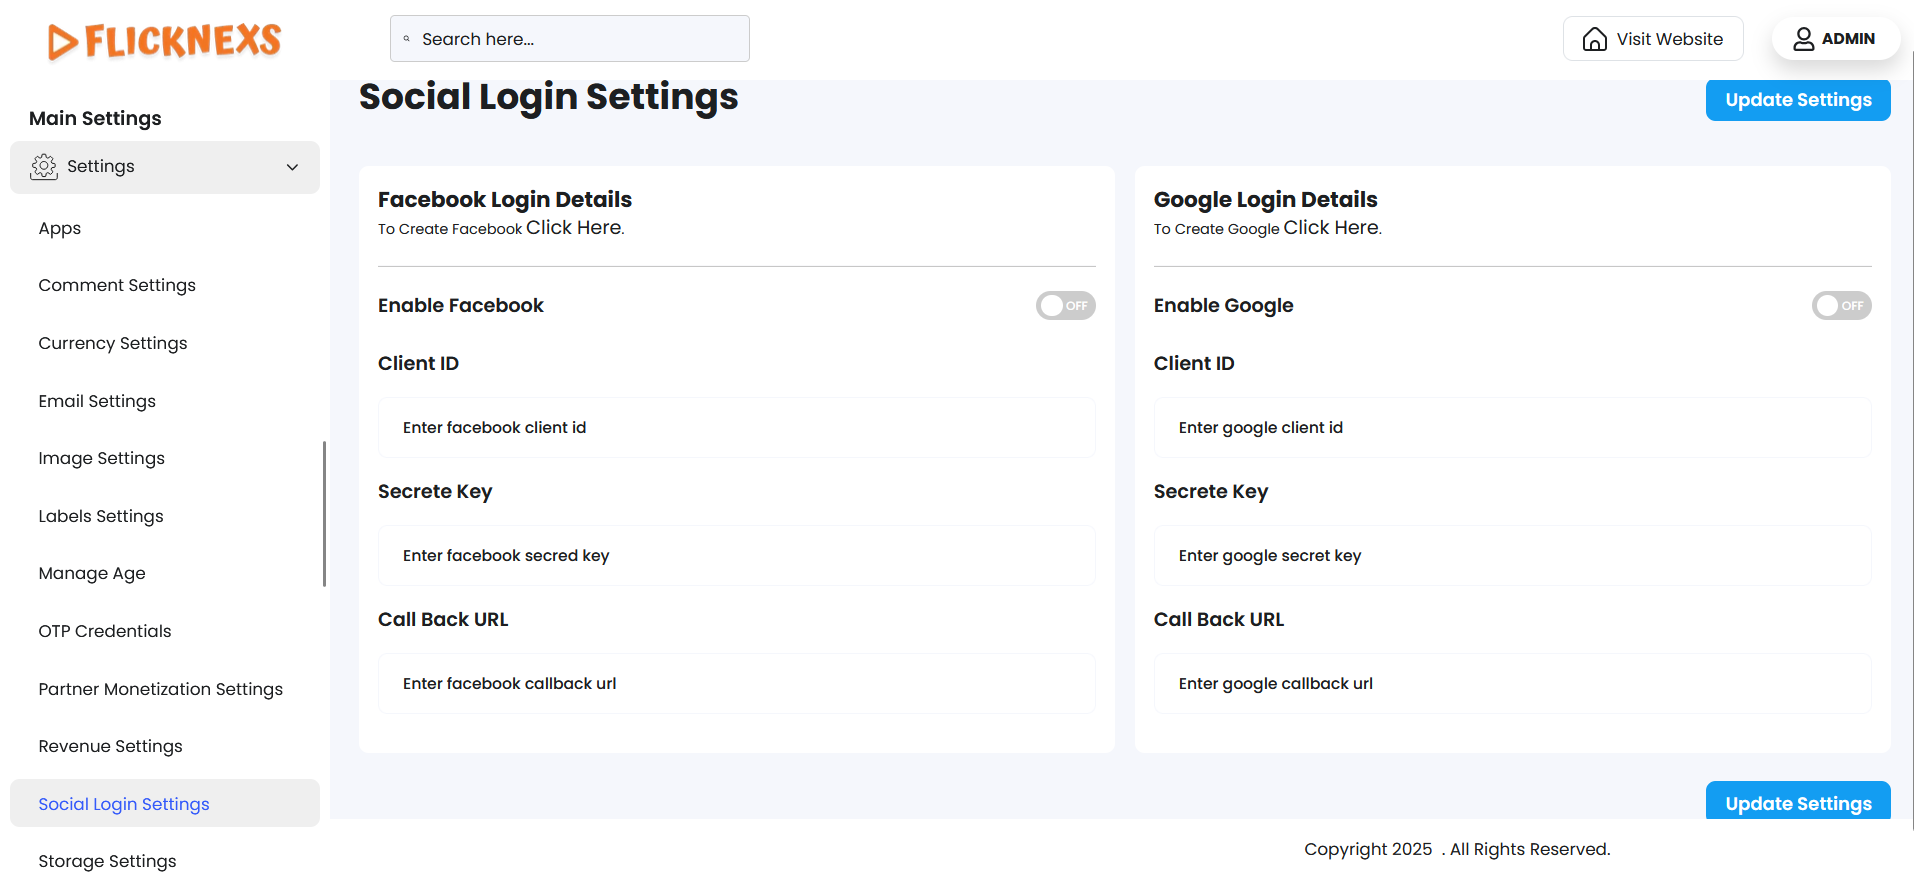
In the Social Login Settings, you can configure options for enabling user login through popular social media platforms such as Facebook and Google. This feature enhances user experience by allowing quick and easy account access without requiring a separate username and password for your platform.
Purpose of Social Login Settings
- Simplifies the registration and login process for users.
- Encourages more users to sign up as they can log in using their existing Facebook or Google accounts.
- Provides an additional layer of convenience and security for users.
Key Features
- Enable/Disable Option:
- You can choose to activate or deactivate the social login feature based on your platform’s requirements.
- Integration with Facebook:
- Allows users to log in using their Facebook credentials.
- Integration with Google:
- Allows users to log in using their Google credentials.
Configuration Fields
When enabling social login for Facebook or Google, you need to provide the following details:
a. Facebook Login Configuration
- Client ID:
- This is a unique identifier provided by Facebook for your application.
- Example: “123456789012345”
- Purpose: Identifies your platform in the Facebook ecosystem.
- Secret Key:
- A confidential key provided by Facebook for secure communication between your app and Facebook’s API.
- Example: “abcdef1234567890abcdef1234567890”
- Purpose: Ensures the authenticity of the connection.
- Callback URL:
- The URL to which Facebook redirects users after they have successfully logged in.
- Example: https://www.yourplatform.com/auth/facebook/callback
- Purpose: Specifies where users are redirected after authentication.
b. Google Login Configuration
- Client ID:
- A unique identifier assigned by Google to your application.
- Example: “123456789012-abcdefg.apps.googleusercontent.com”
- Purpose: Identifies your platform within the Google ecosystem.
- Secret Key:
- A secure key provided by Google to authenticate API requests.
- Example: “abcdef123456-ABCDEFabcdef123456”
- Purpose: Ensures the connection is legitimate.
- Callback URL:
- The URL to which Google redirects users after successful login.
- Example: https://www.yourplatform.com/auth/google/callback
- Purpose: Specifies where users land post-login.
How to Configure Social Login
- Step 1: Navigate to the Social Login Settings section in your admin panel.
- Step 2: Toggle the switch to enable or disable social login.
- Step 3: For each platform (Facebook and Google), fill in the required details:
- Client ID
- Secret Key
- Callback URL
- Step 4: Save the settings to apply changes.
- Step 5: Test the integration to ensure users can log in smoothly.
Benefits of Social Login
- Faster Onboarding:
- Reduces the time required for users to register, increasing the likelihood of sign-ups.
- Improved User Experience:
- Provides a seamless login process with fewer barriers to entry.
- Security and Trust:
- Users feel more secure using trusted platforms like Facebook or Google for authentication.
- Cross-Platform Support:
- Users can log in across devices using their existing credentials.
By configuring social login, you streamline the authentication process and make it more user-friendly, boosting engagement and reducing the dropout rate during sign-ups.