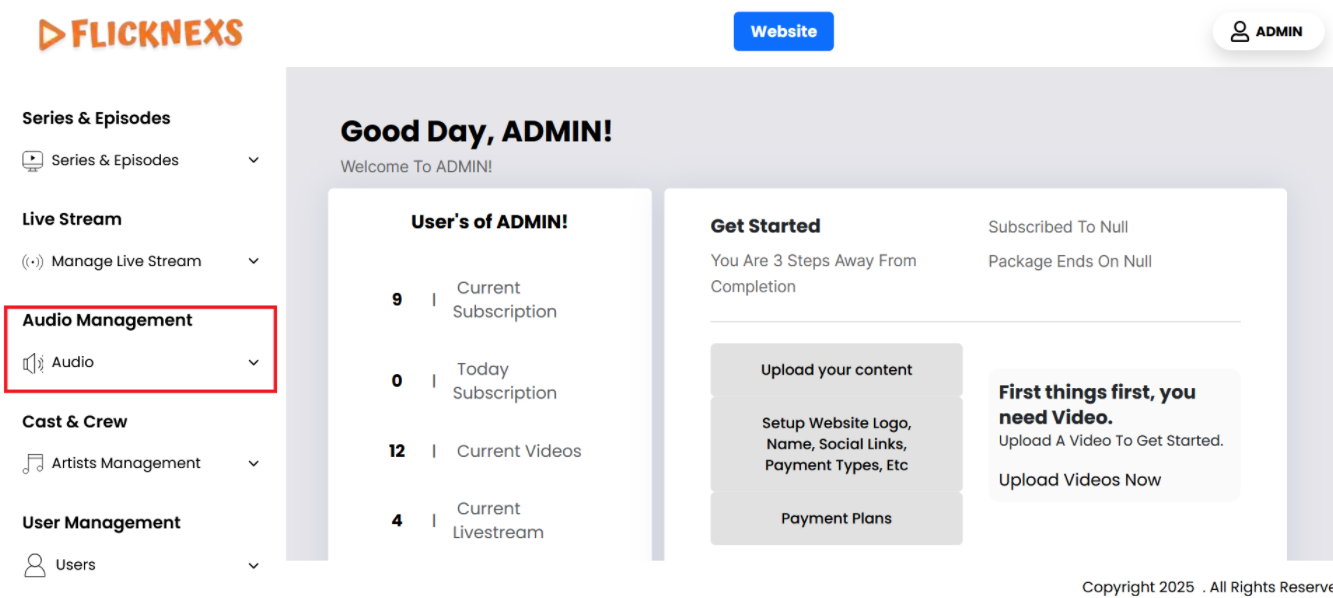
In the Admin panel, you will find various options listed on the left side of the page. To manage audios, please follow these steps:
1. Access the Admin Panel: Log in to the Admin panel from your platform.
2. Locate the Sidebar: On the left side of the page, you will see a sidebar containing multiple options.
3. Select ‘Audio Management’: From the sidebar, click on the ‘Audio Management’ option.
4. Navigate to the Audio Management Section: After selecting ‘Audio Management’, you will be directed to the audio management section where you can upload, edit, delete, and organize audio.
By following these steps, you can efficiently manage your audio content through the Admin panel.
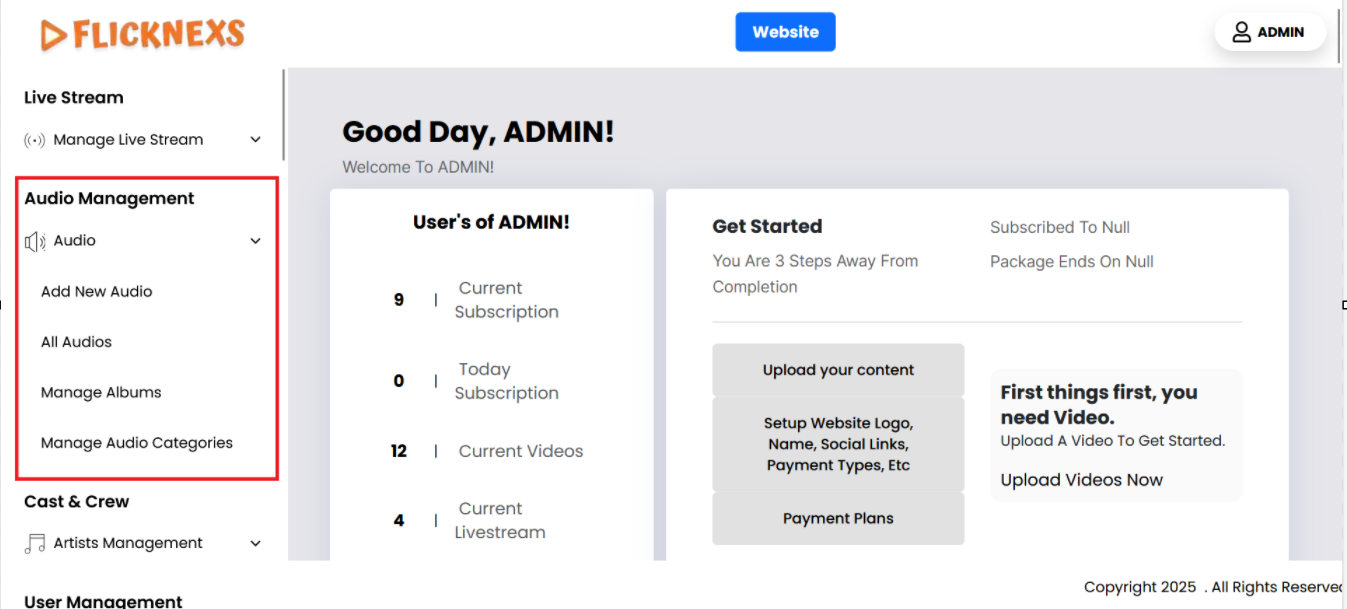
All Audios

Select “Audio List”:
- Within the “Audio Management” section, there should be an option labeled “Audio List.” Click on this option to navigate to the page displaying all Audio content.
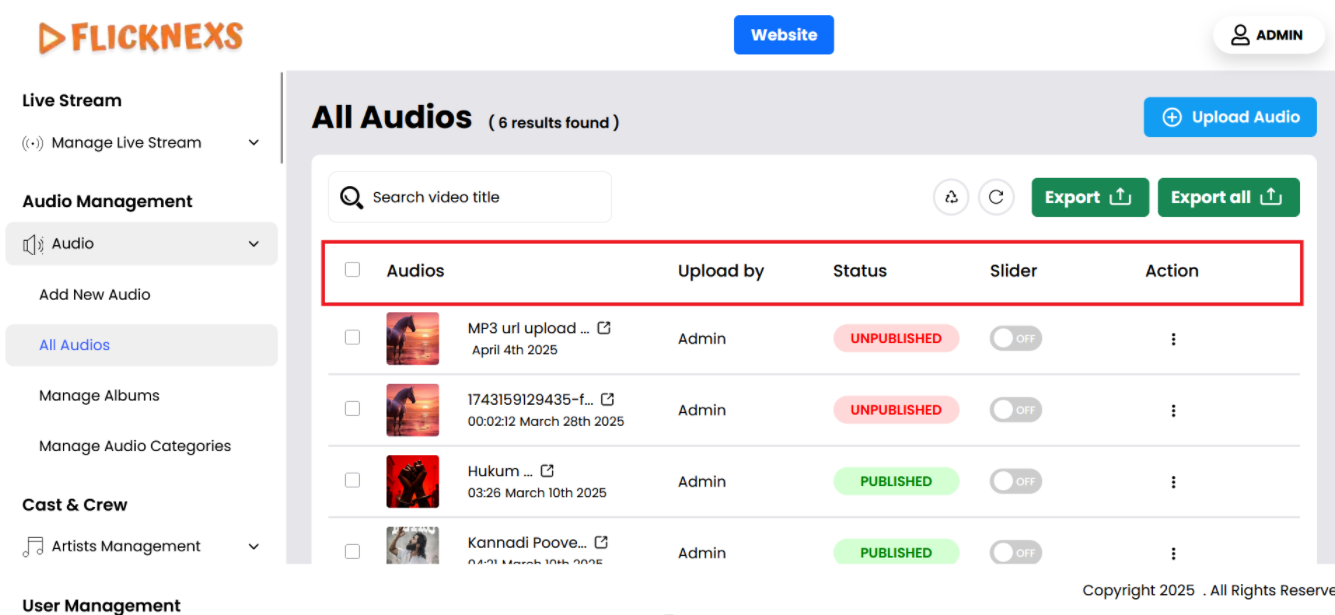
You can view the complete list of all available audio files here. The interface allows you to either select all audios at once or choose specific ones individually. For each audio file, the following details are displayed:
- Audios: The name or title of the audio file.
- Uploaded By: This field shows the name of the person who uploaded the audio.
- Status: This denotes the current state of the audio, which will include options like published, and unpublished. It helps the uploader and administrators manage the audio’s lifecycle.
- Slider: This will refer to a slider control. You can enable/disable this option if you want to show that audio to the slider of the homepage.
- Actions: You have several actions available, including:
- Edit audio: Make changes to the audio files.
- Edit Meta: Make changes to the audio metadata.
- Delete: Remove the audio file from the platform.
This setup provides an efficient way to manage and interact with the audio content.
Delete Selected Audio
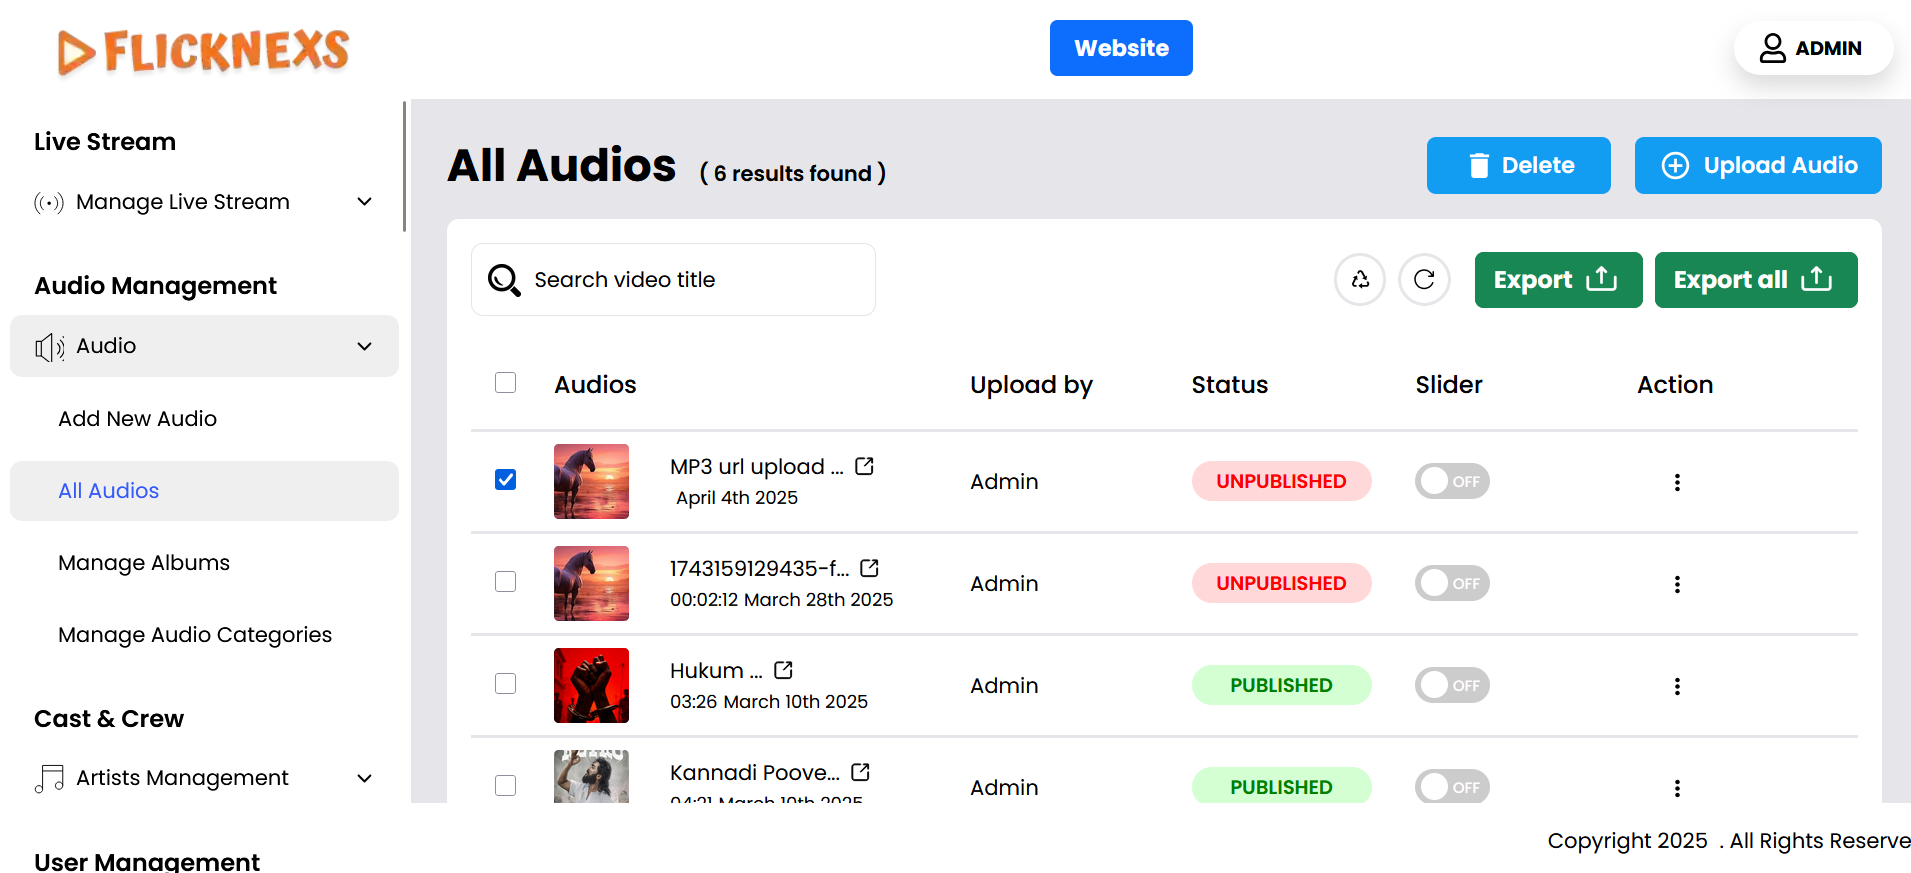
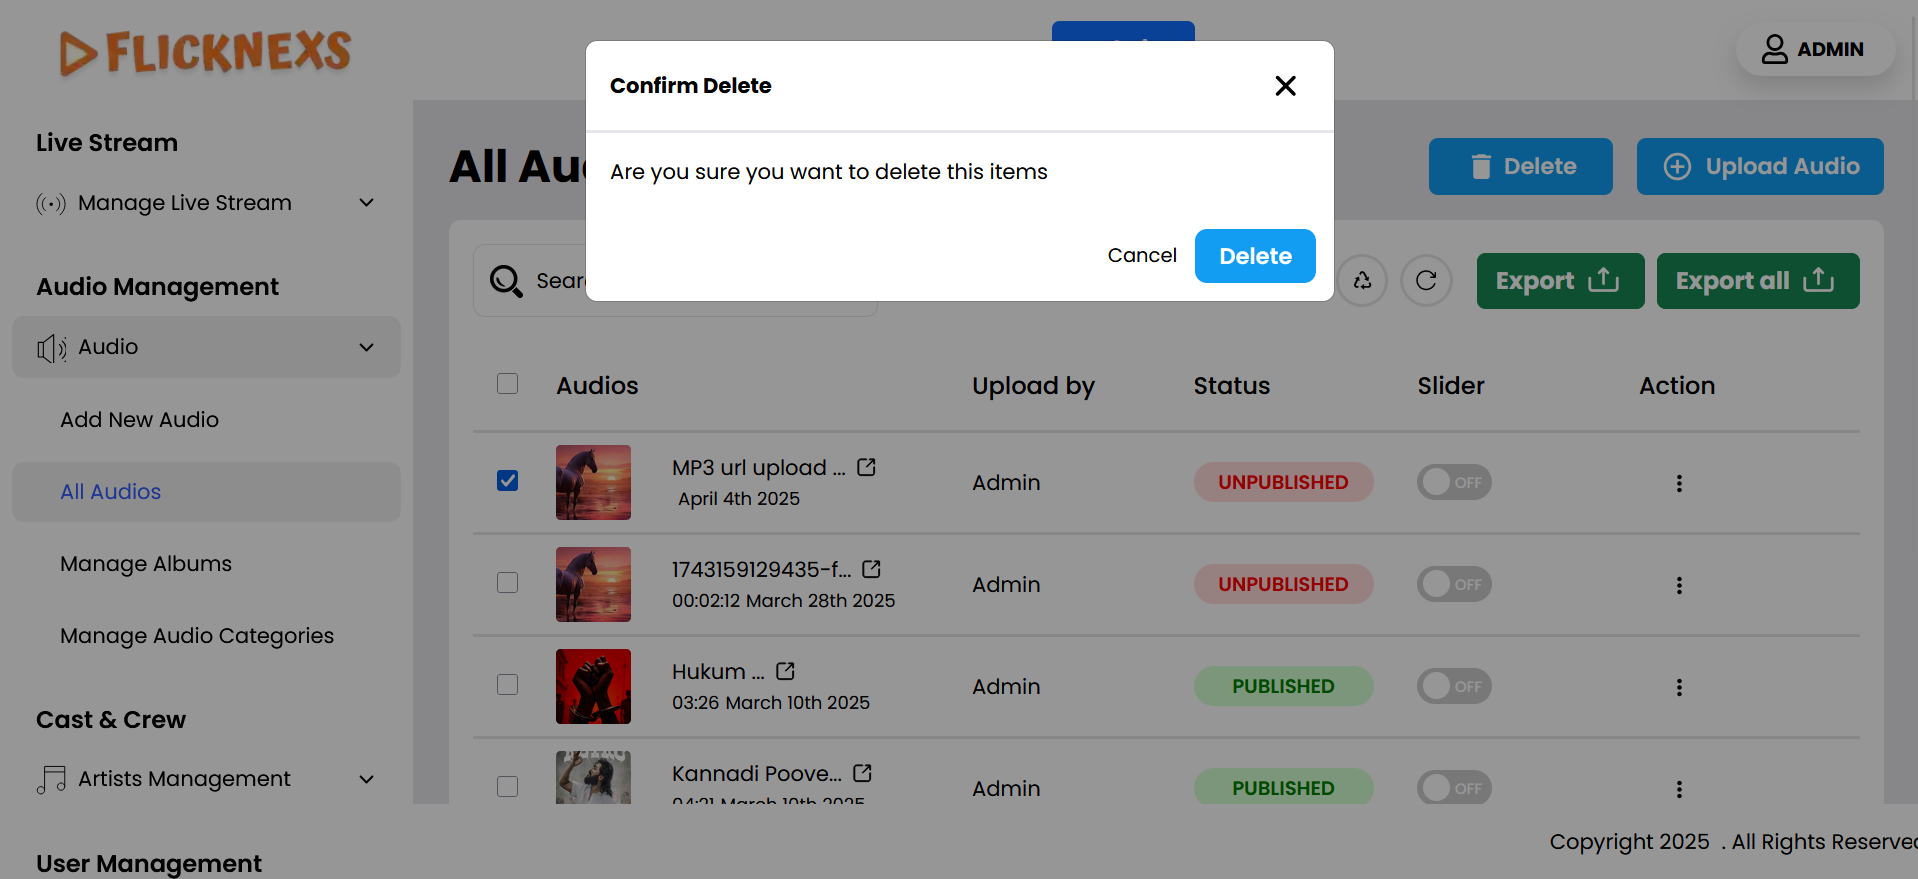
It allows you to permanently remove an entire audio track that you’ve highlighted or marked for deletion. Here’s how it typically works:
- Selection of Audio: First, you need to select the audio that you wish to delete.
- Access the Delete Option: Once the selection is made, the “Delete” option can be accessed from the section.
- Confirmation of Deletion: It asks for confirmation before deleting to prevent accidental removal. Once confirmed, the selected audio will be removed.
Add New Audio
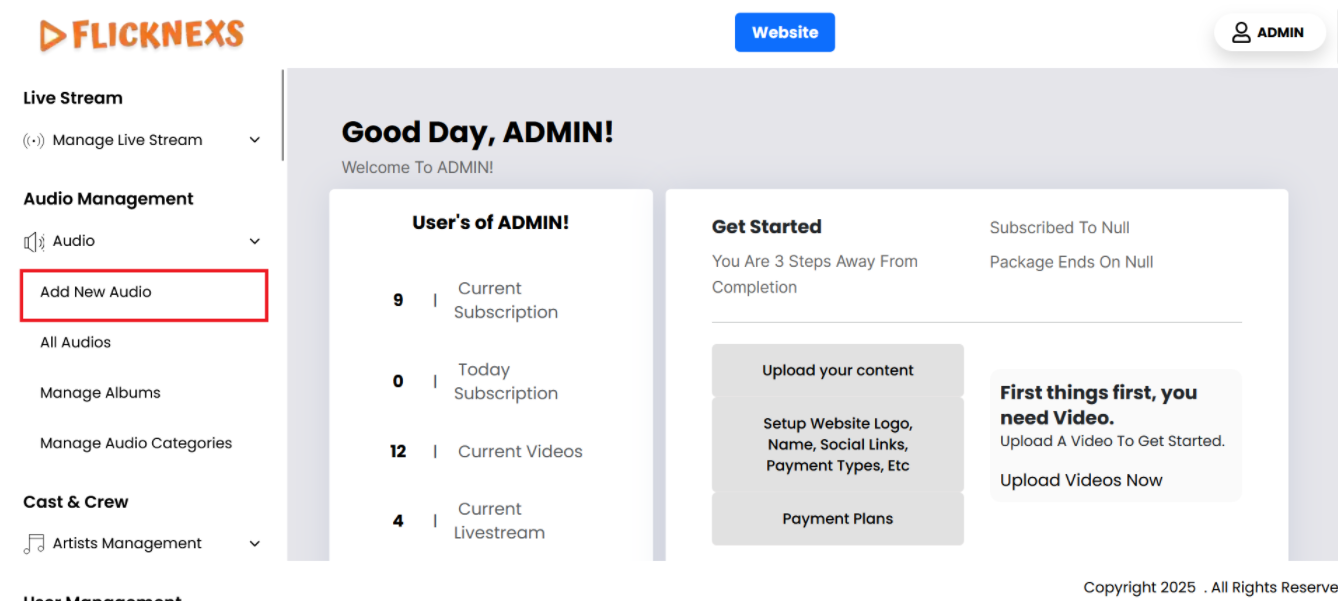
When uploading audio files to the platform, users are provided with a streamlined process that includes both file uploads and more advanced URL-based uploads. There are three distinct options for uploading audio content, each suited to different needs. These options are:
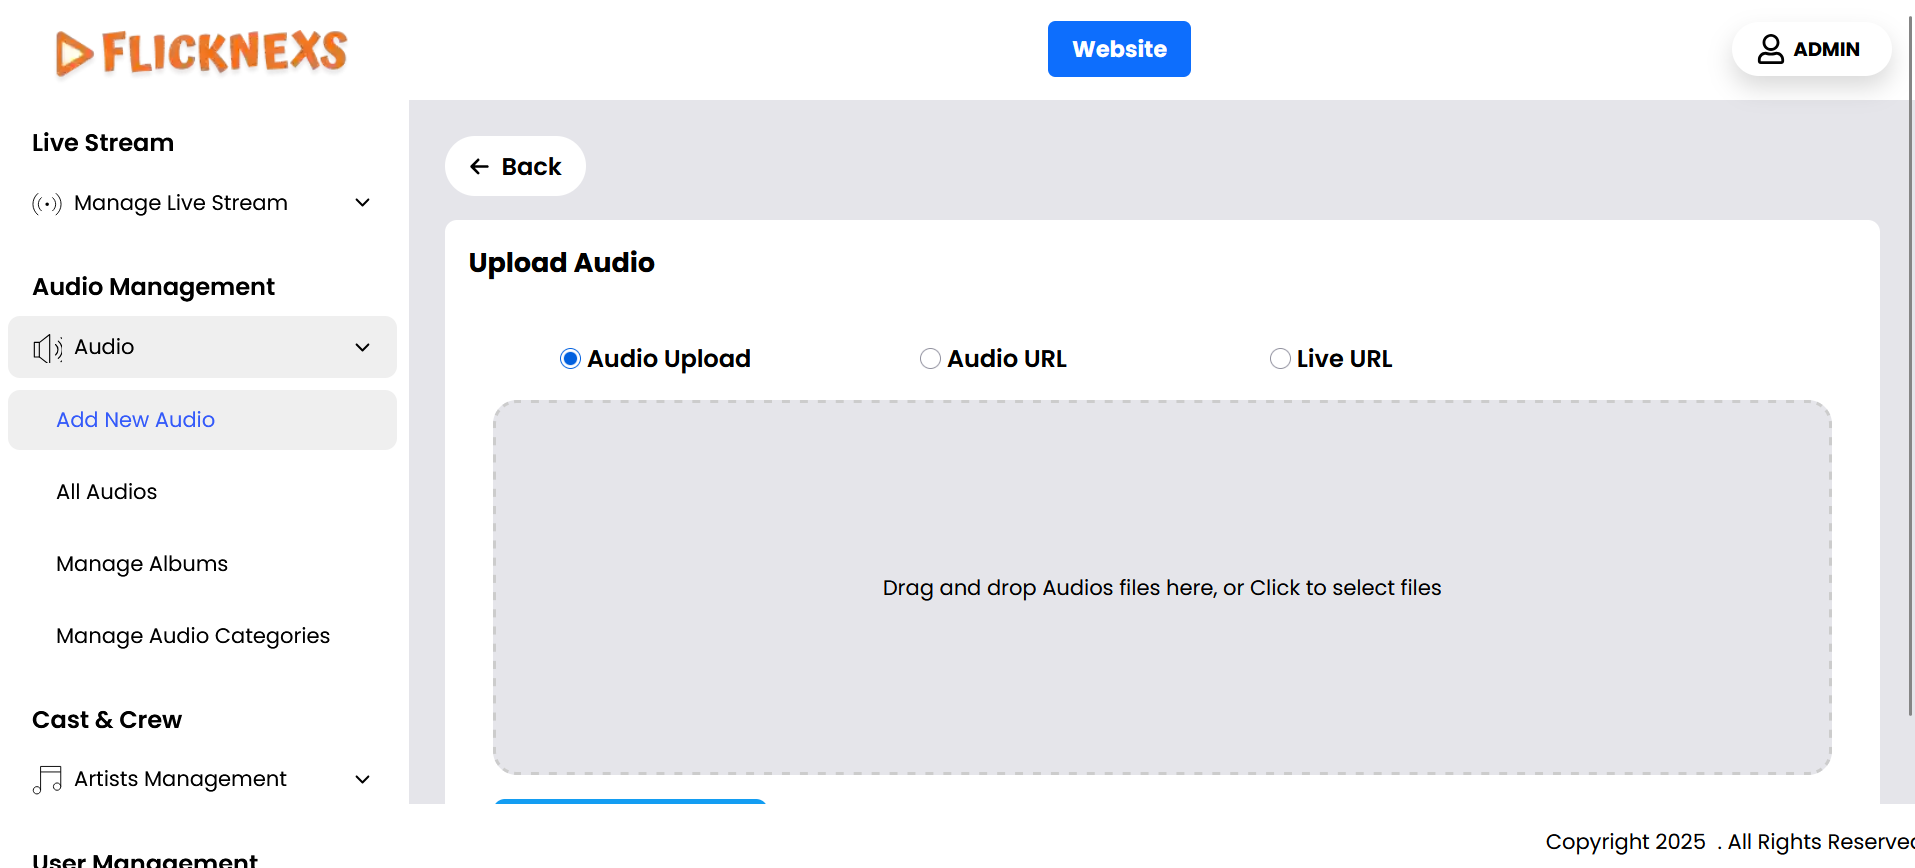
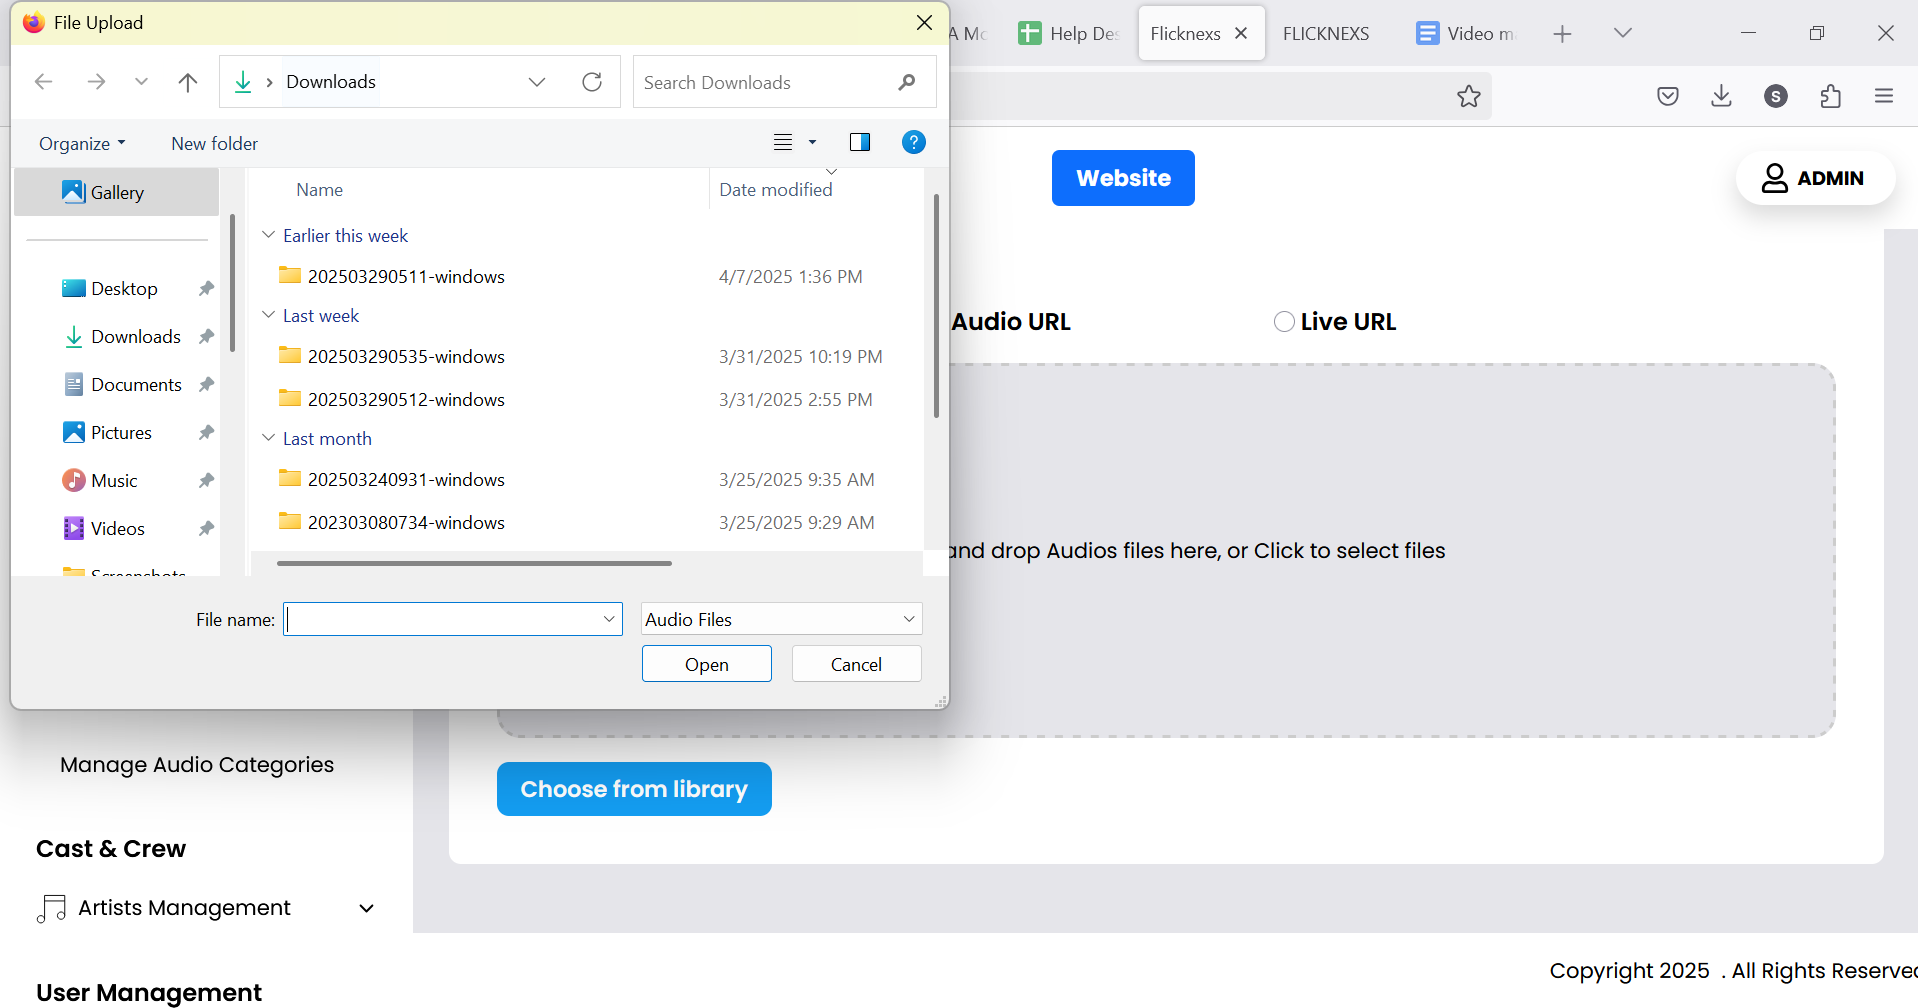
1. Audio Upload (from Computer)
- Overview: This is the traditional method of uploading audio files directly from a user’s device. Users can either browse their computer for a file or drag and drop the audio file into the upload area.
- Process:
- Browse Option: Users click a “Browse” button that opens their file explorer, allowing them to navigate their computer’s directory and select an audio file. Once selected, the file is uploaded to the platform.
- Drag-and-Drop Option: Users can simply drag an audio file from their device’s folder and drop it into the upload box on the platform interface. The file will begin uploading automatically.
- Supported Formats: The platform supports common audio formats such as MP3, and AAC.
- Use Case: This option is ideal for users who have audio files saved on their local device and need to upload them directly, such as podcasts, music tracks, or voice recordings.
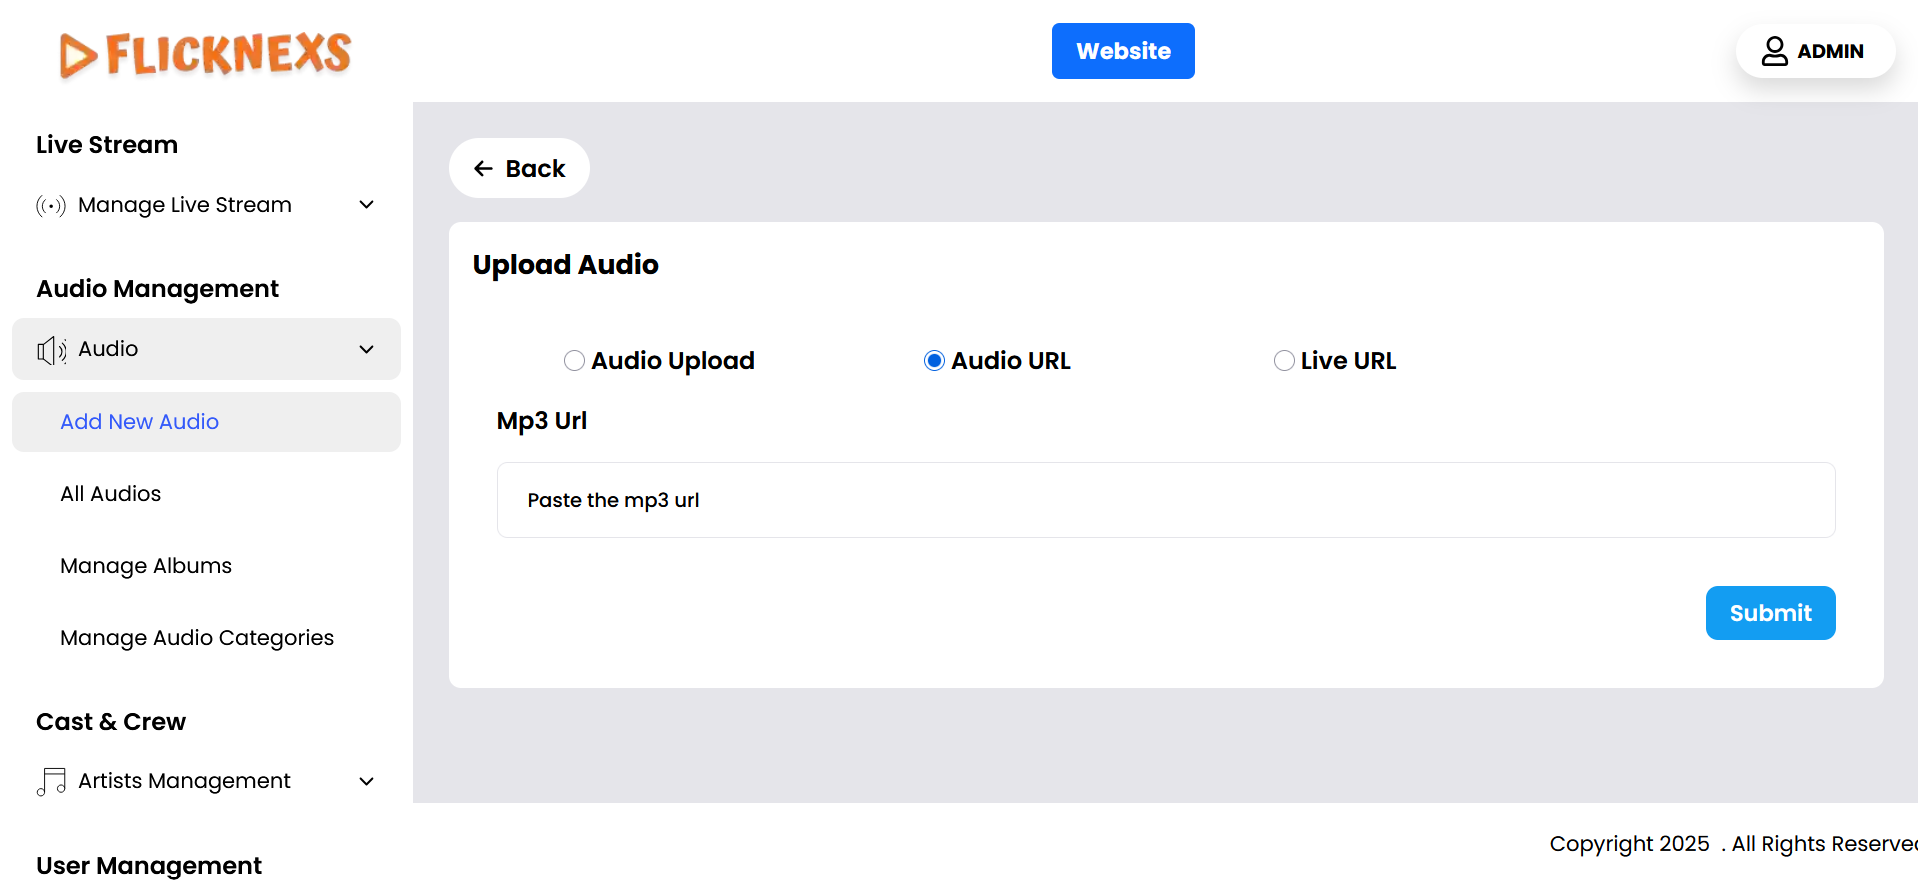
2. Audio File (via URL Upload)
- Overview: This option allows users to upload audio by providing a URL that links directly to the file.
- Process:
- URL Input: Users paste the URL of the audio file into a designated field. The platform then retrieves the file for playback.
- Validation: The platform checks the URL to ensure it is valid and points to a file with a supported audio format.
- Supported Formats: The system should verify that the URL points to an audio file in formats like MP3, and AAC that the platform supports.
- Use Case: This method is useful for users who have already hosted their audio files on external servers or platforms, such as Google Drive, Dropbox, or a content delivery network (CDN), and prefer to link to the file instead of uploading it directly.
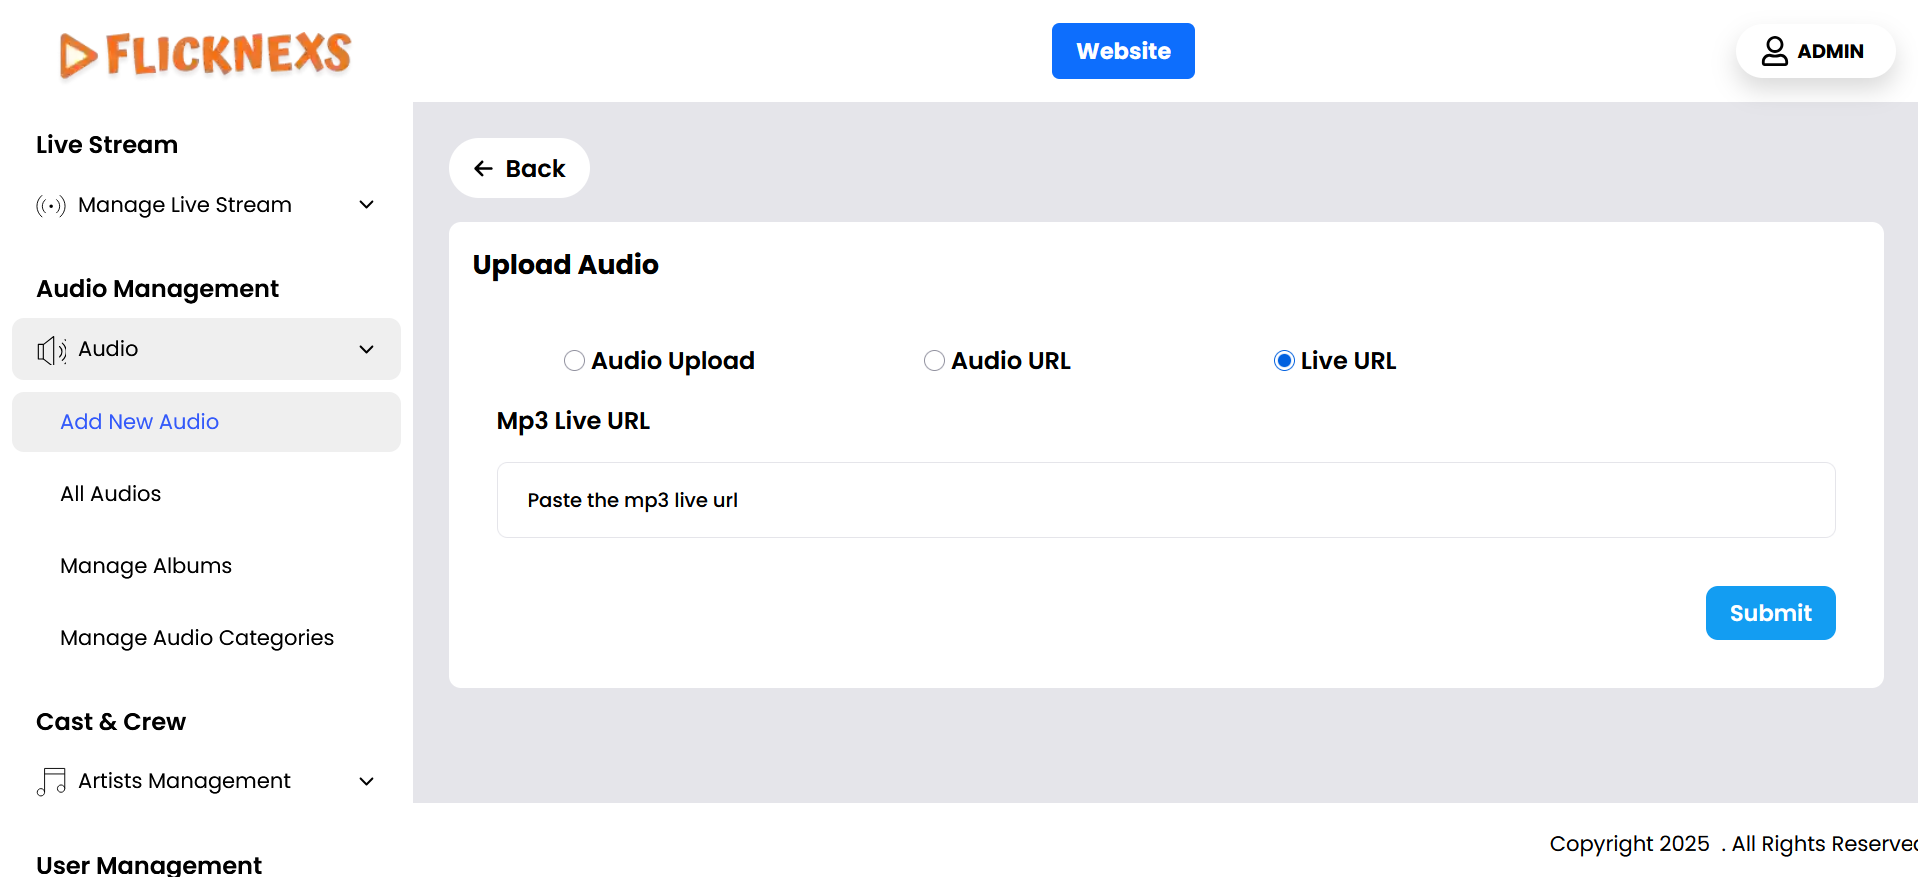
3. Live Audio File (via Live Stream URL)
- Overview: This option is designed specifically for live audio streaming. Users can provide a URL that points to a live audio feed, enabling real-time streaming through the platform.
- Process:
- Live Audio URL Input: Users paste the URL of the live audio stream into a designated field. The platform connects to the live stream and enables real-time audio playback.
- Validation: The platform ensures that the URL is valid and compatible with live streaming features.
- Use Case: This option is perfect for broadcasting live audio content, such as radio shows, live commentary, or other real-time events, where users need to connect to a live stream rather than uploading a static file.
These three options ensure flexibility for different use cases, providing users with multiple ways to get their audio content onto the platform efficiently. Whether they are uploading from their computer, linking an existing audio file, or connecting to a live stream, users are equipped with a user-friendly and adaptable system.
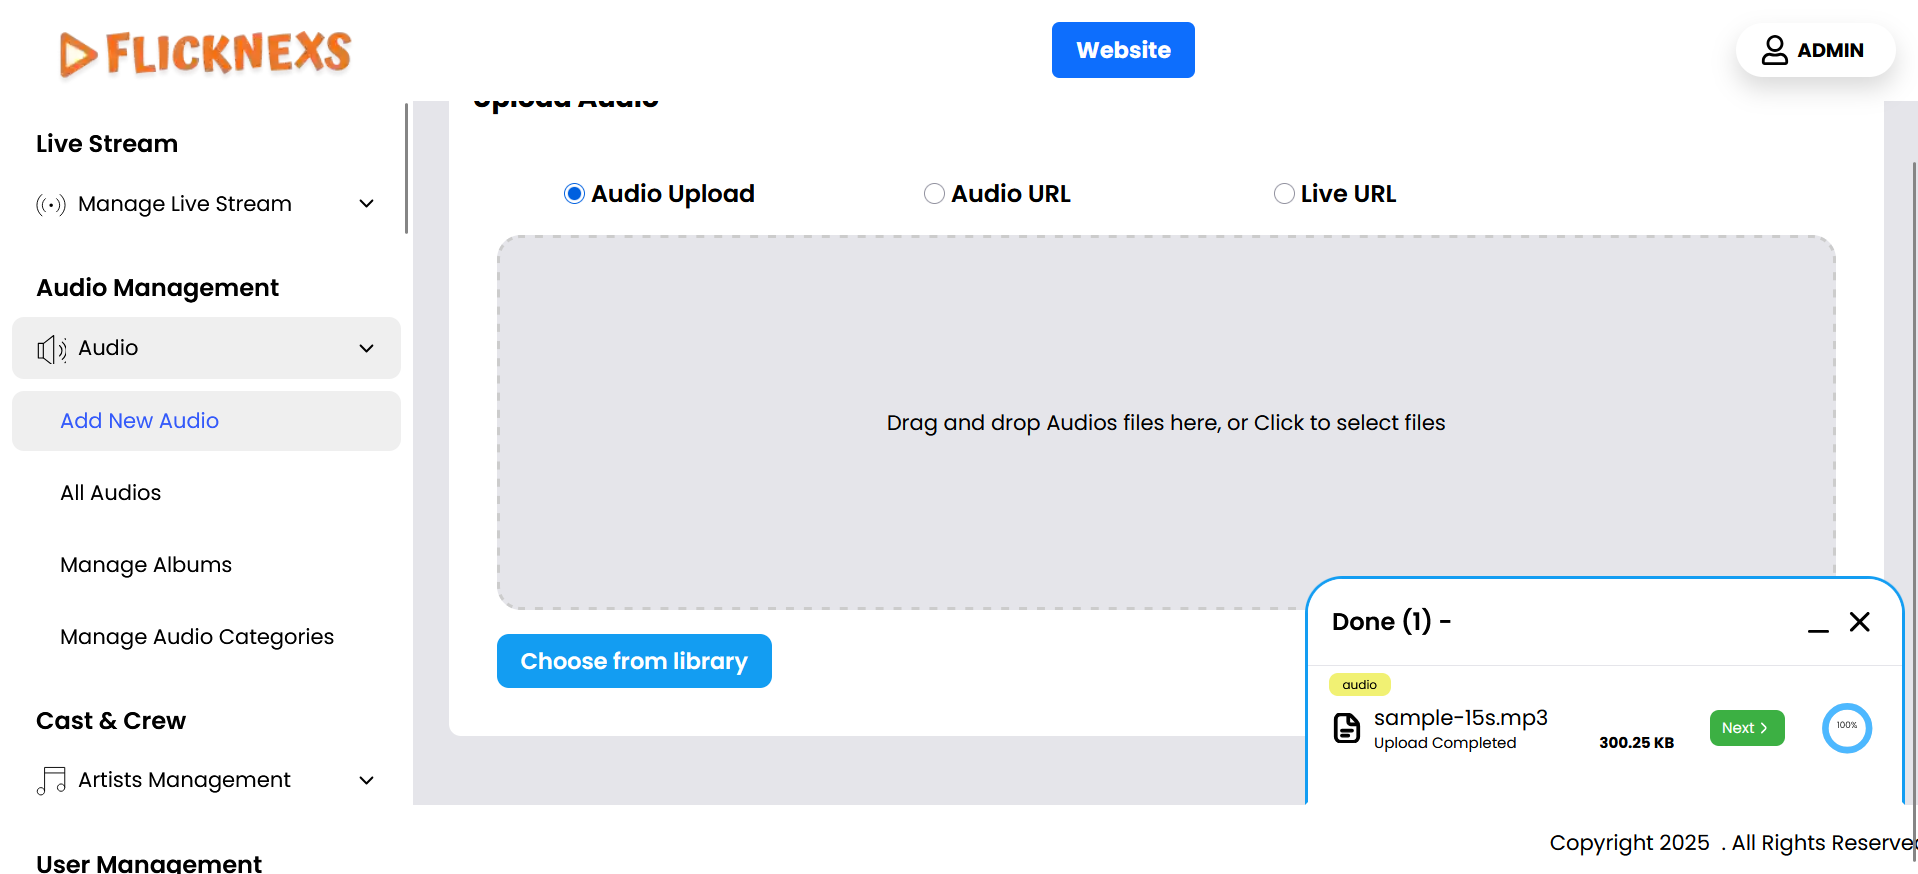
After Uploading Audio File: Once the audio file is uploaded successfully, clicking the “Next” button will redirect you to the Audio File Meta Update page. This is where you will provide detailed metadata and information related to the audio file for proper categorization and display on your platform.
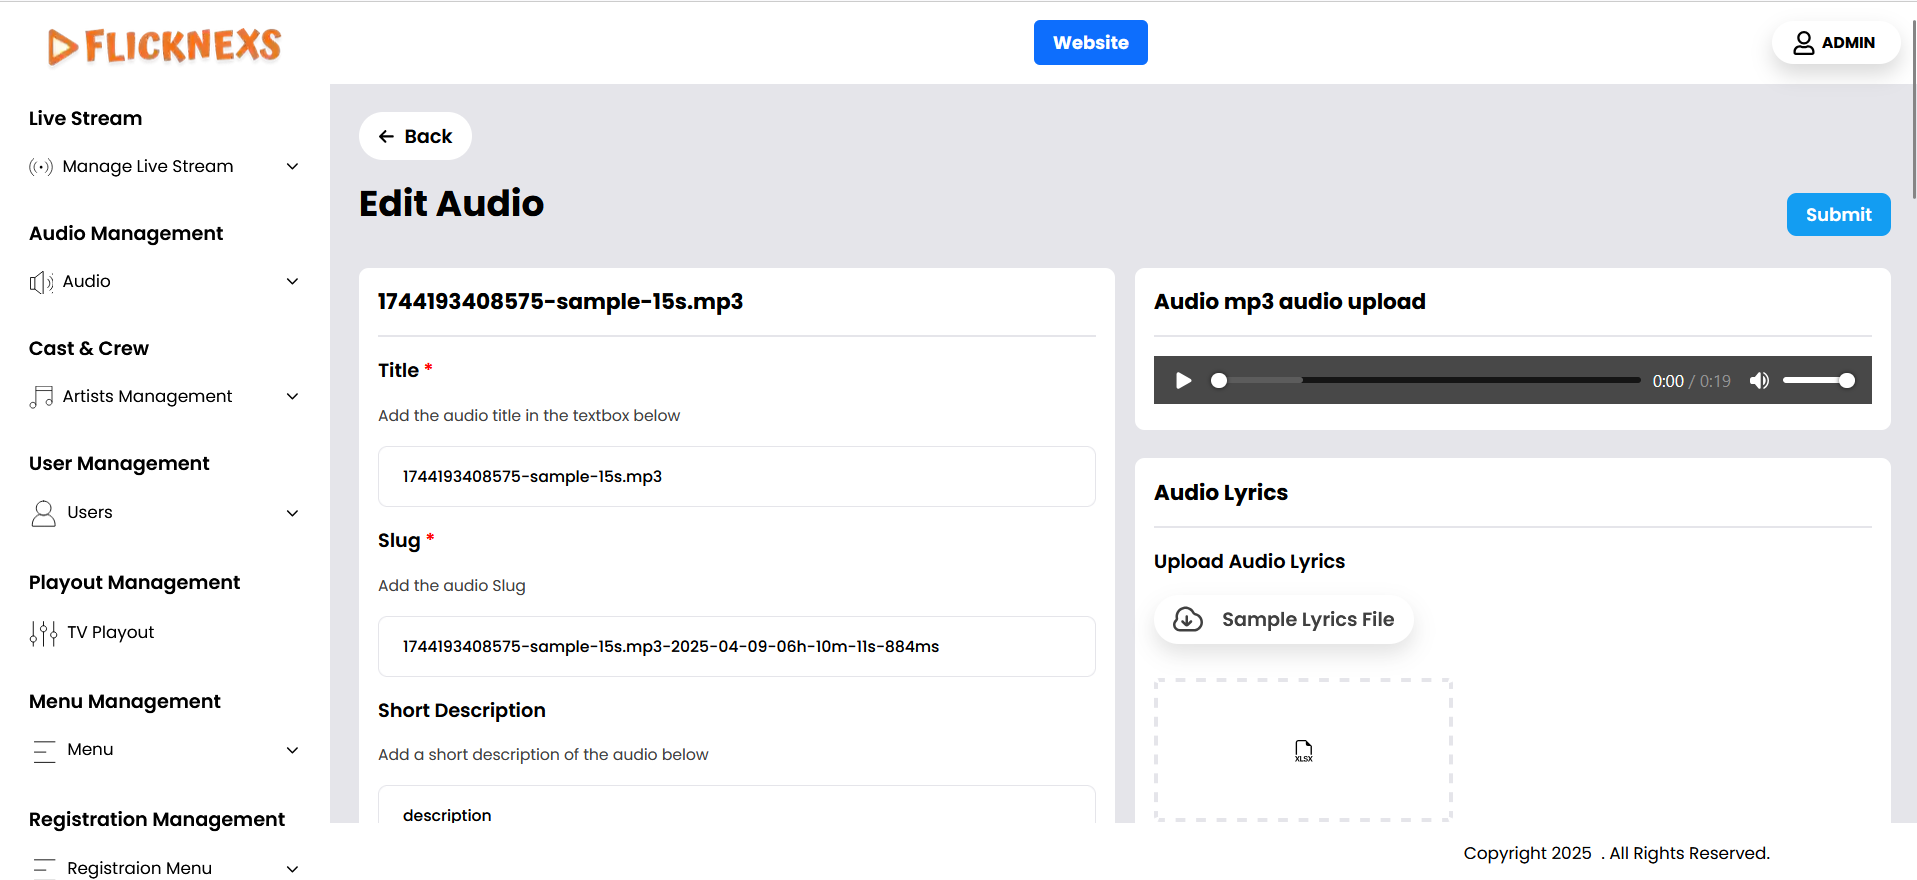
Audio File Meta Update Section:
- Title: Enter the title of the audio file, which will be visible to users.
- Slug: Create a unique, URL-friendly identifier (slug) for the audio file that is easy to remember and share.
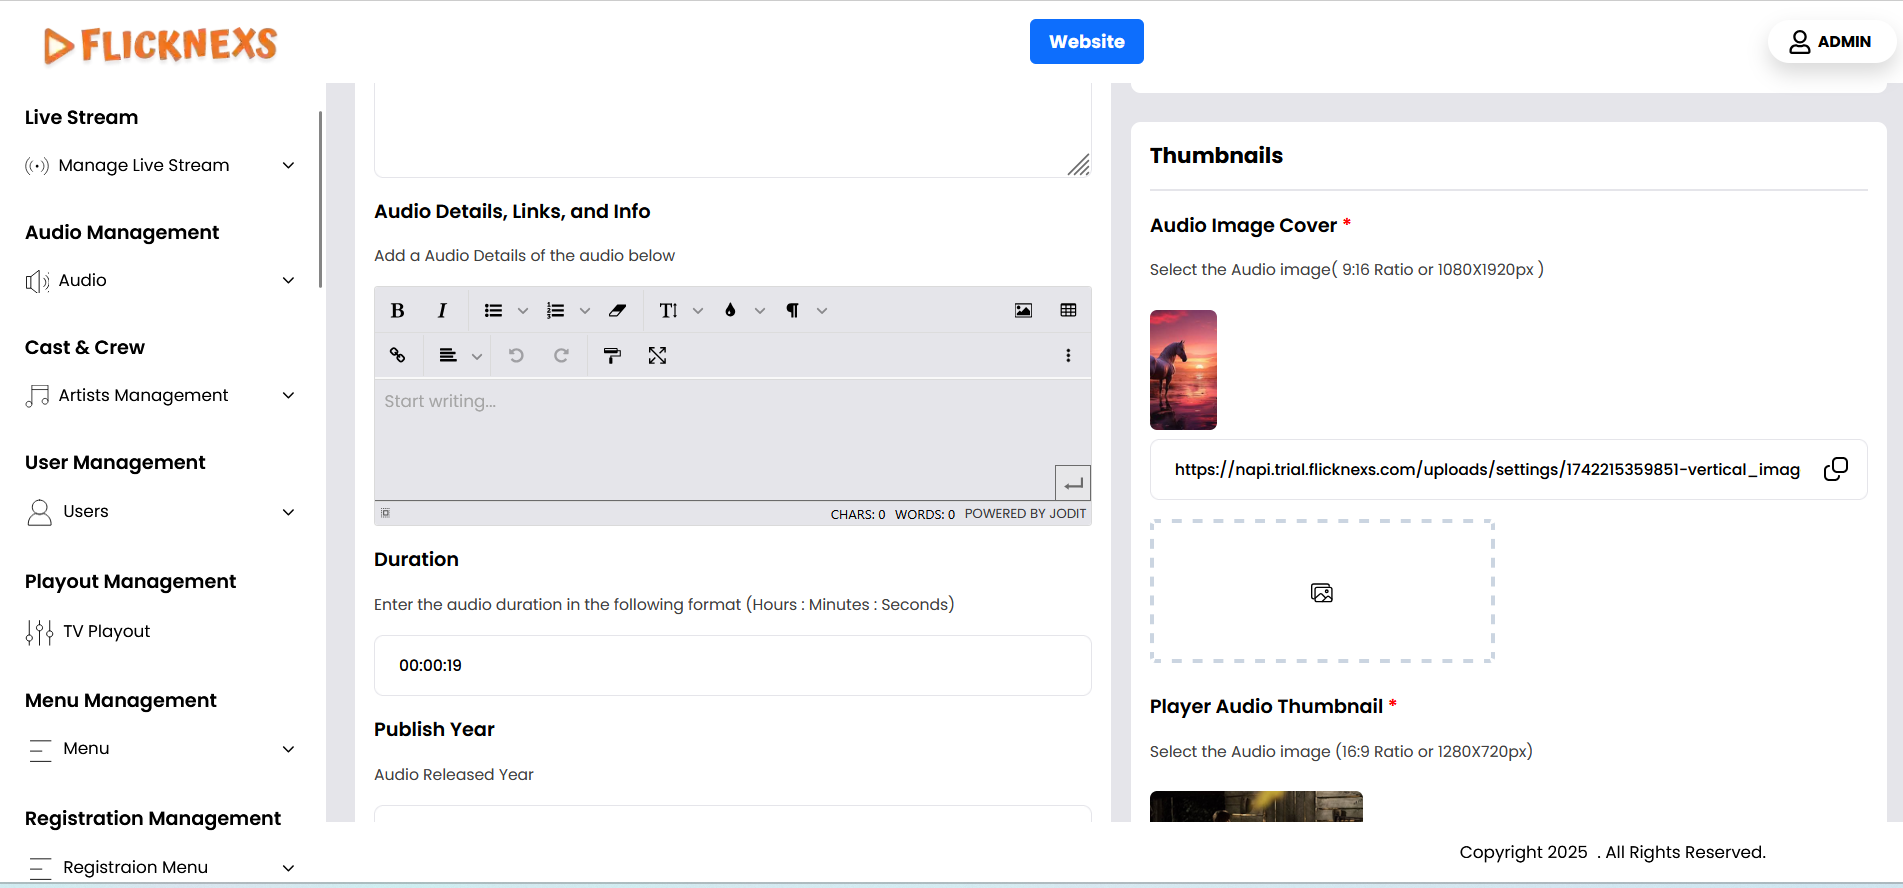
- Audio Image Cover: Select an image with a 9:16 aspect ratio or 1080×1920 pixels. This image will serve as the cover art for the audio file.
- Player Image Cover: Choose an image with a 16:9 aspect ratio or 1280×720 pixels. This image will be shown in the player interface during playback.
- Upload Audio Lyrics: Upload the lyrics for the audio file in an Excel (xlsx) format. This allows you to provide the lyrics in a structured way, making it easy for users to follow along or for display in the player.
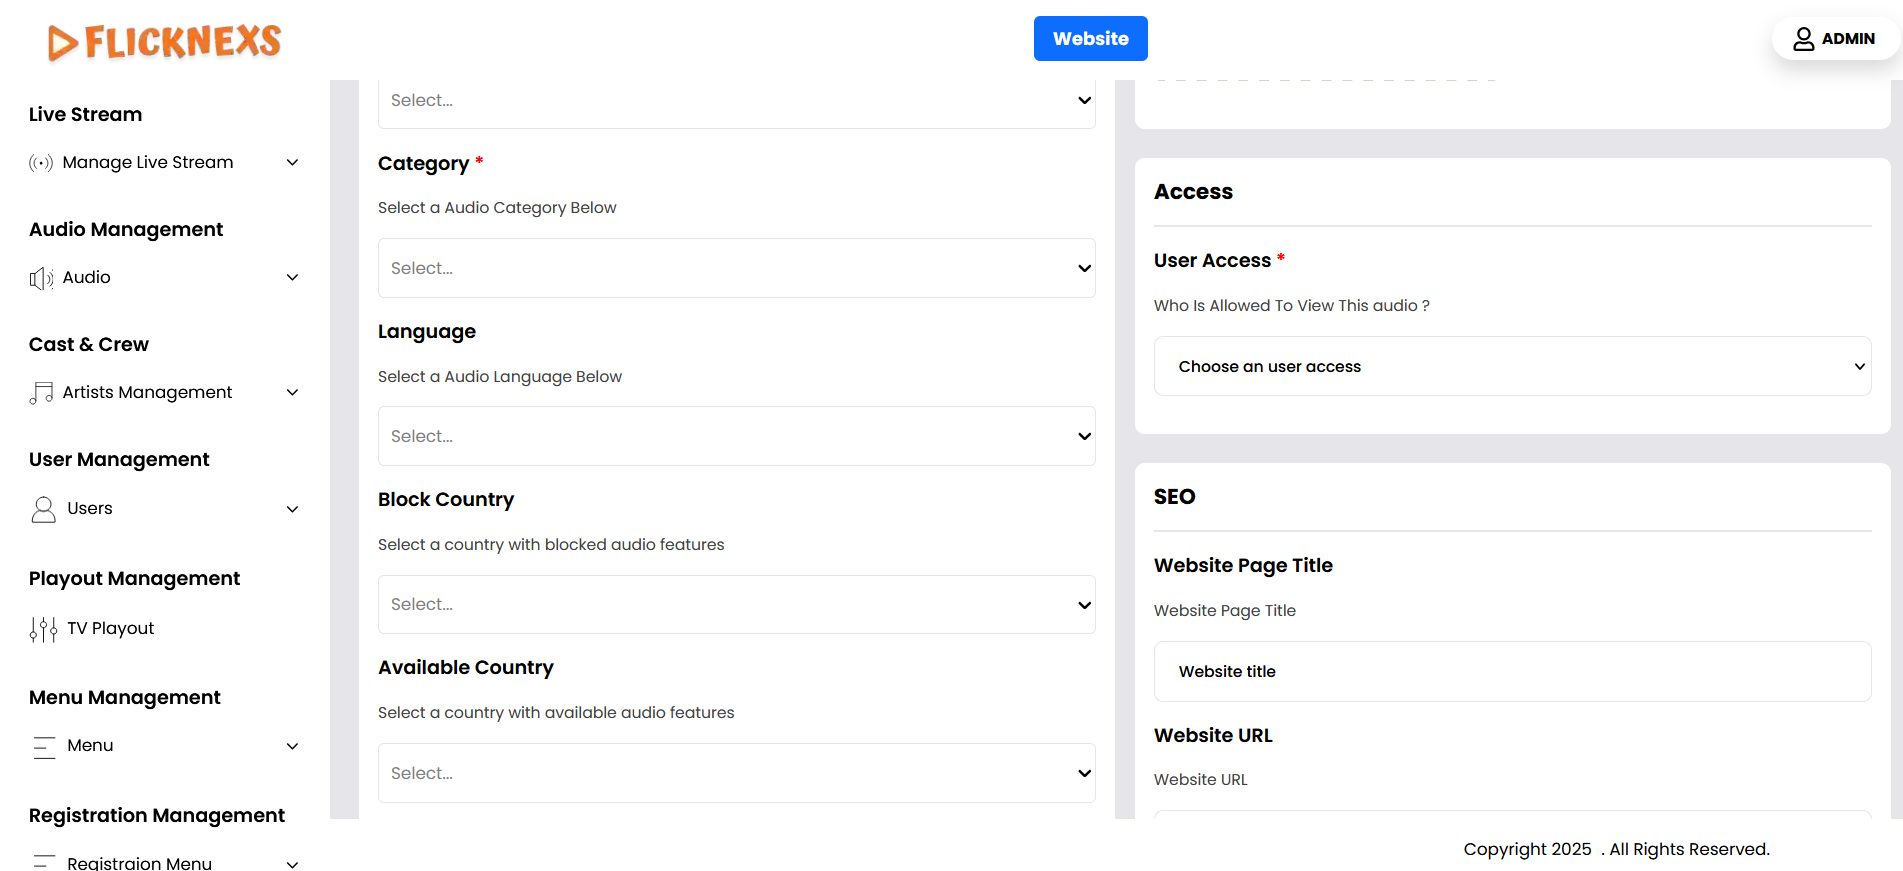
Country: You can restrict access to the audio by blocking it in selected countries. This is useful for managing content licensing and availability based on geographical regions.
Search Tags: Add relevant keywords to help users easily discover the audio through search.
Audio Details, Links, and Info:
- Short Description: Provide a brief description of the audio content to give users an overview of what it’s about.
- Cast and Crew: List the artists, musicians, producers, and other contributors to the audio file. This gives credit and context to the content.
- Album: If this audio is part of an album, select or assign it to the correct album. This helps organize content and allows users to find related audio files easily.
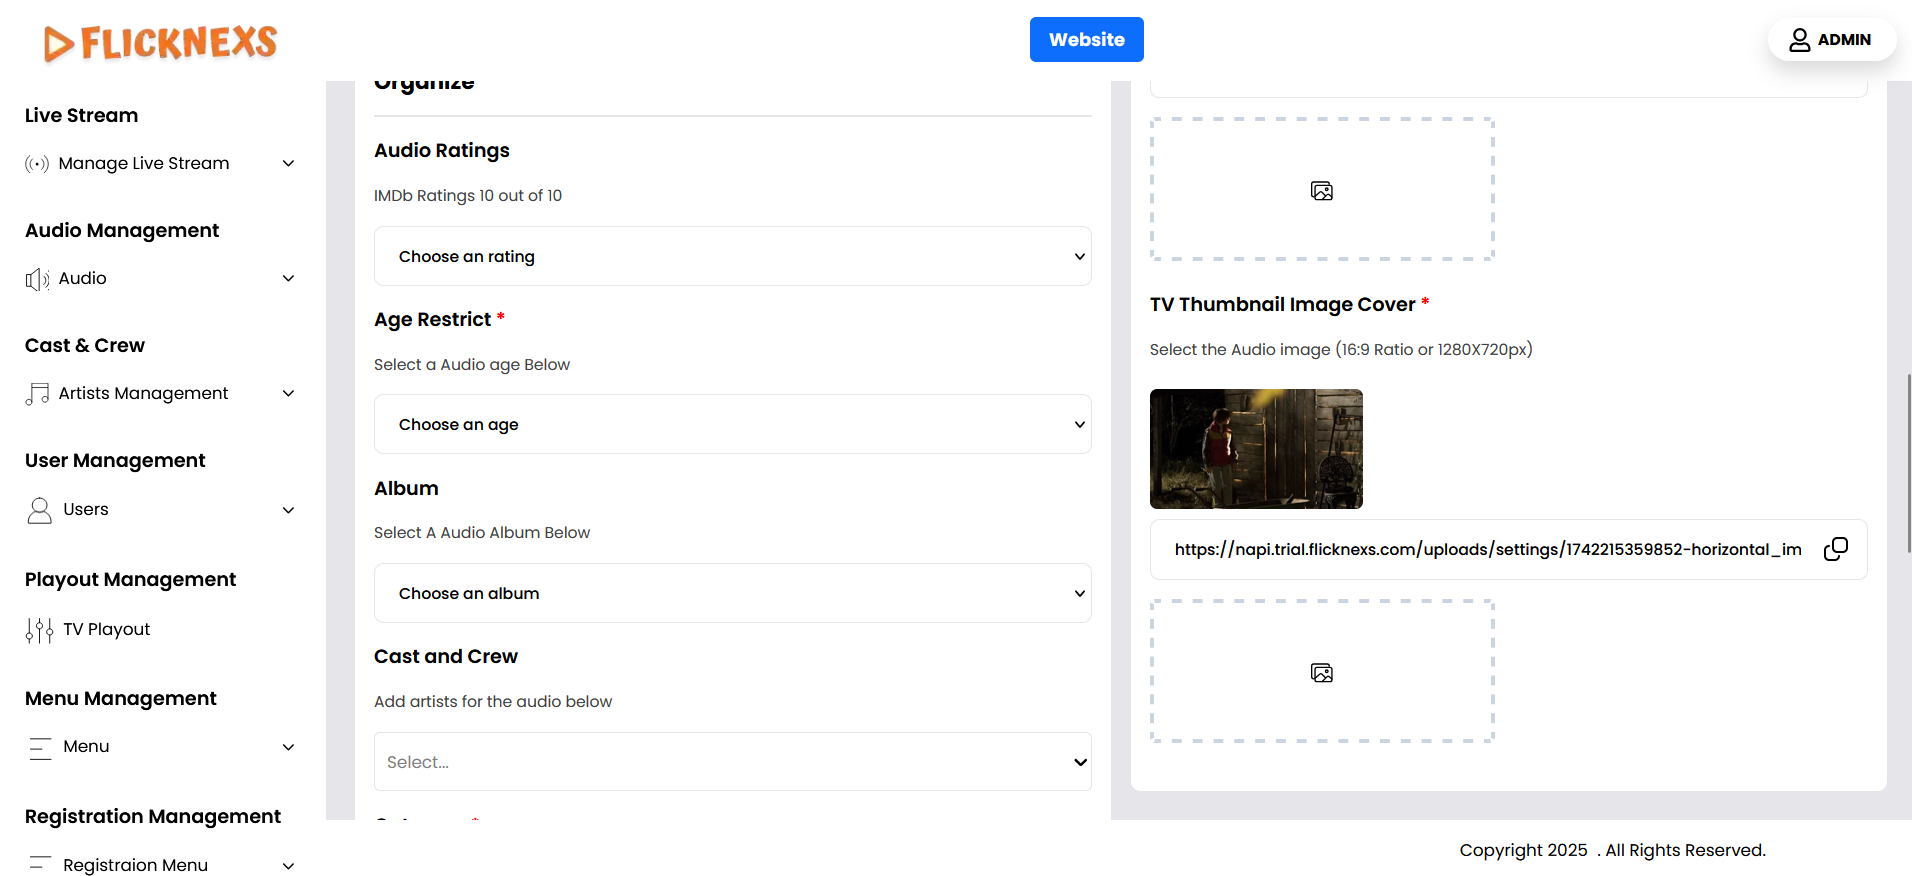
- Category: Choose the appropriate category for the audio file, such as genre (e.g., Pop, Rock, Classical) or type (e.g., Podcast, Audiobook).
Audio Ratings: Enter the IMDB or other rating scores for the audio file, if available, to help users gauge its popularity or quality.
Language: Select the primary language of the audio file to help with filtering and recommendations.
Audio Year: Enter the year the audio was released. This can be useful for organizing content by release date.
Duration: Provide the total duration of the audio file in a standard time format (HH:MM).
User Access Options:
- Guest: The audio is available to all visitors, even if they are not logged in.
- Registered Users: Only users who have registered on the platform will be able to access the audio.
- Subscriber: The audio will only be accessible to paid subscribers.
- PPV Users: This option allows the audio to be available on a Pay-Per-View basis, where users pay to access the specific file.
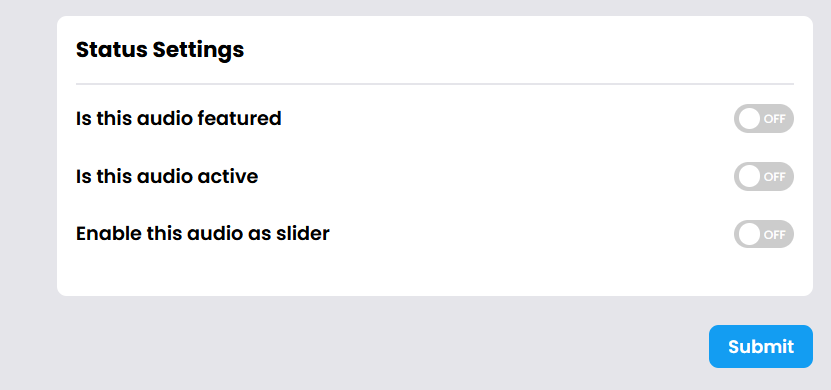
Status Settings:
- Is this audio Featured: Enable this if you want the audio file to be featured prominently on the platform (e.g., in special sections or highlights).
- Is this Audio Displayed in Banner: Enable this if you want the audio file to be included in the homepage banner for increased visibility.
- Is this Audio Active: Toggle this option to indicate whether the audio is currently available and live on the platform.
Final Step: After reviewing all the fields and ensuring the metadata is accurate, click the “Add New Audio” button to save the file and publish it on the platform.
This setup ensures that all relevant metadata is properly added to optimize user experience, categorization, and discoverability of the audio content.
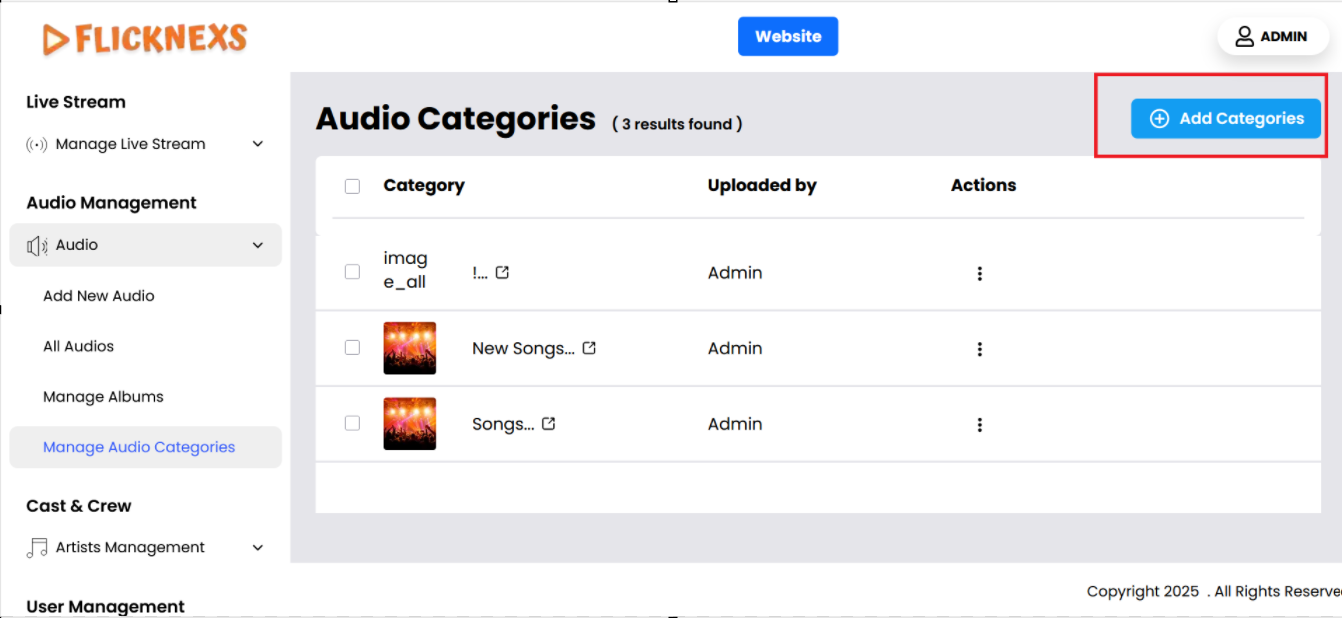
Manage Audio Categories

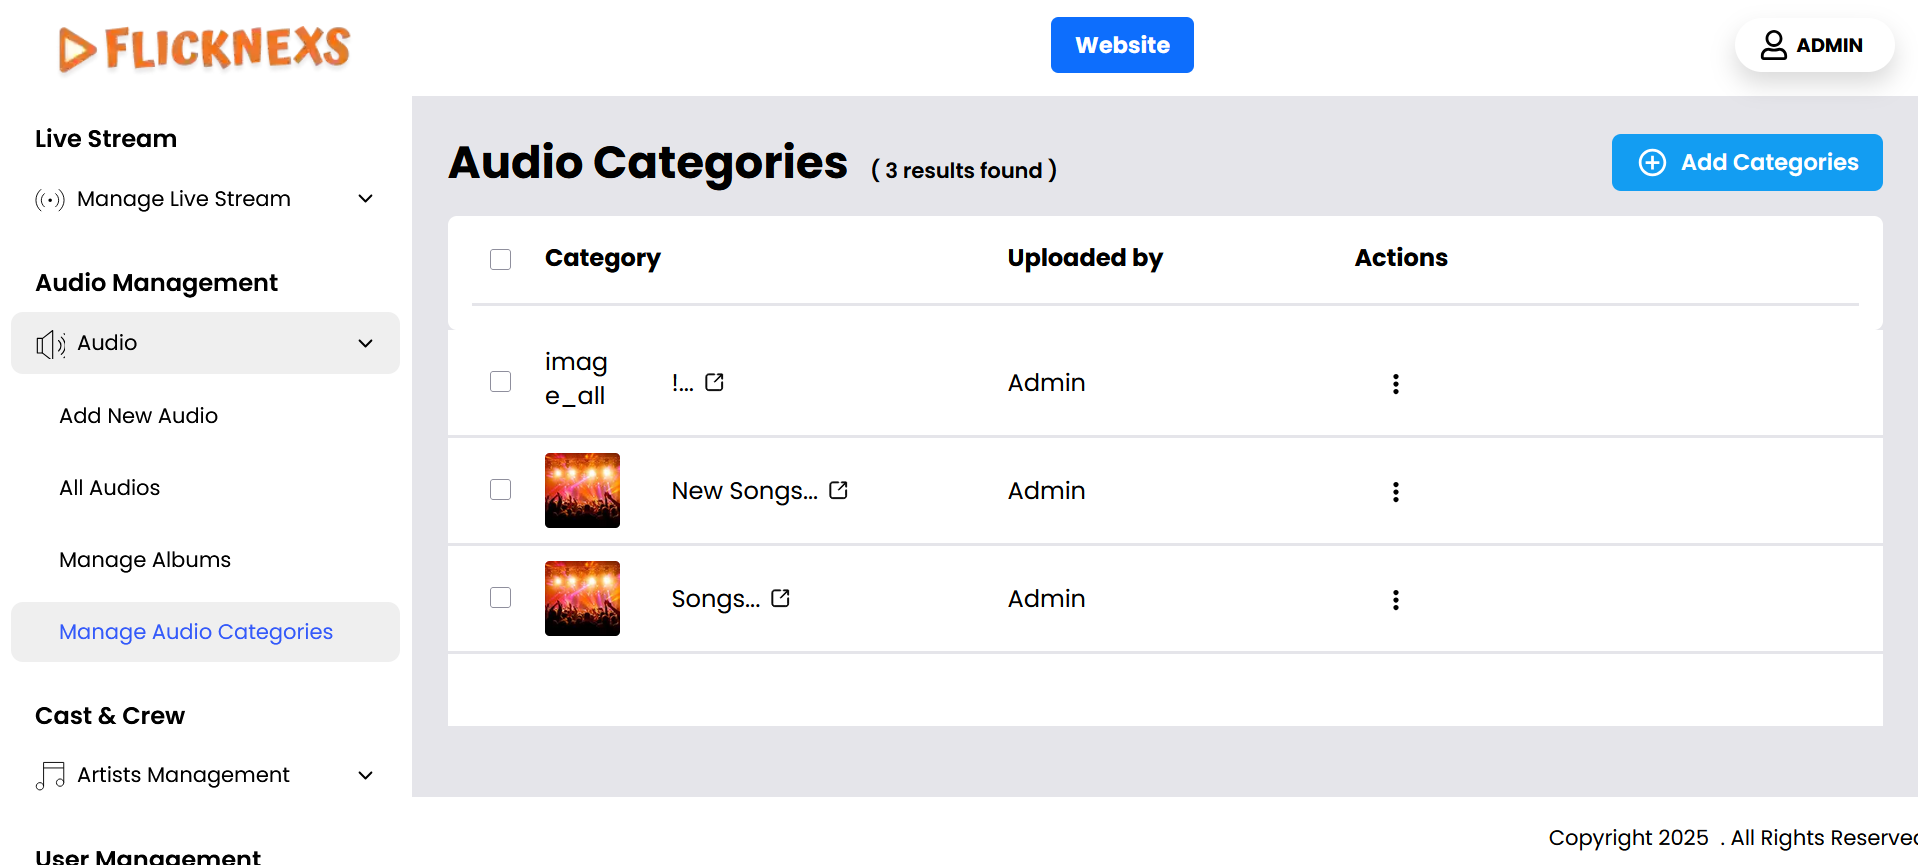
In the audio categories management section, you will be able to view and manage various categories associated with audio content. Here’s a detailed breakdown of the fields and actions available:
Fields in the Audio Categories List:
- Category: This is the label or title of the audio category (e.g., “Podcasts,” “Music,” “Audiobooks”). It helps in classifying audio content and grouping them under relevant categories for easy access. This displays a visual representation (cover image) for each audio category. The image serves as an identifier or aesthetic representation of the category and can help users navigate more easily.
- Uploaded By: This field shows the name of the person who uploaded the category.
Actions:
- Edit: Clicking the Edit option allows you to modify the details of the category. This can include updating the category name, changing the category image, or toggling the active status.
- Delete: The Delete option removes the entire category. When a category is deleted, all the audios under that category may be affected or reclassified into other categories, depending on the platform’s setup. It is important to confirm the deletion to avoid data loss or broken links to the audios in that category.
This setup allows for easy management of audio categories, ensuring that the platform remains organized and content is displayed as desired.
Add Audio Category
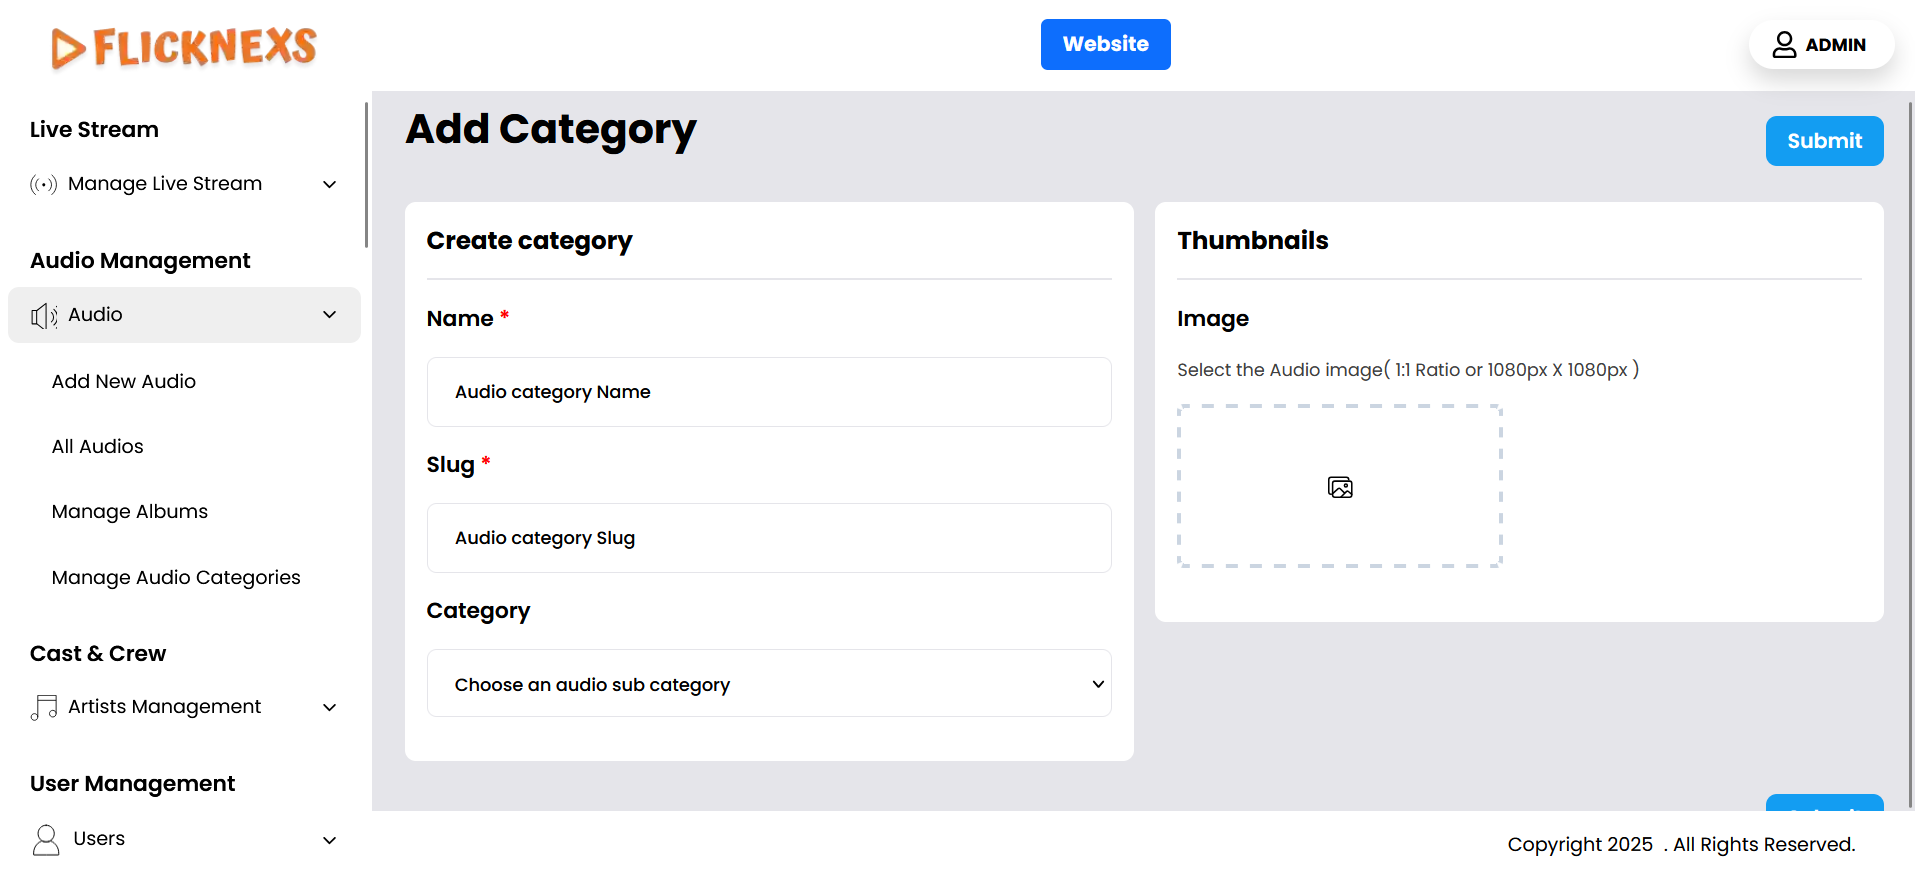
To create a new audio category on your platform, follow these steps:
- Name: Enter the name of the category that reflects the type of audio content, such as “Podcasts,” “Music,” or “Audiobooks.”
- Slug: Define a unique URL-friendly identifier (slug) for the category. This will be used in the website’s URL (e.g., /audio/podcasts).
- Thumbnails: Upload an image that visually represents the category. This image may appear on the platform’s front end in the category listings or sliders.
- Subcategory Option: If you want this new category to be a subcategory of an existing category, select the parent category from a dropdown or list. This will nest the new category under the parent, allowing for better organization and browsing on the platform.
Once the category is created, it can be managed through the backend, with the option to edit, delete, or enable/disable it as needed.
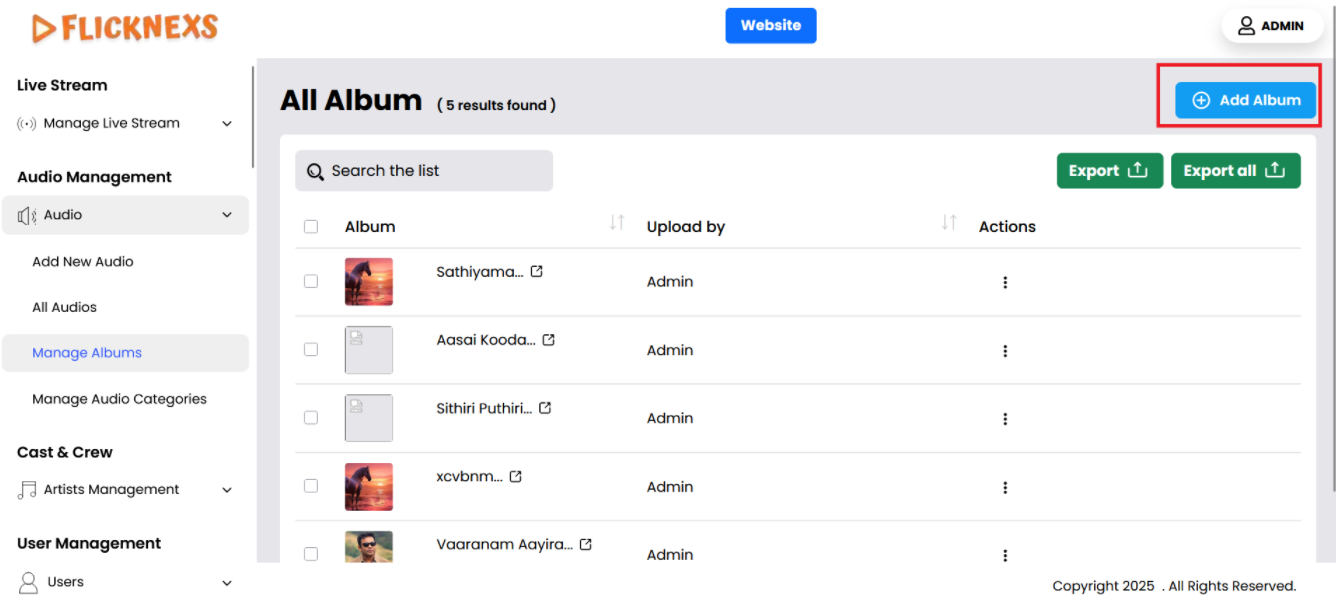
Manage Albums
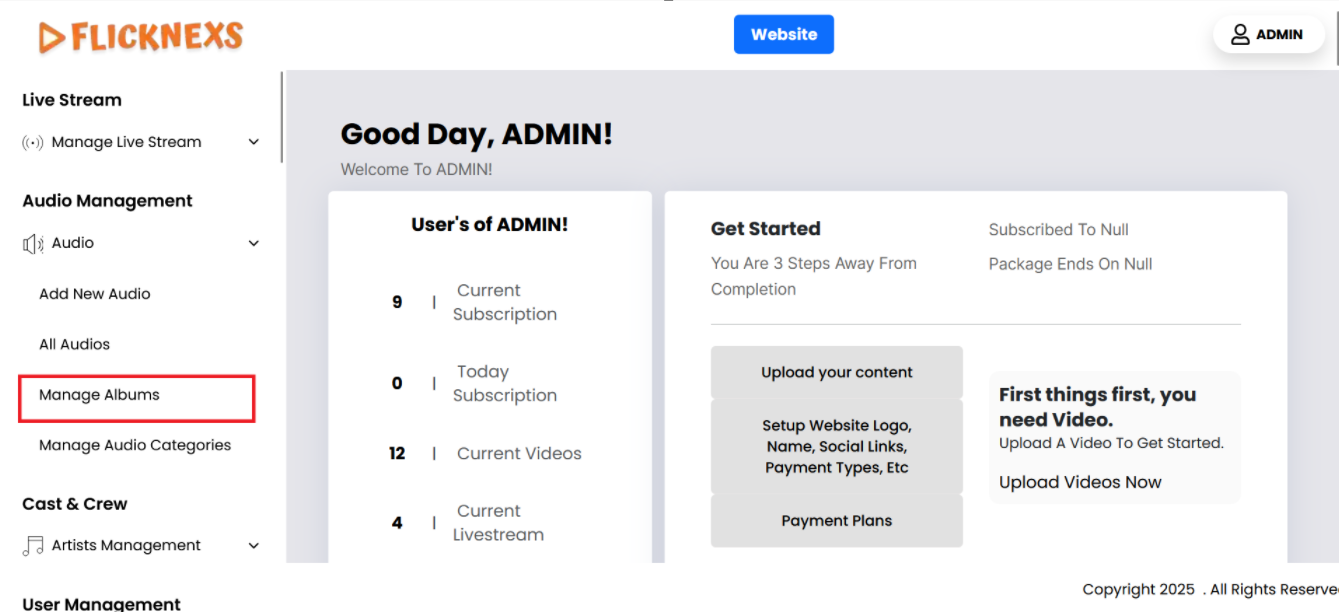
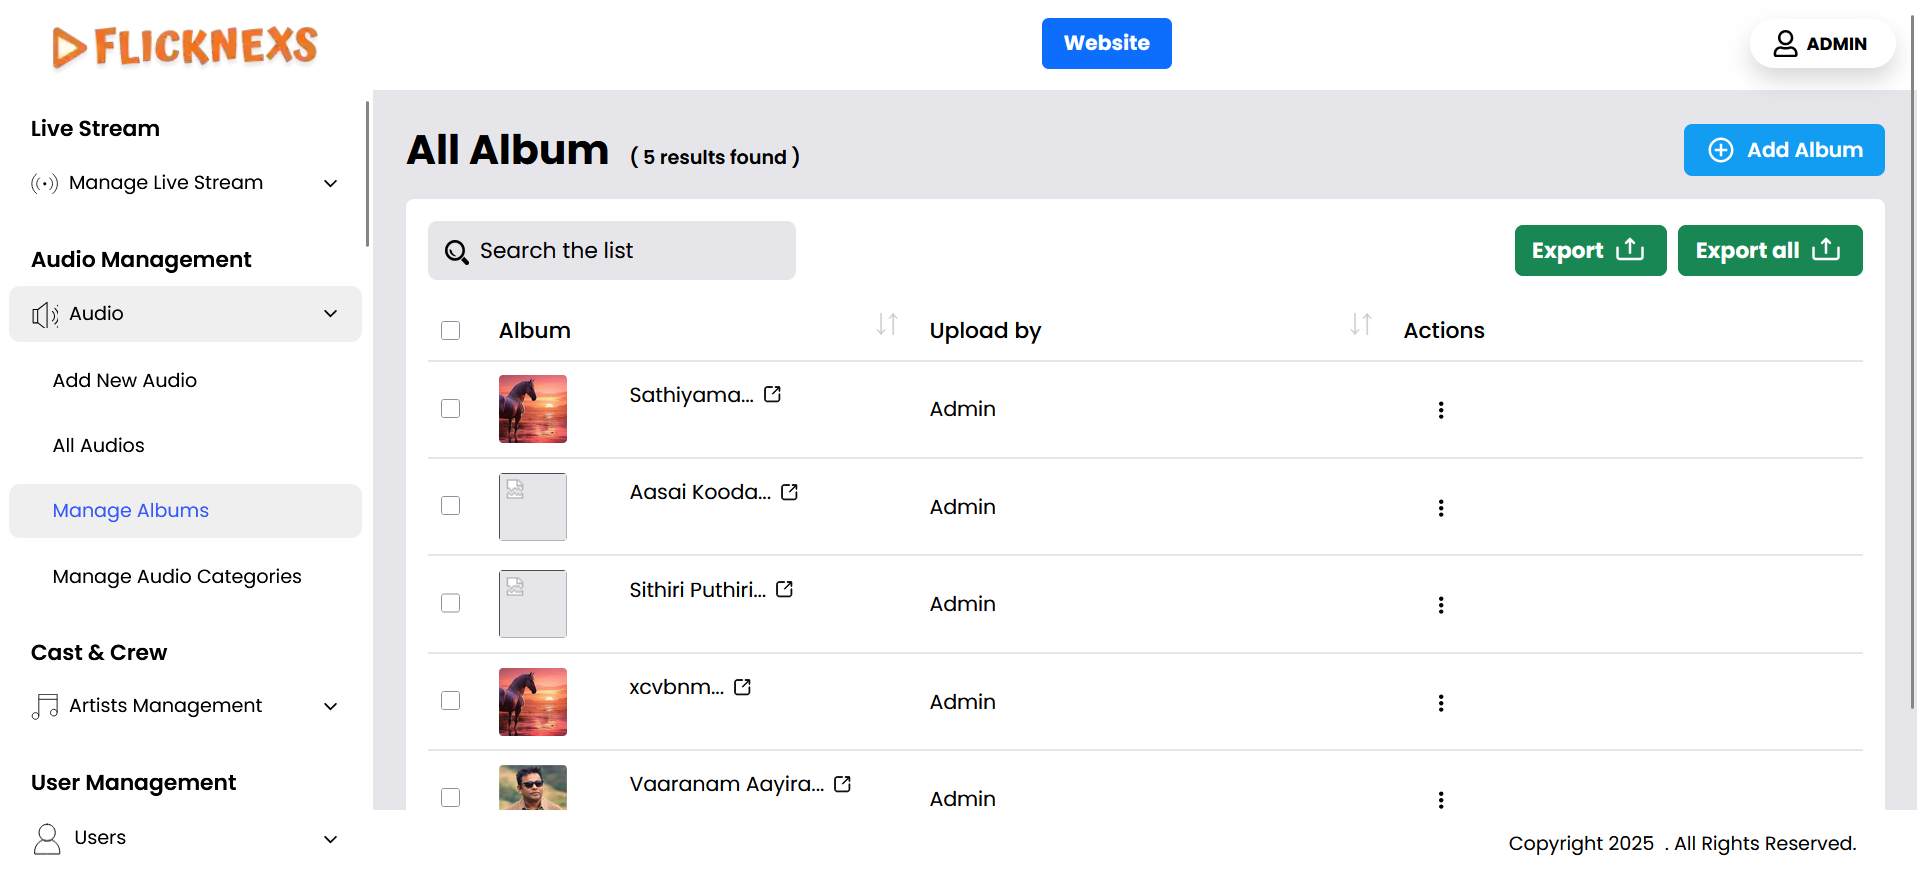
You can manage a list of audio albums on your platform with the following fields:
- Name of the Album: Display the title of each audio album in the list, allowing for easy identification and management of albums.
- Image of the Album: Each album should have an associated image or cover art, which can be displayed next to the album name for a more visual presentation.
- Uploaded By: This field shows the name of the person who uploaded the album.
- Actions (Edit/Delete): For each album, there will be options to either:
- Edit: This allows you to update the album details, such as the title, cover image, and other metadata.
- Delete: This lets you remove an album from the platform entirely.
This list allows for easy navigation and management of audio content on the platform.
Add Audio Album
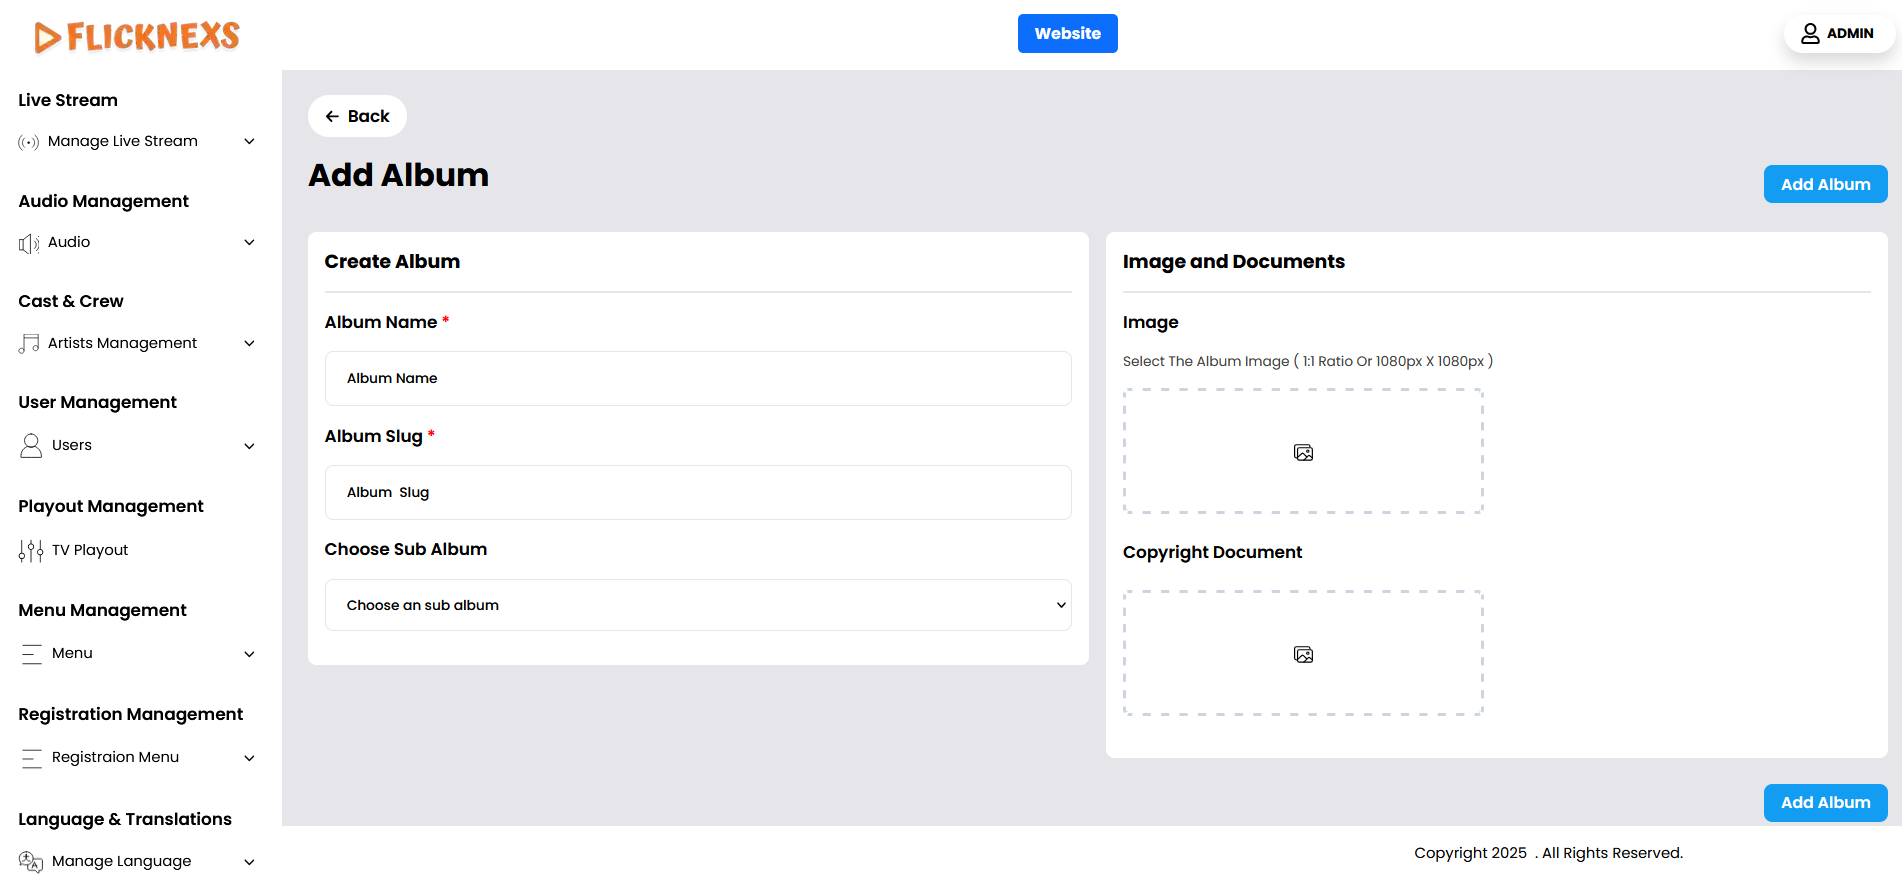
To add a new audio album on your platform, follow these steps:
- Name of the Audio Album: Enter the title of the album, which will be displayed to users as the album’s main identifier.
- Image: Upload a cover image that represents the album. This image will be displayed alongside the album name on the platform, giving users a visual reference.
- Slug for the Audio Album: Create a unique, URL-friendly identifier (slug) for the album, which will be used in the album’s web address (e.g., /audio/album-title). This helps with navigation and SEO.
- Choose Sub Album: If you want this new album to be a sub-album of an existing album, select the parent album from a dropdown or list. This will nest the new album under the parent, allowing for better organization and browsing on the platform.
- Copyright Document: If you have any copyright documentation for the album that grants permission for its usage, please upload it here. This may include licensing agreements, proof of ownership, or any other legal document verifying that you have the rights to use the album. Uploading the document will help us ensure compliance and proceed accordingly.
These fields will allow you to properly categorize and display audio albums on your platform, making it easier for users to find and interact with them.