The Email Settings section allows you to configure and manage how your platform sends automated emails to users. These emails can include registration confirmations, password resets, subscription updates, payment receipts, and system notifications.
With proper configuration, this section ensures that your platform’s email communication is reliable, secure, and branded.
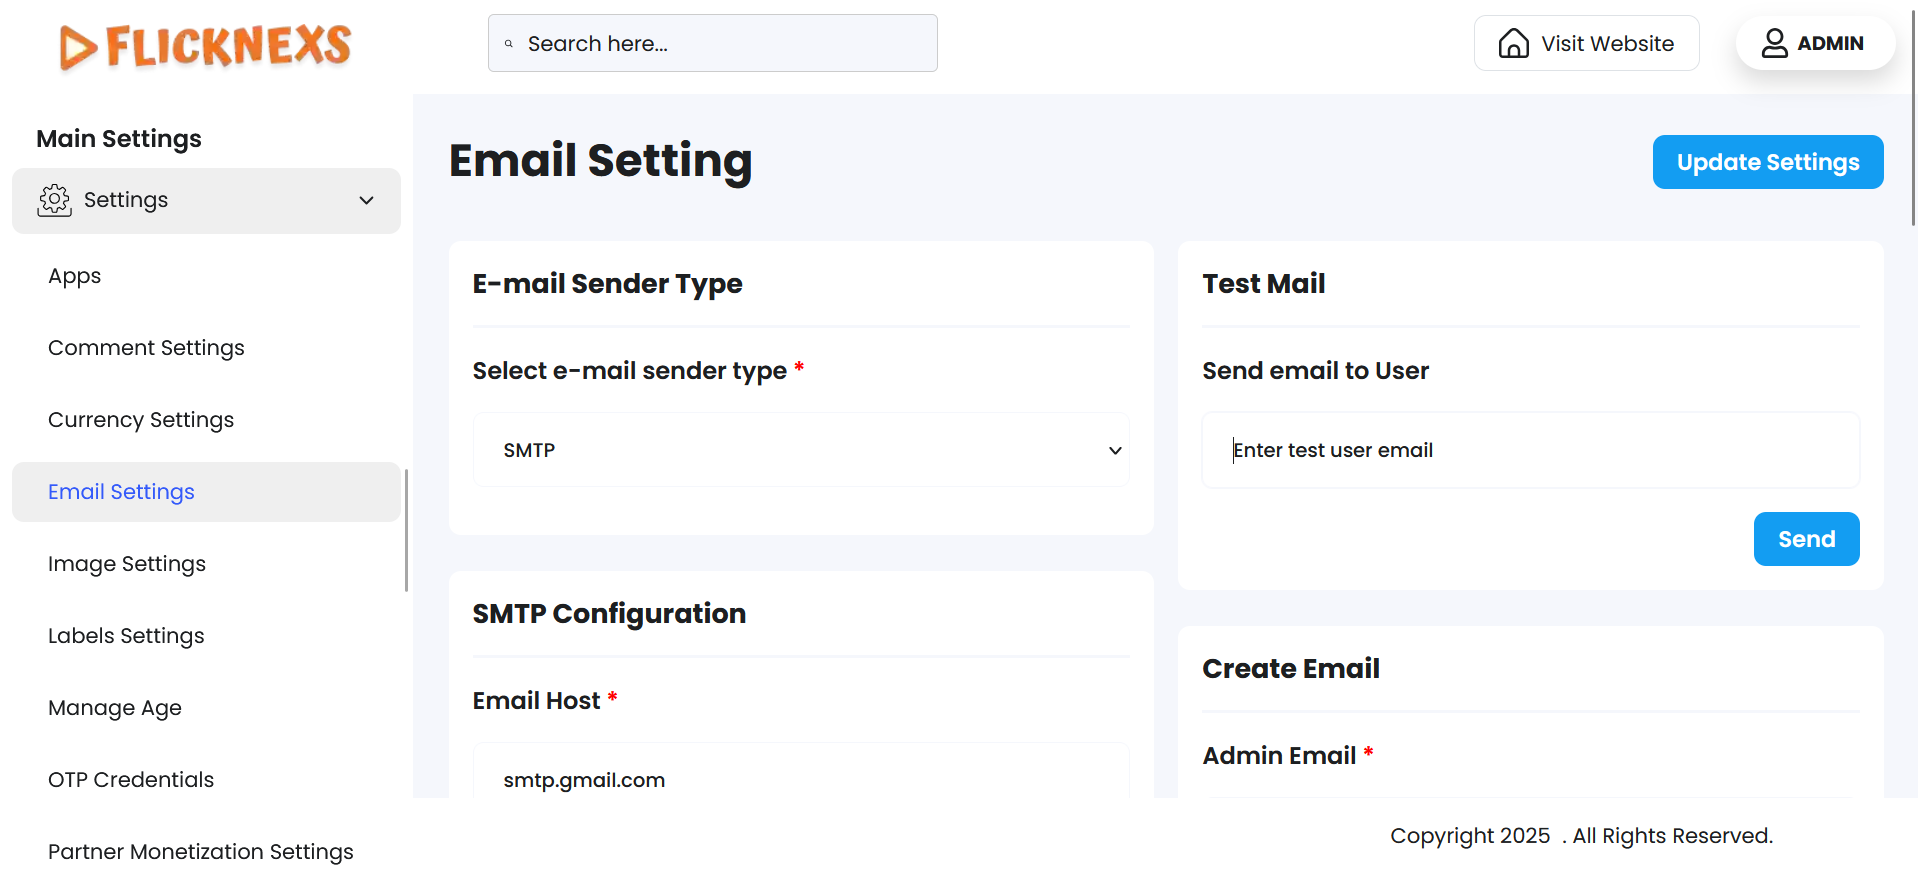
In the Email Configuration Settings, you can set up the email functionality that enables the platform to send notifications, updates, and other communication to users. Below are detailed explanations of each field and its importance in the setup process:
Email Sender Type
This setting allows you to choose the method your platform will use to send emails. Selecting the correct email sender type ensures reliable delivery of system-generated emails like registration confirmations, password resets, subscription updates, and more.
Available Email Sender Types:
- SMTP (Simple Mail Transfer Protocol):
- A standard and widely used method for sending emails.
- Requires configuration of SMTP server details like host, port, username, and password.
- Commonly used with email providers such as Gmail, Zoho Mail, Outlook, etc.
- Postmark:
- A third-party transactional email service known for high-speed delivery and detailed tracking.
- Ideal for platforms requiring scalable and secure email delivery.
- Requires Postmark API key and configuration details.
Why this matters:
Choosing the right email sender type improves email reliability, prevents delivery to spam folders, and supports branding through custom sender domains.
Test Email
The Test Email feature allows you to validate your email configuration before going live. This ensures that emails are being sent correctly from your chosen sender (SMTP or Postmark).
How it Works:
- Enter a valid email address in the Test Email field (usually your own or a QA/staff account).
- Click the “Send” button.
- The system will attempt to send a sample message using the current email settings.
Why Use It:
- To verify if your SMTP/Postmark configuration is correct
- To check deliverability, formatting, and branding of your platform’s emails
- To troubleshoot email delivery issues before launching email features
SMTP Configuration
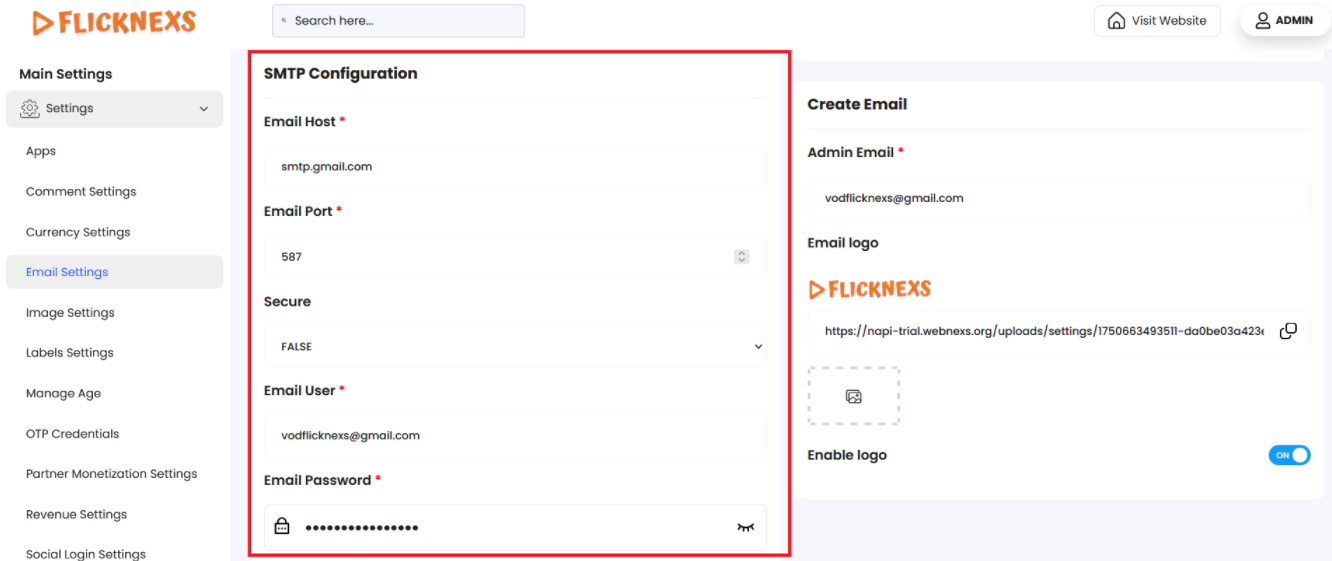
Email Host
- Purpose: This specifies the service provider for the email system. For example:
- Gmail: Use smtp.gmail.com.
- Other Providers: Enter the SMTP server address provided by your email host (e.g., smtp.mail.yahoo.com for Yahoo or smtp.office365.com for Office 365).
- How to Determine:
- Check the documentation or support resources of your email provider for the SMTP host address.
- Common Examples:
- Gmail: smtp.gmail.com
- Yahoo: smtp.mail.yahoo.com
- Outlook/Office365: smtp.office365.com
- Custom Domain: Provided by your hosting provider.
Email Port
- Purpose: The port number defines the communication endpoint for the email server. It ensures a secure connection and proper functioning of the email system.
- Common Port Numbers:
- 587: For TLS (Transport Layer Security) encryption.
- 465: For SSL (Secure Sockets Layer) encryption.
- 25: For non-secure communication (not recommended).
Secure
- Purpose: Specifies whether to enable a secure connection when sending emails.
- Options:
- True: Enables a secure connection (TLS or SSL).
- False: Disables a secure connection (not recommended for production environments).
- Recommendation: Always set this to True for secure email delivery.
Email User
- Purpose: This is the email address used to authenticate with the email server. Typically, this is the same as the Admin Email field.
- Example:
- If the Admin Email is admin@yourdomain.com, enter the same value here.
Password
- Purpose: This field is for the App Password or SMTP Password, not your regular email account password. It is used to authenticate with the email server securely.
- How to Obtain:
- For Gmail: Generate an App Password from your Google account settings.
- For other providers: Check your email provider’s documentation for SMTP authentication requirements.
- Security Tips:
- Store the password securely and restrict access.
- Use strong passwords or App Passwords for better security.
Create Email
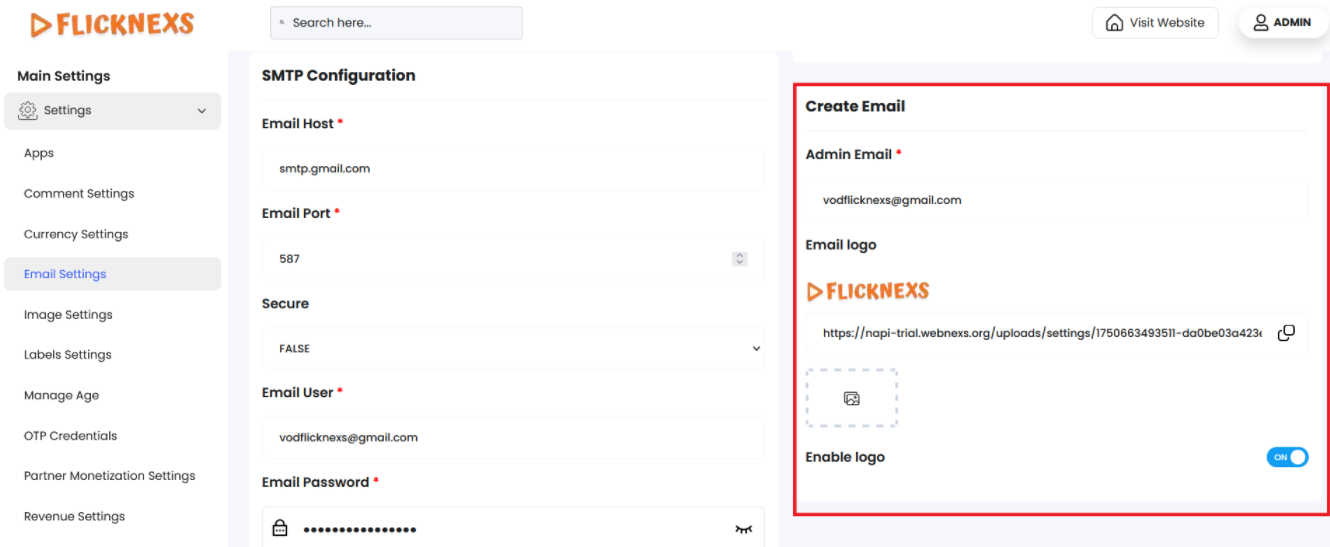
Admin Email
- Purpose: This is the primary email address used by the system to send emails to your platform’s users. All outgoing emails such as account confirmations, password resets, and promotional messages will appear as being sent from this email address.
- Best Practices:
- Use a professional email address (e.g., admin@yourdomain.com) to maintain credibility.
- Ensure the email address is active and monitored in case users respond.
Email Logo
The Email Logo setting allows you to customize the appearance of the emails sent from your platform by including your brand’s logo in each communication. This helps maintain a consistent and professional look across all user interactions.
Email Logo Upload
- You can upload a custom image to serve as the logo displayed in outgoing emails (e.g., welcome emails, password resets, subscription confirmations, etc.).
- This logo typically appears in the email and reflects your platform’s branding.
- Supported formats include JPG, PNG, or SVG, with recommended size guidelines to ensure proper rendering across devices.
Why it’s important:
A visible logo reinforces brand identity, builds trust with users, and gives your platform’s emails a polished and official appearance.
Enable Logo Option
- This toggle allows you to enable or disable the display of the uploaded email logo.
- Enable: The logo will be shown in all outgoing platform emails.
- Disable: Emails will be sent without displaying the logo, using only text or other elements.
Best Practices:
- Use a logo with a transparent background for better compatibility.
- Keep file sizes optimized to ensure fast email loading.
- Test the appearance by sending a sample email to ensure proper alignment and visibility on various email clients.
Forget Password Limit
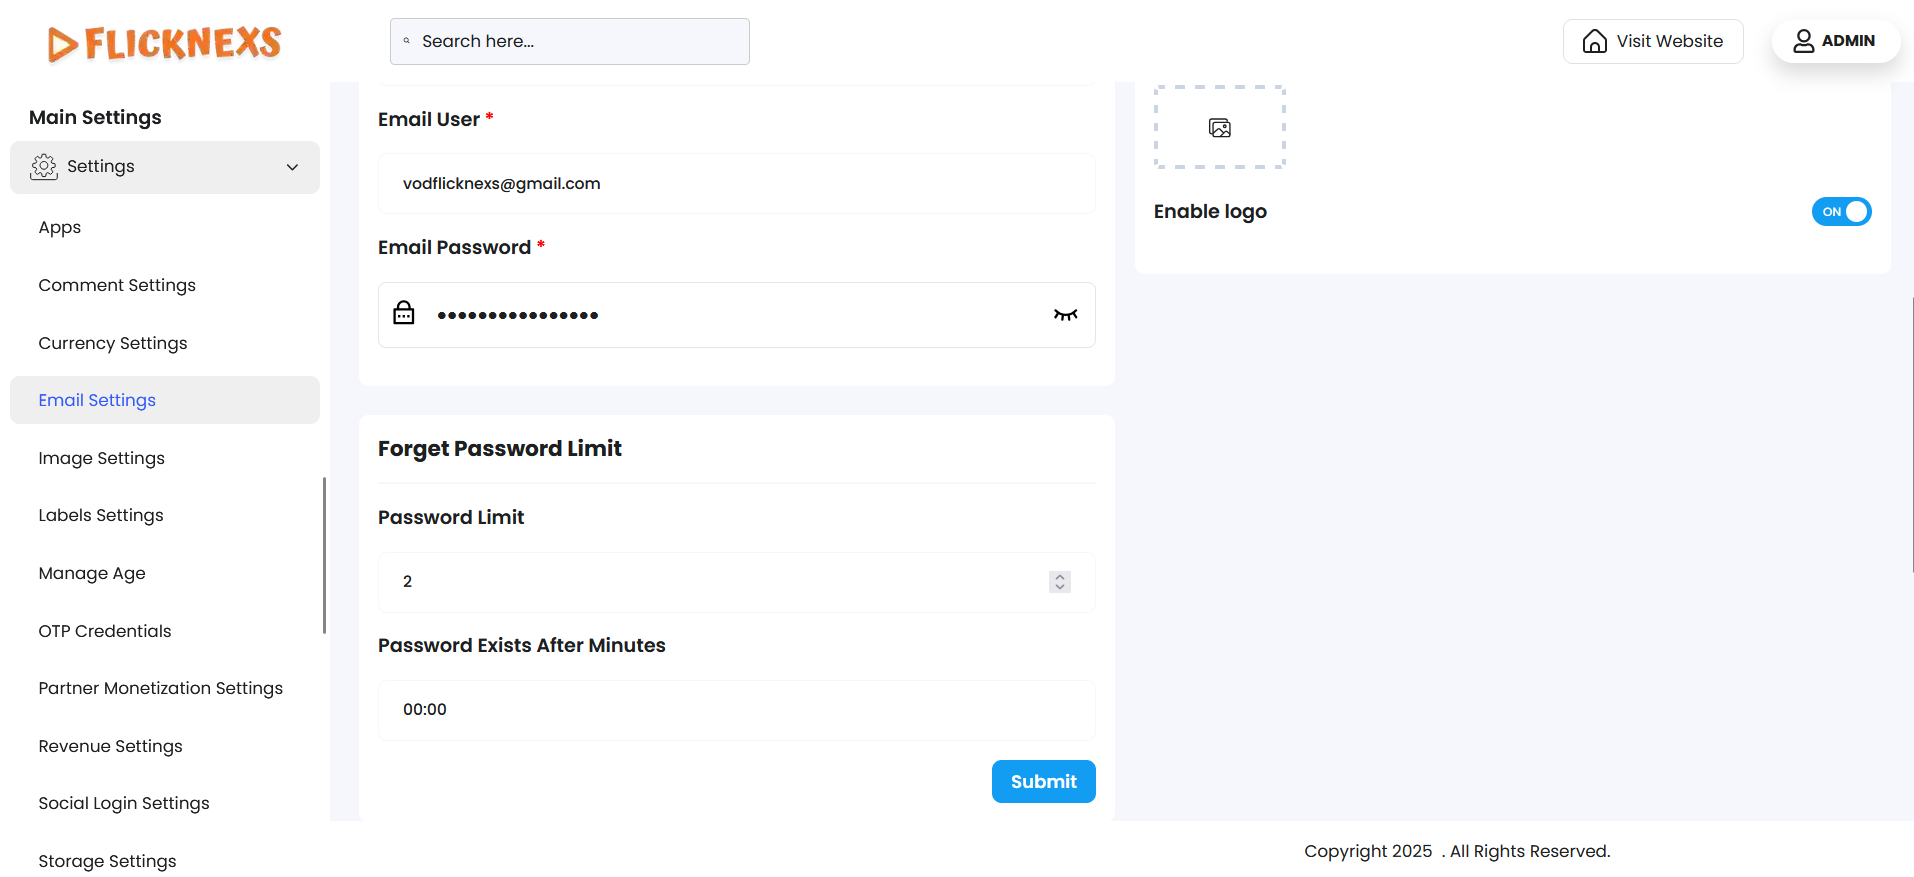
This section allows you to control how the “Forgot Password” feature behaves on your platform, improving both security and user experience.
1. Forget Password Limit
- This setting defines the maximum number of times a user is allowed to request a password reset within a certain time frame (e.g., per hour or per day).
- Helps prevent abuse or spam attempts through repeated reset requests.
Example:
If set to 5, a user can request a password reset up to 5 times in the configured time period. Any requests beyond that will be blocked until the time resets.
2. Password Limit (in Number)
- This specifies the maximum number of password reset links that can be active or generated per user.
- Ensures that only a limited number of reset links are valid at any given time, reducing security risks.
Example:
If set to 3, only 3 password reset links will remain valid. Older ones will be invalidated automatically.
3. Password Exists After Minutes
- This defines how long a password reset link remains valid after it’s been generated.
- Helps protect accounts by ensuring that links expire quickly if not used.
Example:
If set to 15, the password reset link will expire after 15 minutes.
These settings help maintain secure control over account recovery processes while minimizing the risk of unauthorized access or misuse.
Why Proper Configuration Matters?
- Correct email setup ensures that your platform can effectively communicate with users.
- Misconfigurations may lead to emails being marked as spam or failing to deliver.
- Secure settings protect both the platform and users’ data during communication.
Once all fields are correctly configured, test the email system by sending a test email to ensure everything works as expected. If issues arise, verify the settings with your email provider’s documentation.