The Home Page Settings section allows you to control and personalize how your platform’s homepage appears to users. It provides tools to manage the layout, content visibility, and featured sections, ensuring a visually appealing and engaging first impression.
Audio Page Settings
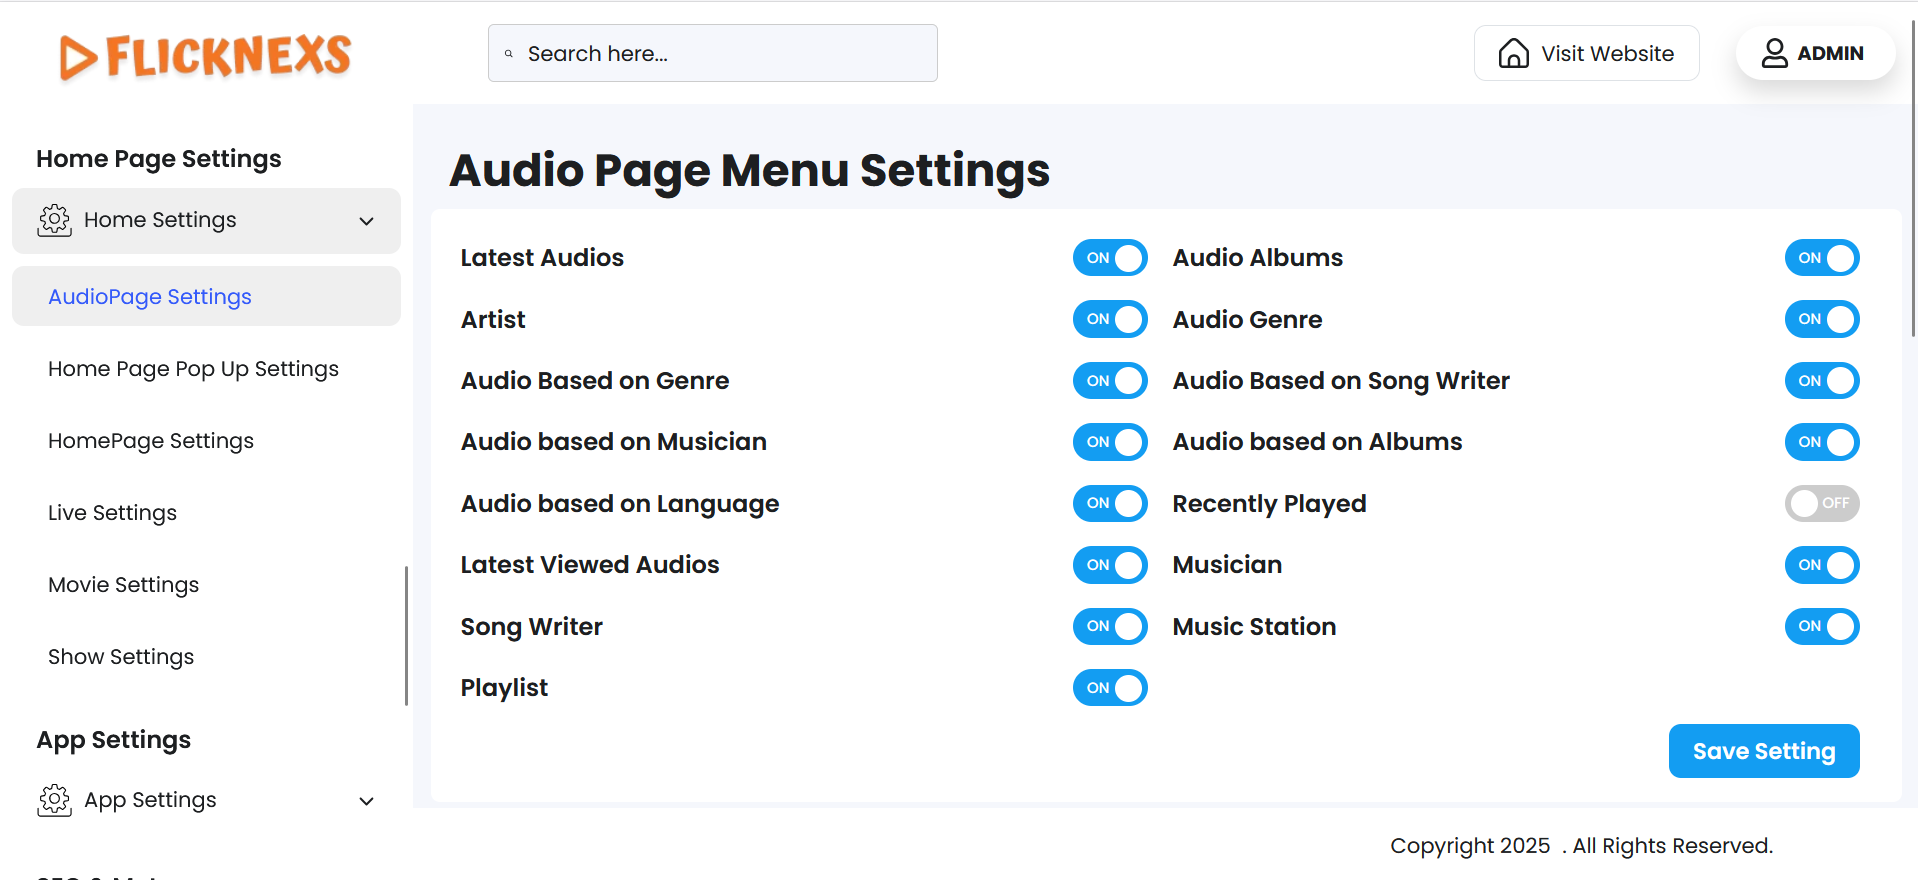
- You will find a list of all the menu options related to the audio section, such as Artist, Latest Audios, Audio Genre, and more. These menus help users navigate and explore the audio content more effectively.
- If you want these menus to appear on the audio page of your platform, you can enable the toggle for each one individually. If you prefer not to show certain menus to users, you can simply disable them.
- This gives you full control over the visibility and structure of the audio page based on your platform’s content strategy or user experience preferences.
Audio Page Menu Settings
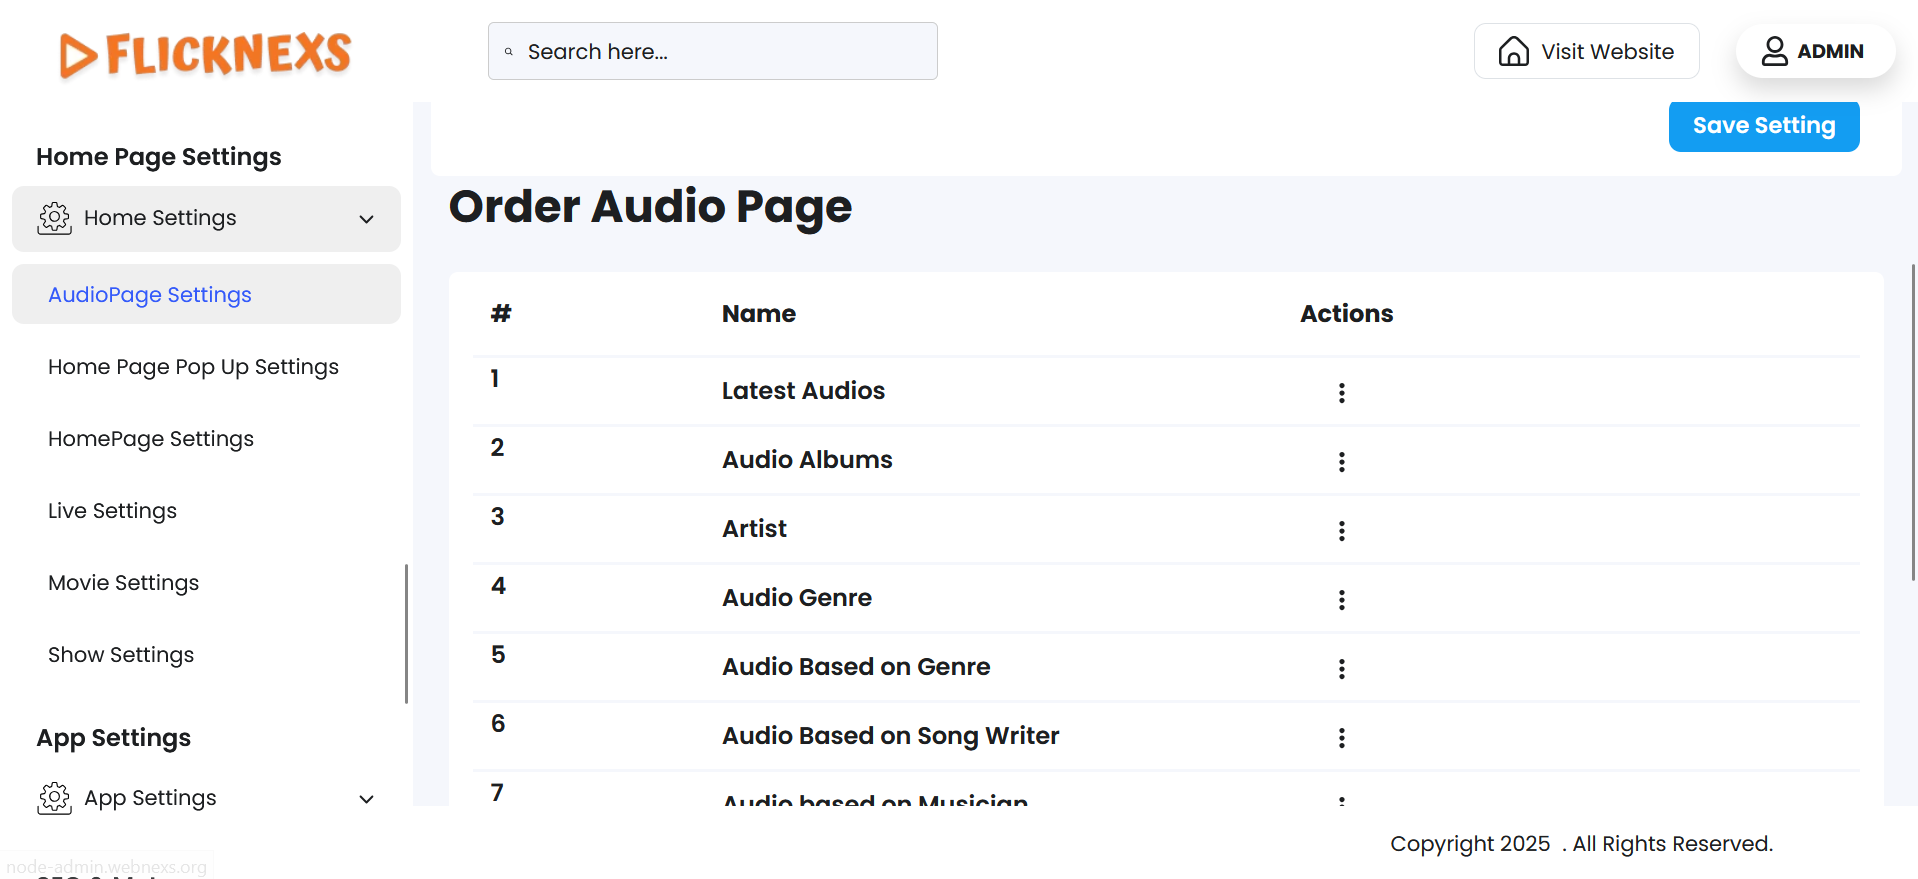
Order Audio Page
- In this section, you will see a list of all the menus associated with the audio section of your platform, such as Artist, Latest Audios, Audio Genres, and others, displayed in a predefined order.
- If you wish to rearrange these menus to better suit your platform’s layout or user experience, you can easily drag and drop each menu item to change its position. This allows for full customization of the display order based on your preferences.
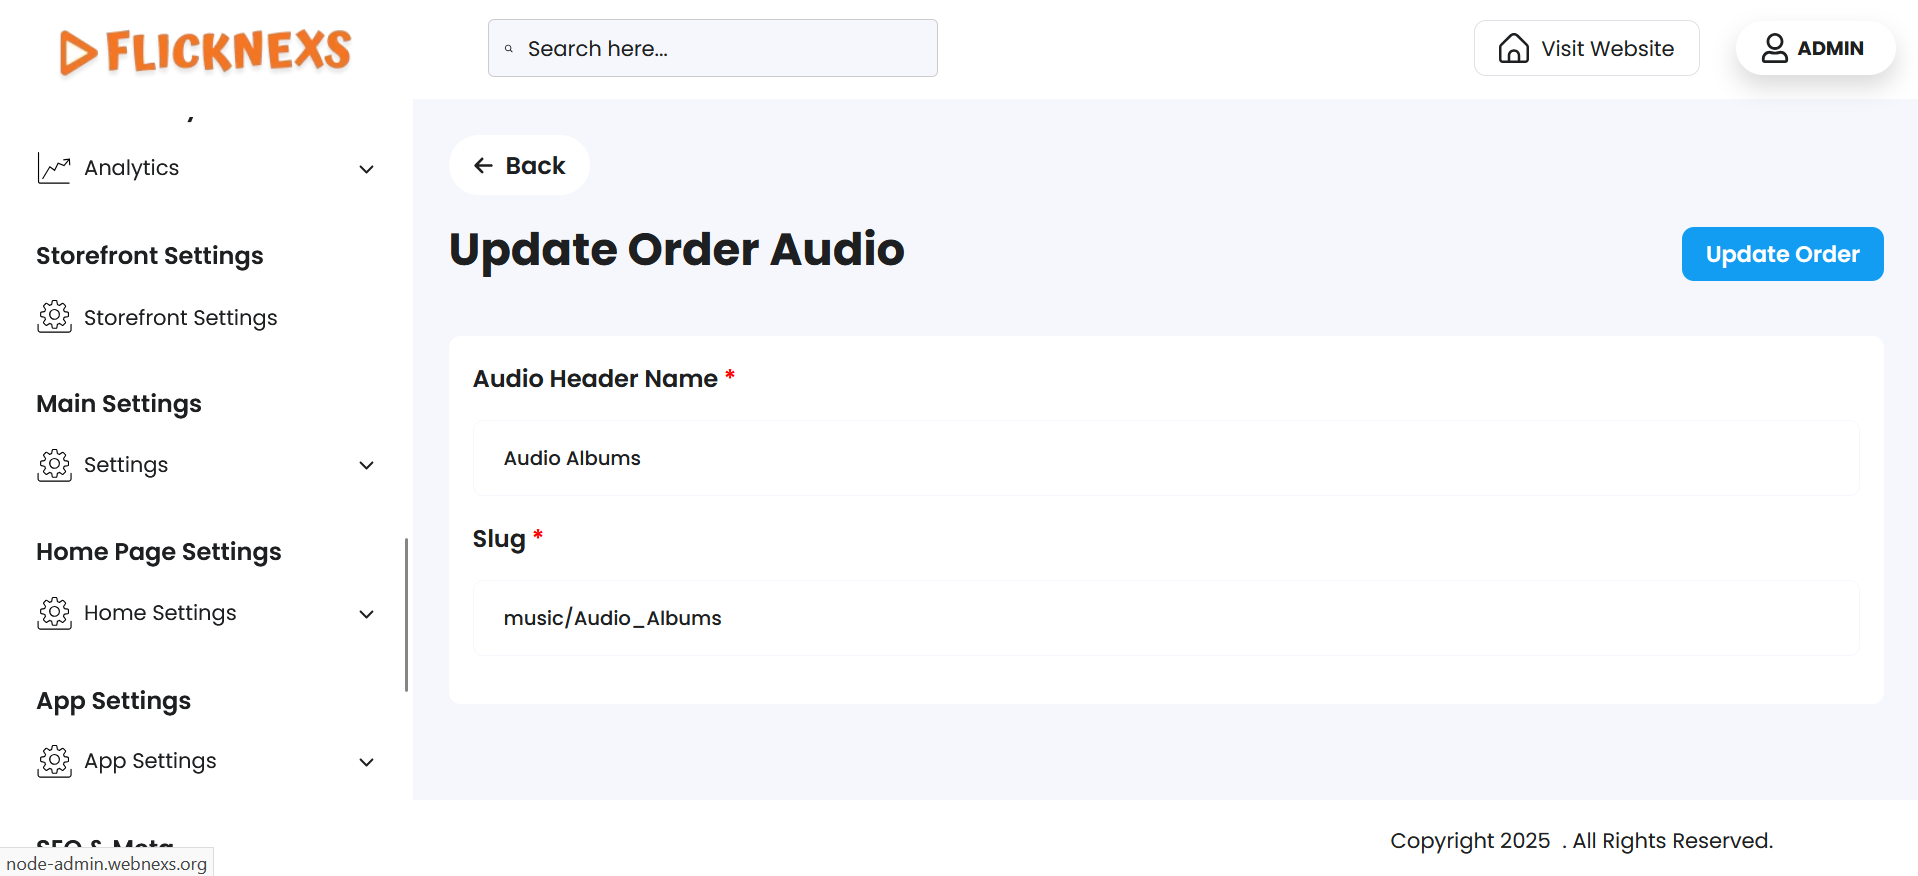
- Additionally, under the Action column, you have the ability to edit any menu. When editing a menu, you can update the Audio Header Name — the label that appears to users — as well as modify the Slug, which defines the URL-friendly identifier for that menu.
- This provides flexibility to maintain consistent branding, improve SEO, or adjust navigation naming based on content strategy.
Home Page Pop-Up Settings
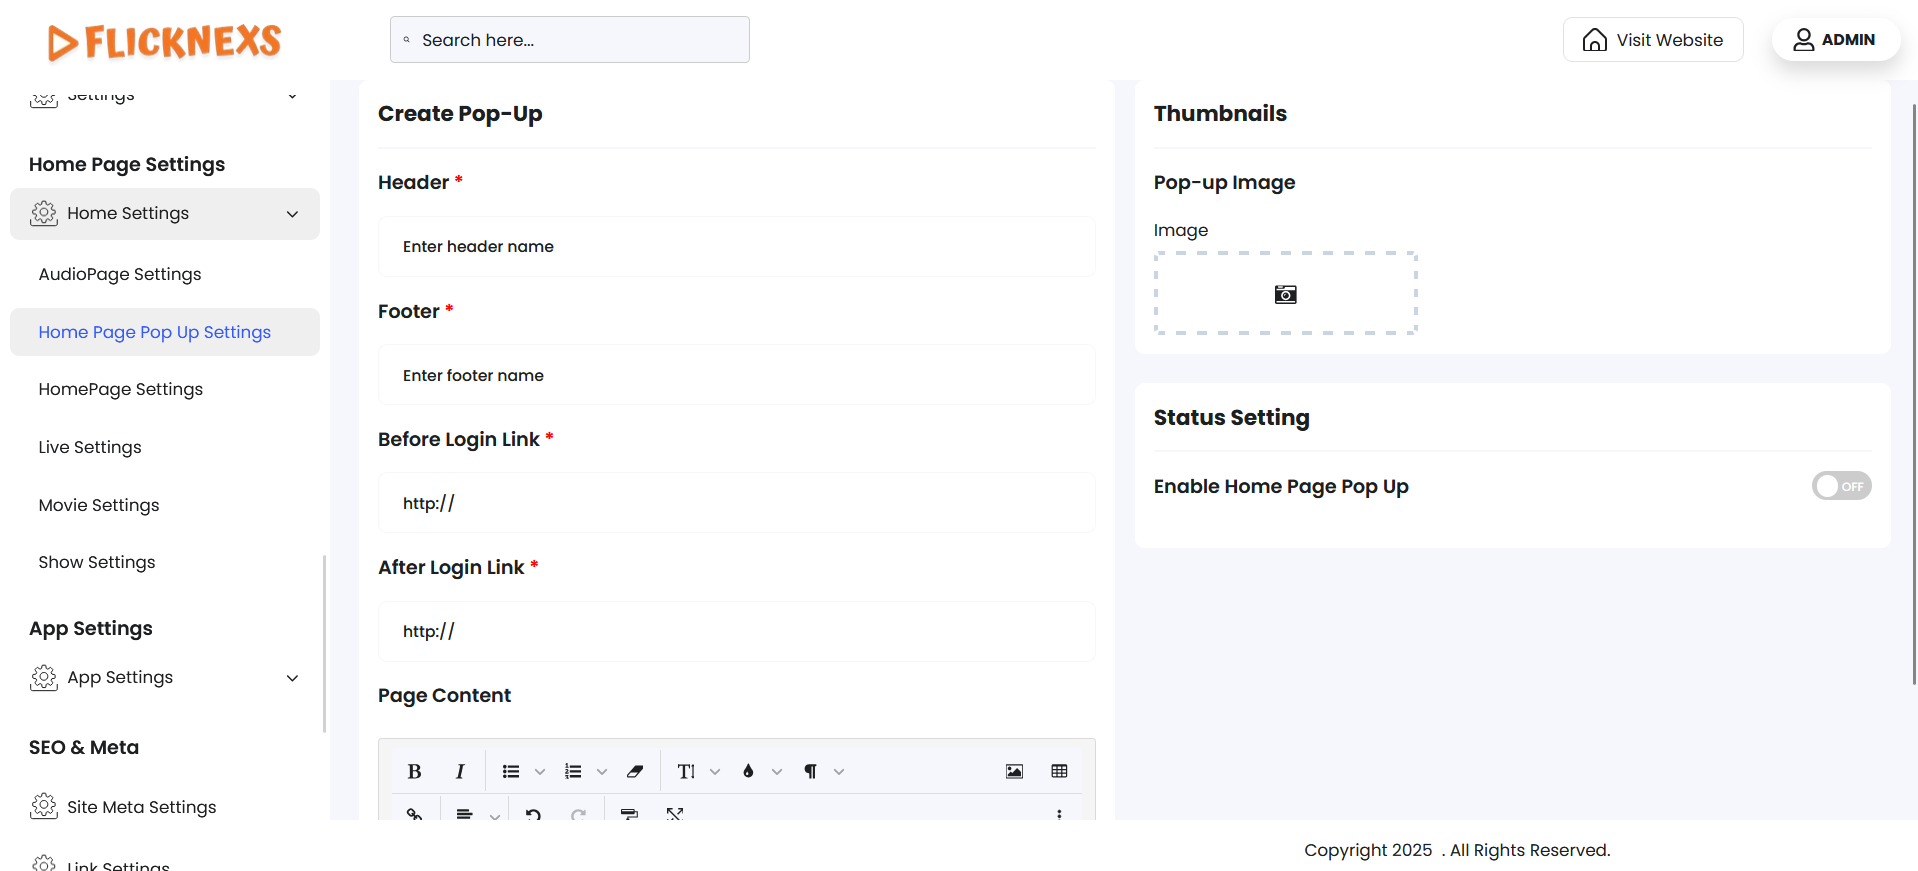
In these settings, you can configure and enable a Pop-Up feature that appears on the home page to grab user attention or convey important information. The settings allow you to customize the appearance and behavior of the pop-up, ensuring it aligns with your website’s goals and design.
Features and Customization Options:
Enable Pop-Up on Home Page
- This option allows you to activate the pop-up functionality on the home page.
- Once enabled, the pop-up will be displayed to users based on the settings you configure.
Header Section
- If you want the pop-up to appear in the header section of the page:
- Header Name: You can specify a name or title for the pop-up displayed in the header area.
- Before Login Link: Add a URL link for users who have not logged in. This can direct them to specific pages like a signup page, promotional offer, or additional information.
- Pop-Up Image: Upload an image to visually enhance the pop-up in the header section. This could include promotional banners, call-to-action visuals, or branding materials.
Footer Section
- If you want the pop-up to appear in the footer section of the page:
- Footer Name: Specify a name or title for the pop-up displayed in the footer area.
- After Login Link: Add a URL link for logged-in users. This can direct them to specific content like their dashboard, premium plans, or personalized offers.
- Pop-Up Image: Upload an image that will be displayed as part of the footer pop-up.
Content for the Pop-Up
- You can add custom text or HTML content for the pop-up.
- This content can include:
- Promotional messages (e.g., discounts, limited-time offers).
- Announcements (e.g., new features, upcoming events).
- Calls-to-action (e.g., “Sign up now!” or “Explore premium plans”).
Thumbnails
- Pop-up Image – In this section, you have the option to upload an image that will be displayed in the pop-up window on your platform.
- This image can be used to showcase important announcements, promotional banners, subscription offers, or any other custom messages you wish to highlight to your users.
- Make sure to choose an image that is visually engaging and relevant to the message you want to convey. It is recommended to use a high-resolution image with proper dimensions that fits well within the pop-up layout.
- Once uploaded, the image will automatically appear in the designated pop-up area whenever it is triggered on the site.
Benefits
- Improved Engagement: Attract user attention with visually appealing pop-ups.
- Targeted Messaging: Show specific messages based on user login status (before or after login).
- Flexibility: Place pop-ups in the header or footer depending on your design preferences.
- Customizable: Add images, links, and rich content to align with your branding and objectives.
This feature ensures that you can effectively communicate important updates or promotions to your users in a visually appealing and targeted manner.
Home Page Settings
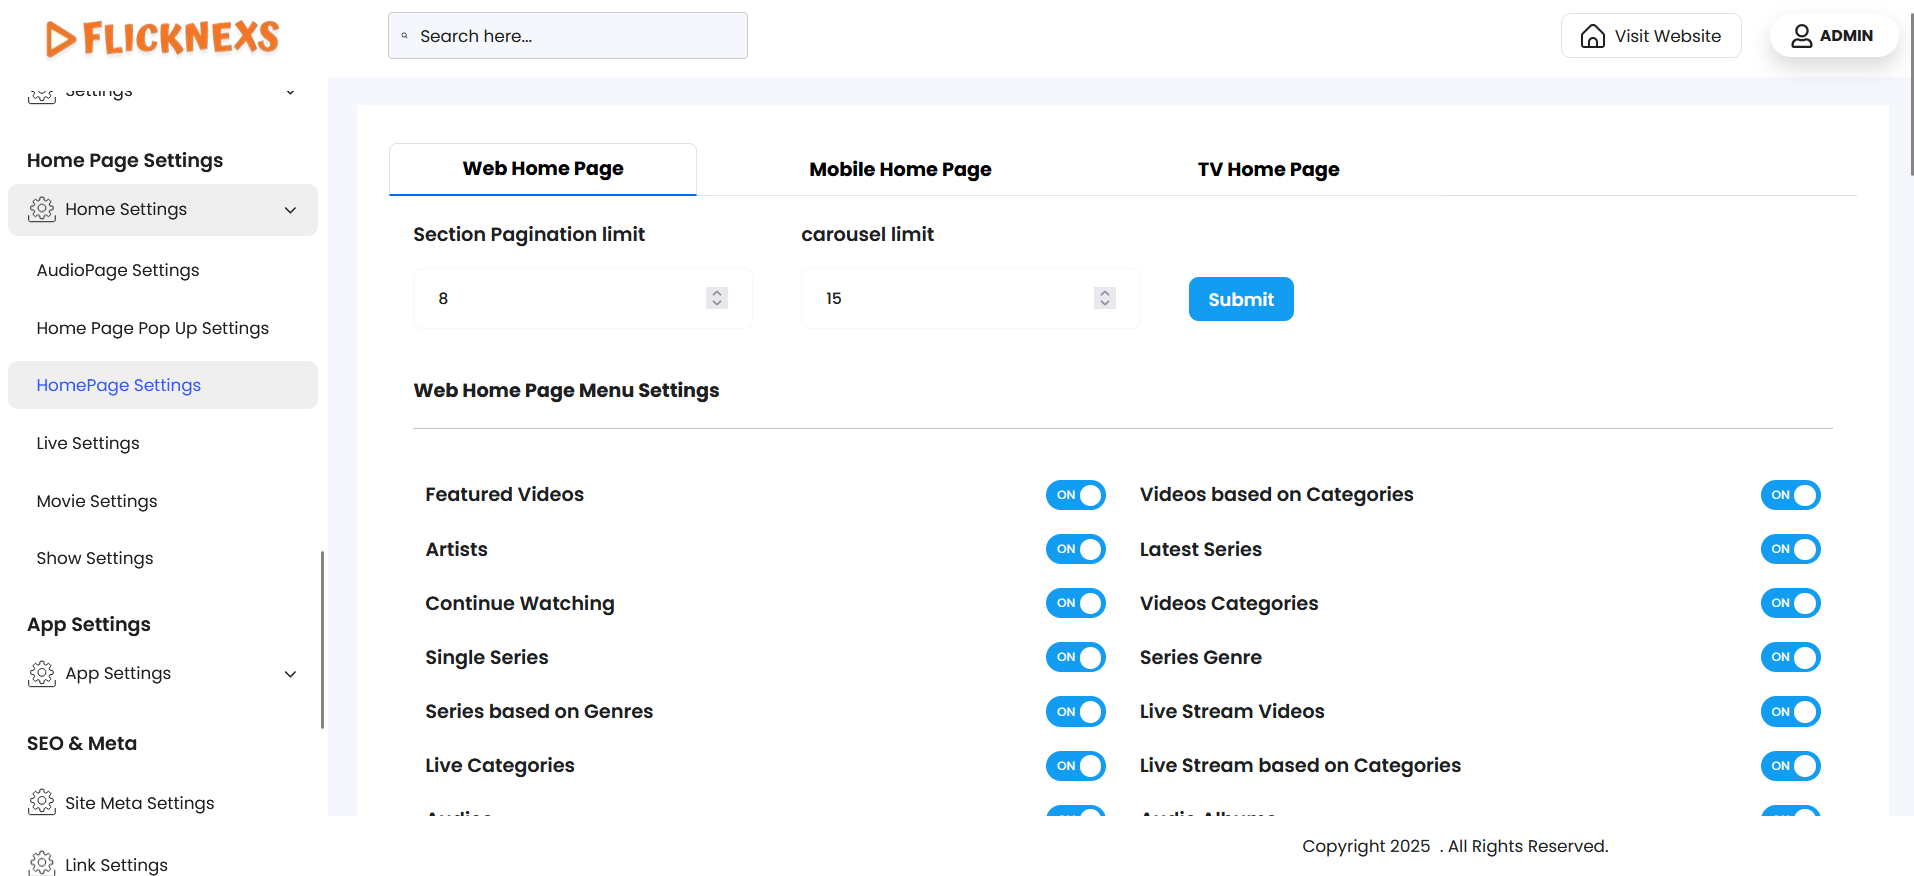
- The Home Page Settings section is divided into three parts: Web Homepage, Mobile Homepage, and TV Homepage. Each of these sections allows you to independently configure and manage the layout and content displayed on that specific platform type.
- You can customize the Mobile Homepage and TV Homepage in the same way as the Web Homepage. This includes adding or removing content sections, reordering blocks, enabling or disabling specific content rows like Featured, Trending, Categories, etc., and adjusting display settings to suit the screen type and user experience for mobile and TV devices.
- This structure ensures a responsive and optimized experience tailored to each device type, providing flexibility in design and content presentation for different viewing platforms.
Web Home Page
- You will find a list of all the menu options related to the entire section, such as Artist, Latest Audios, Audio Genre, Featured Videos, Latest Series, Live Stream Videos, and more. These menus help users navigate and explore the entire content more effectively.
- If you want these menus to appear on the home page of your platform, you can enable the toggle for each one individually. If you prefer not to show certain menus to users, you can simply disable them.
- This gives you full control over the visibility and structure of the home page based on your platform’s content strategy or user experience preferences.
Order Home Page
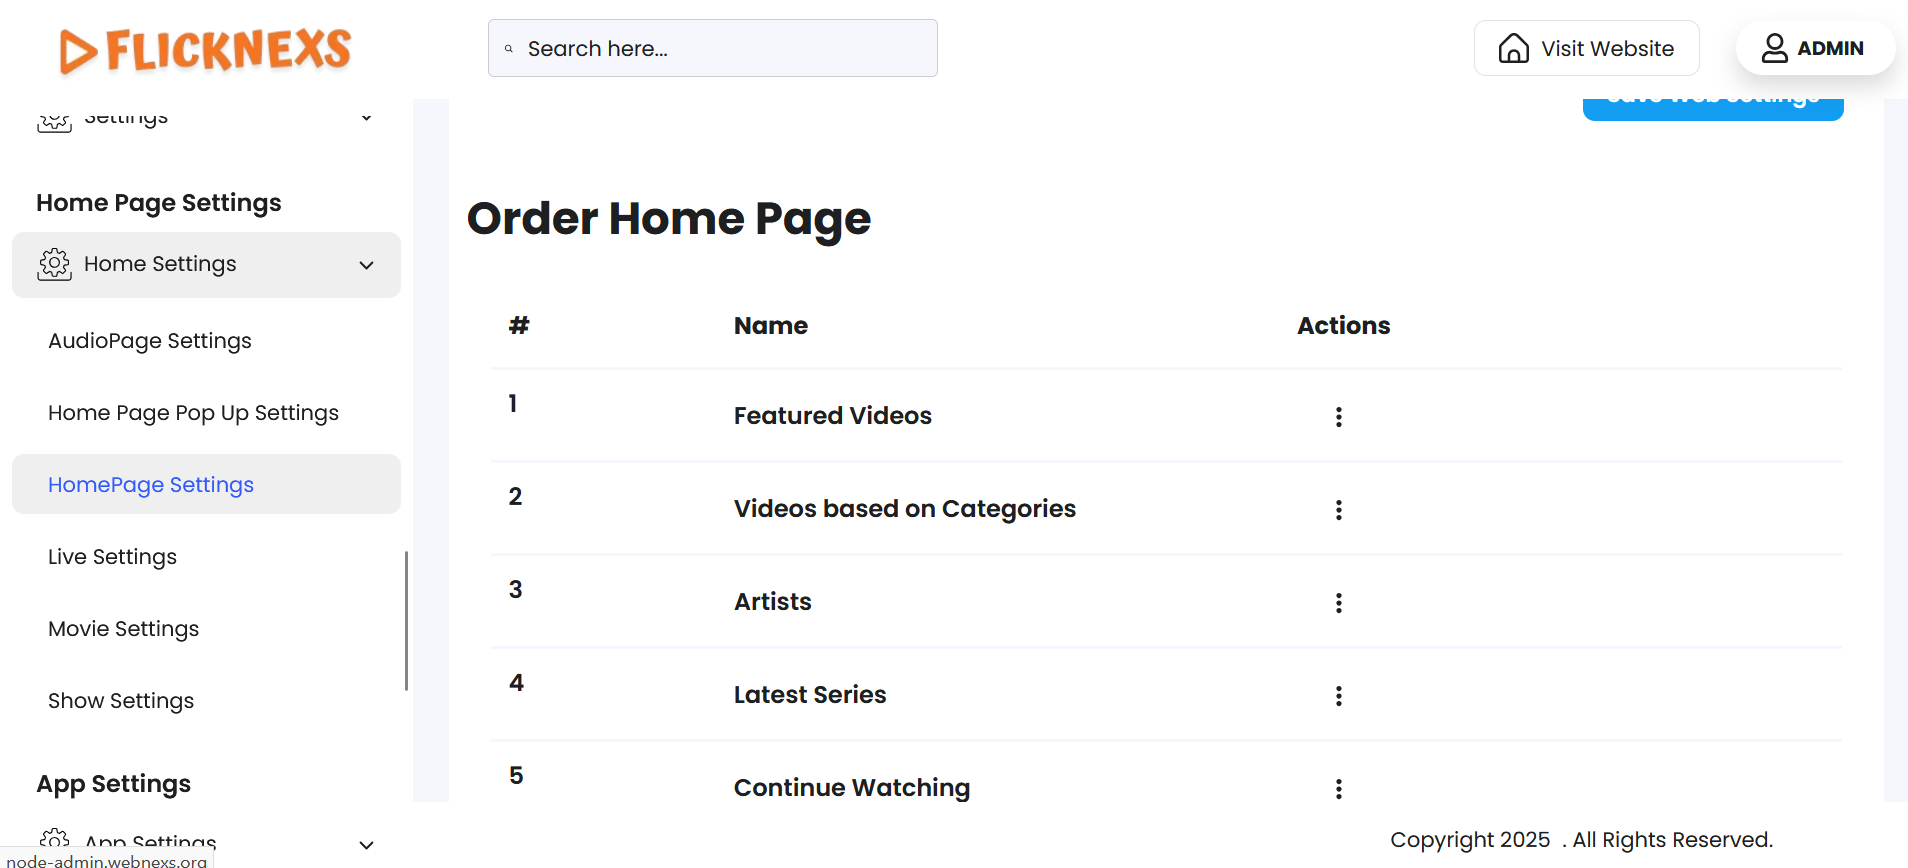
- In this section, you will see a list of all the menus associated with the entire section of your platform, such as Artist, Latest Audios, Audio Genre, Featured Videos, Latest Series, Live Stream Videos, and others, displayed in a predefined order.
- If you wish to rearrange these menus to better suit your platform’s layout or user experience, you can easily drag and drop each menu item to change its position. This allows for full customization of the display order based on your preferences.
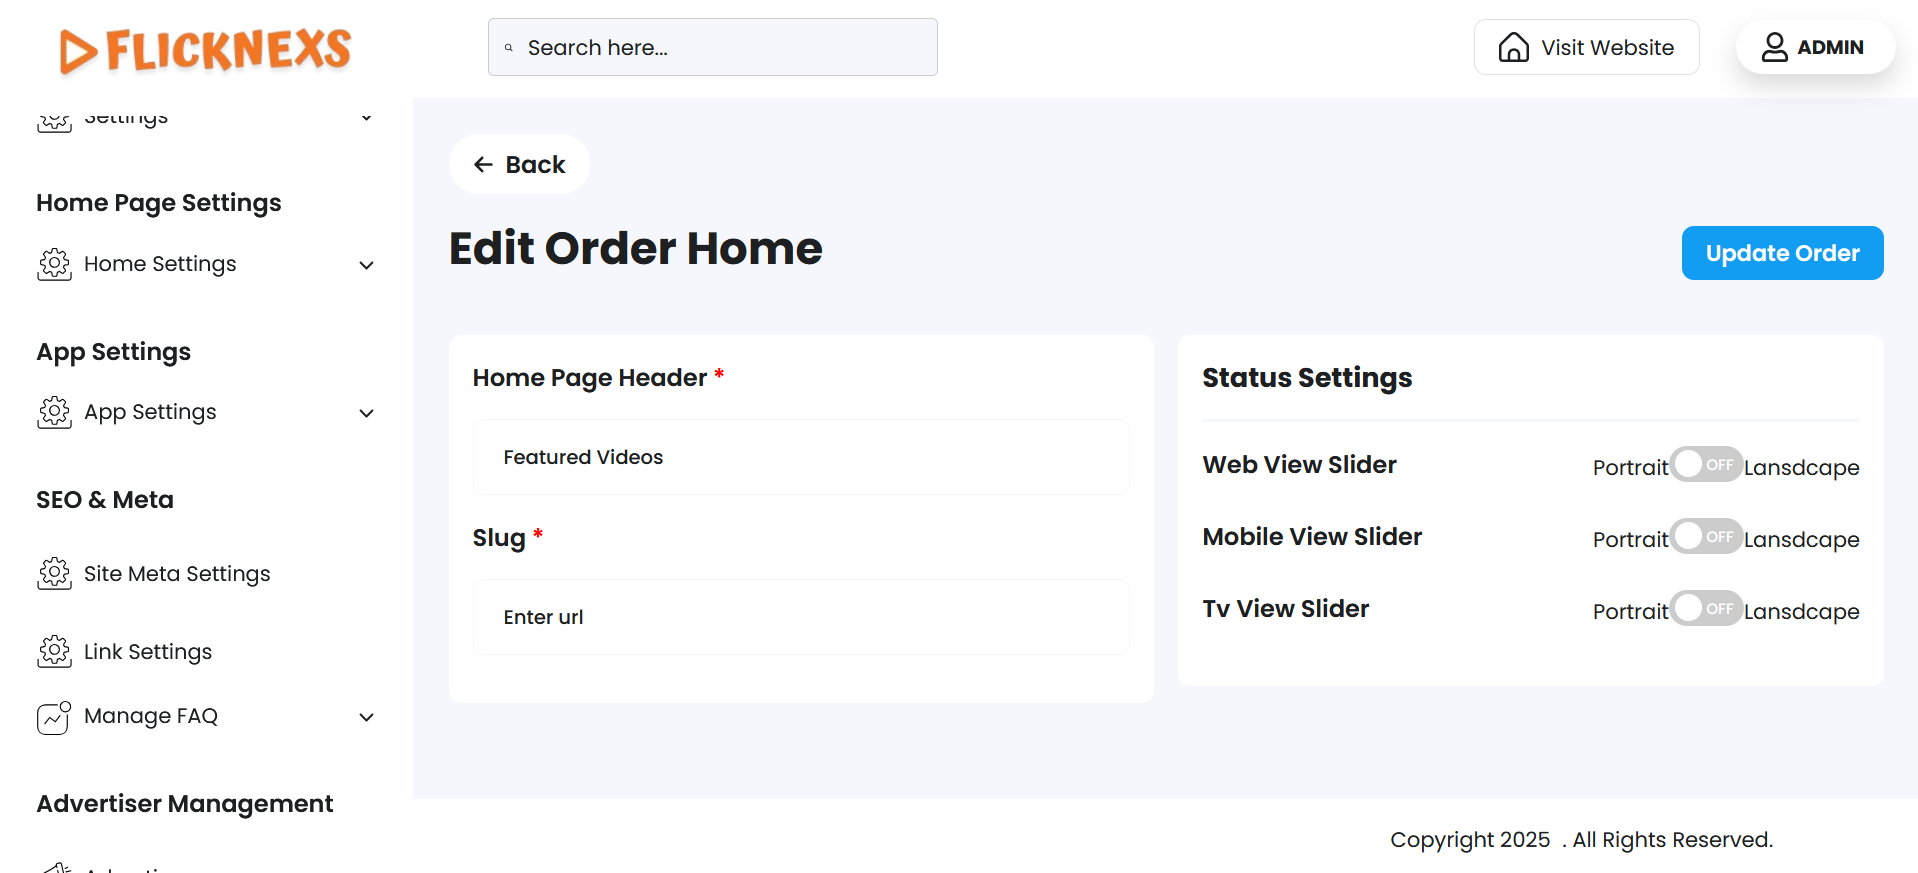
- Additionally, under the Action column, you have the ability to edit any menu. When editing a menu, you can update the Home Page Header Name — the label that appears to users — as well as modify the Slug, which defines the URL-friendly identifier for that menu.
- This provides flexibility to maintain consistent branding, improve SEO, or adjust navigation naming based on content strategy.
Status Settings
- In the Home Page Settings, you have the flexibility to customize the view mode of sliders individually for Web, Mobile, and TV platforms. This means you can choose how the content sliders (such as Featured, Trending, or Category sliders) are visually presented to users based on the device they are using.
- You can enable or disable the option to display sliders in either Portrait or Landscape orientation.
- Portrait View is typically a vertical card layout, ideal for mobile devices or when showcasing poster-style images.
- Landscape View offers a horizontal or widescreen card layout, better suited for TV and desktop experiences where wider thumbnails enhance visibility.
- You can enable or disable the option to display sliders in either Portrait or Landscape orientation.
- This feature ensures that your platform delivers an optimal viewing experience across different devices by adapting the content layout to screen size and user behavior.
Live Settings
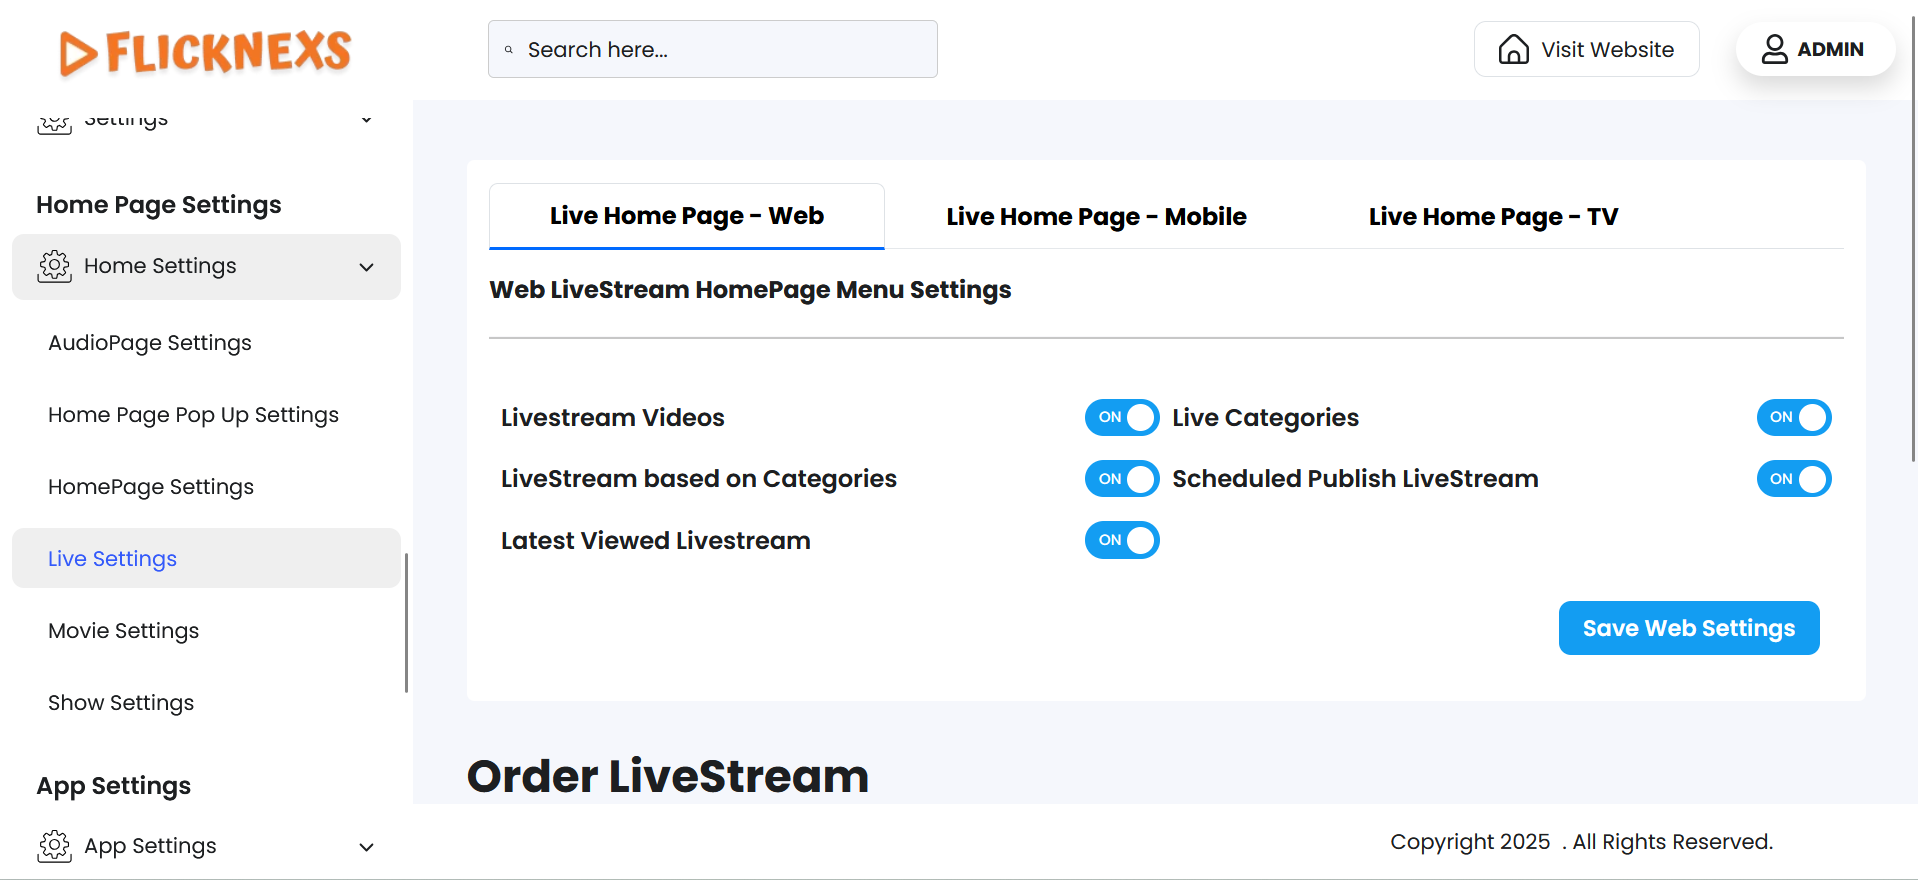
- The Live Settings section is divided into three parts: Web Live Homepage, Mobile Live Homepage, and TV Live Homepage. Each of these sections allows you to independently configure and manage the layout and content displayed on that specific platform type.
- You can customize the Mobile Live Homepage and TV Live Homepage in the same way as the Web Live Homepage. This includes adding or removing content sections, reordering blocks, enabling or disabling specific content rows like Featured, Trending, Categories, etc., and adjusting display settings to suit the screen type and user experience for mobile and TV devices.
- This structure ensures a responsive and optimized experience tailored to each device type, providing flexibility in design and content presentation for different viewing platforms.
Web LiveStream HomePage Menu Settings
- You will find a list of all the menu options related to the Live section, such as Live Stream Videos, Live Categories, and more. These menus help users navigate and explore the live content more effectively.
- If you want these menus to appear on the Web Live stream home page of your platform, you can enable the toggle for each one individually. If you prefer not to show certain menus to users, you can simply disable them.
- This gives you full control over the visibility and structure of the home page based on your platform’s content strategy or user experience preferences.
Order Live Stream
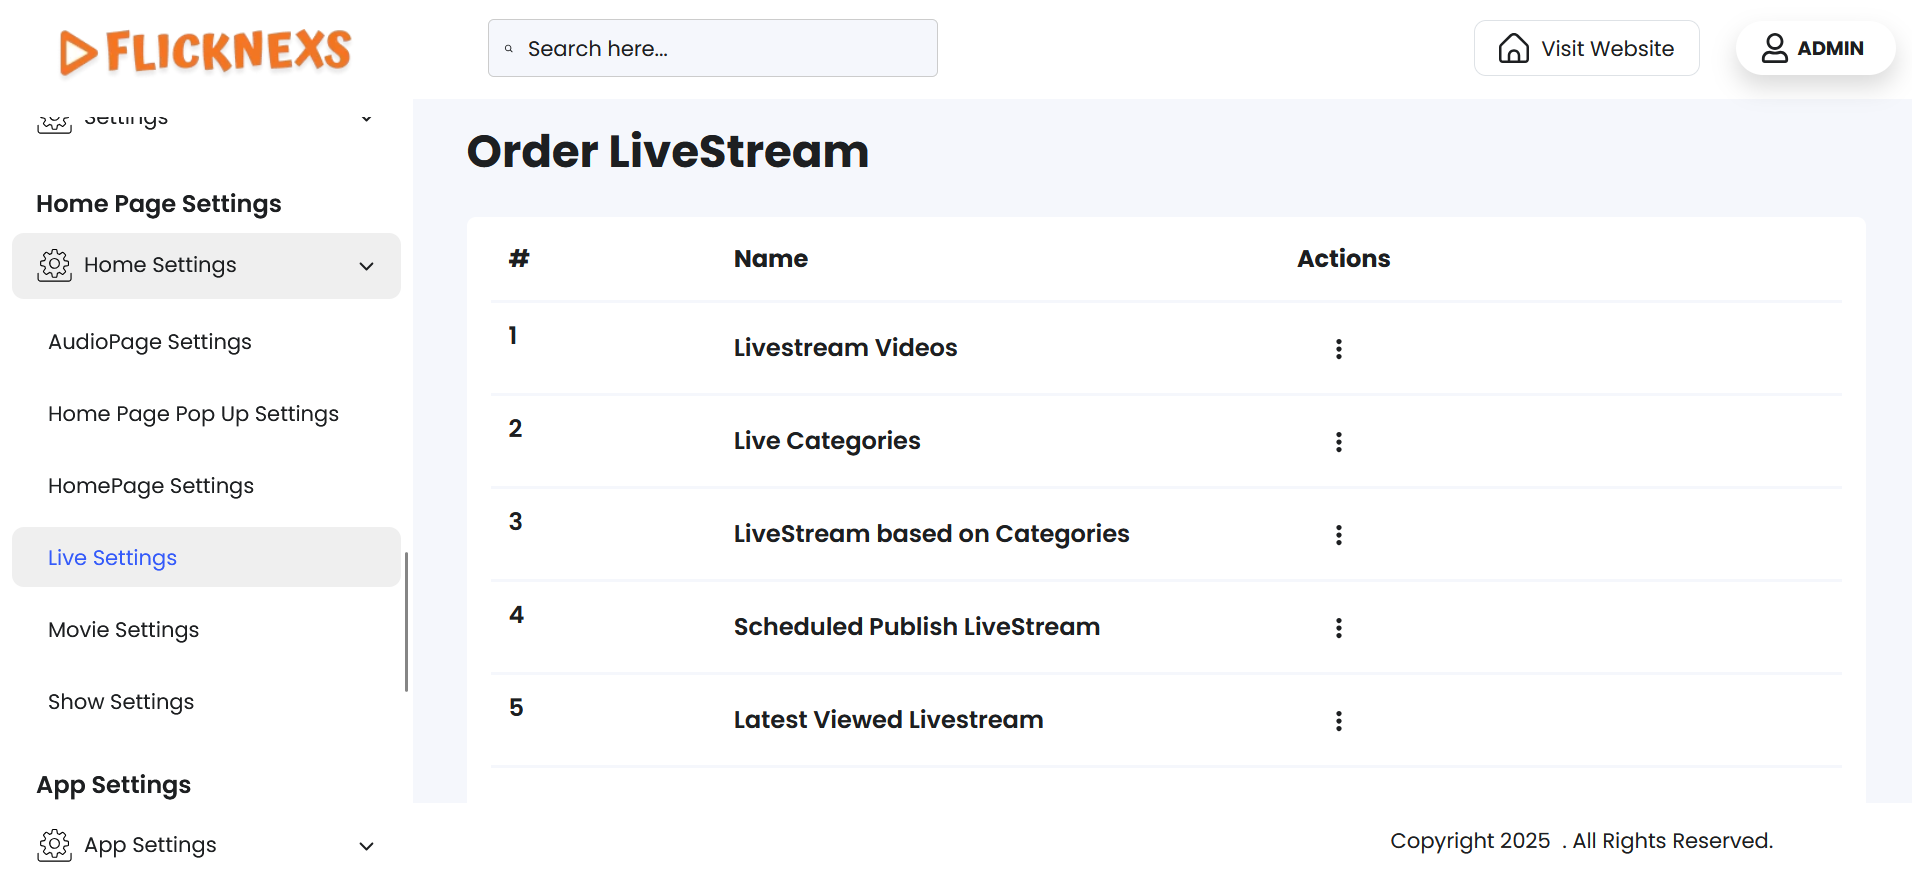
- In this section, you will see a list of all the menus associated with the live stream section of your platform, such as Live Stream Videos, Live Categories, and others, displayed in a predefined order.
- If you wish to rearrange these menus to better suit your platform’s layout or user experience, you can easily drag and drop each menu item to change its position. This allows for full customization of the display order based on your preferences.
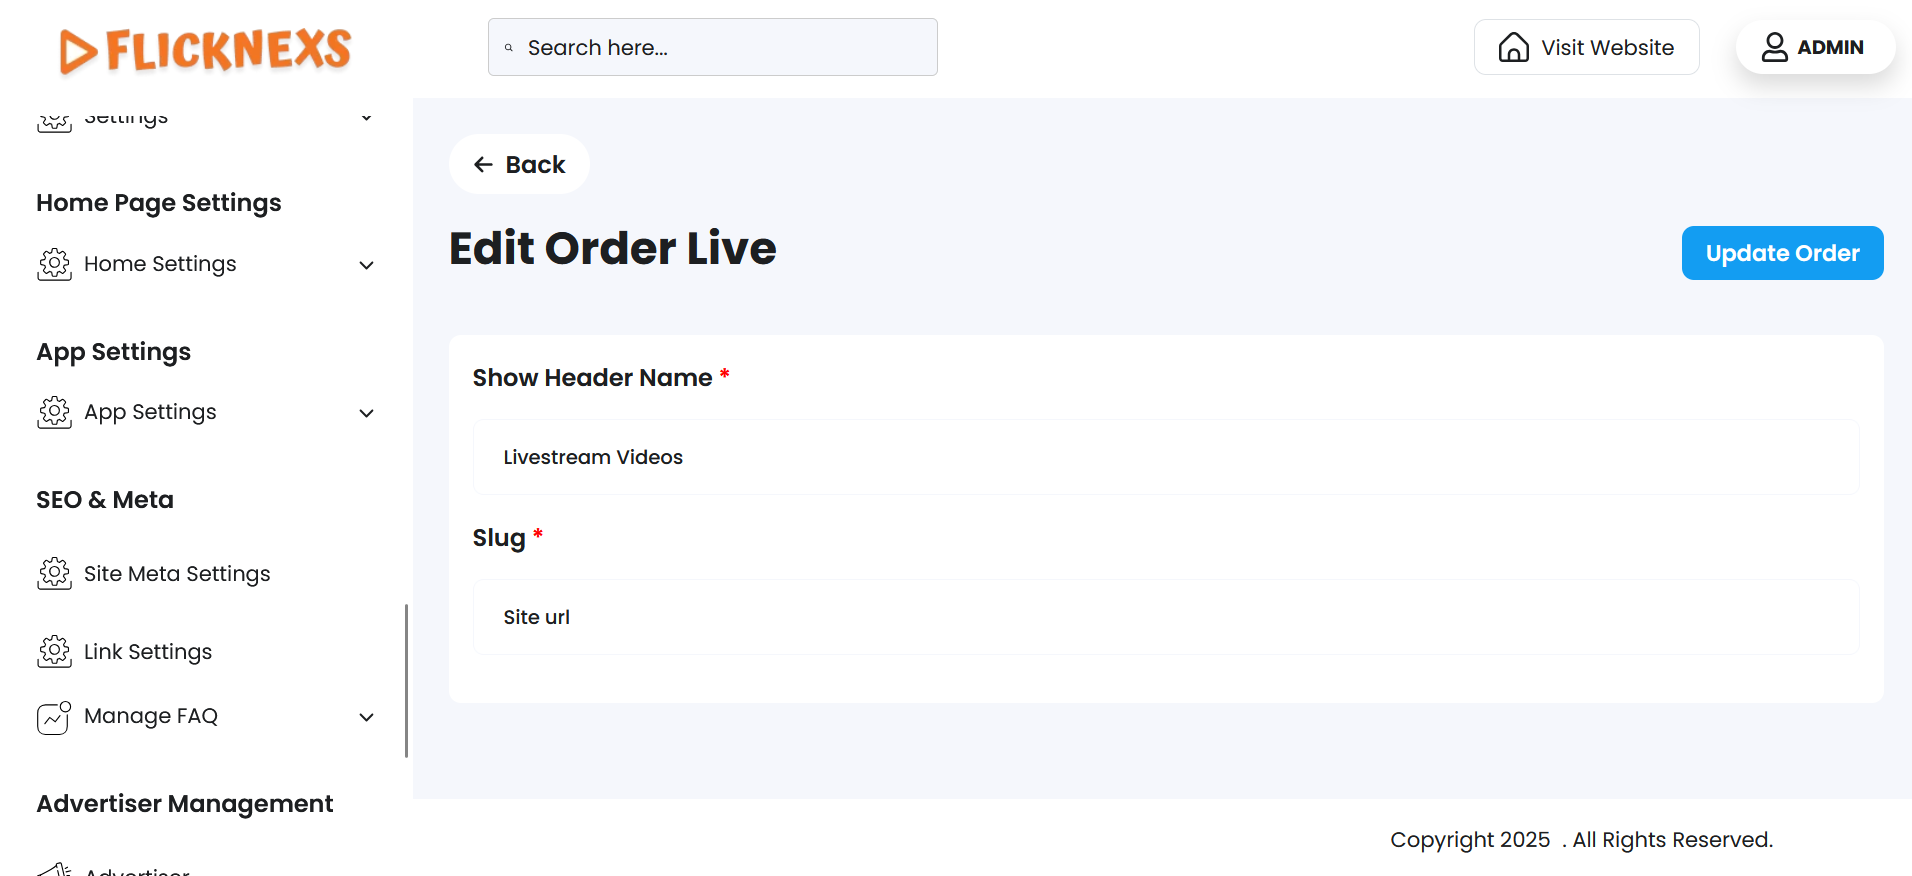
- Additionally, under the Action column, you have the ability to edit any menu. When editing a menu, you can update the Live Header Name — the label that appears to users — as well as modify the Slug, which defines the URL-friendly identifier for that menu.
- This provides flexibility to maintain consistent branding, improve SEO, or adjust navigation naming based on content strategy.
Movie Settings
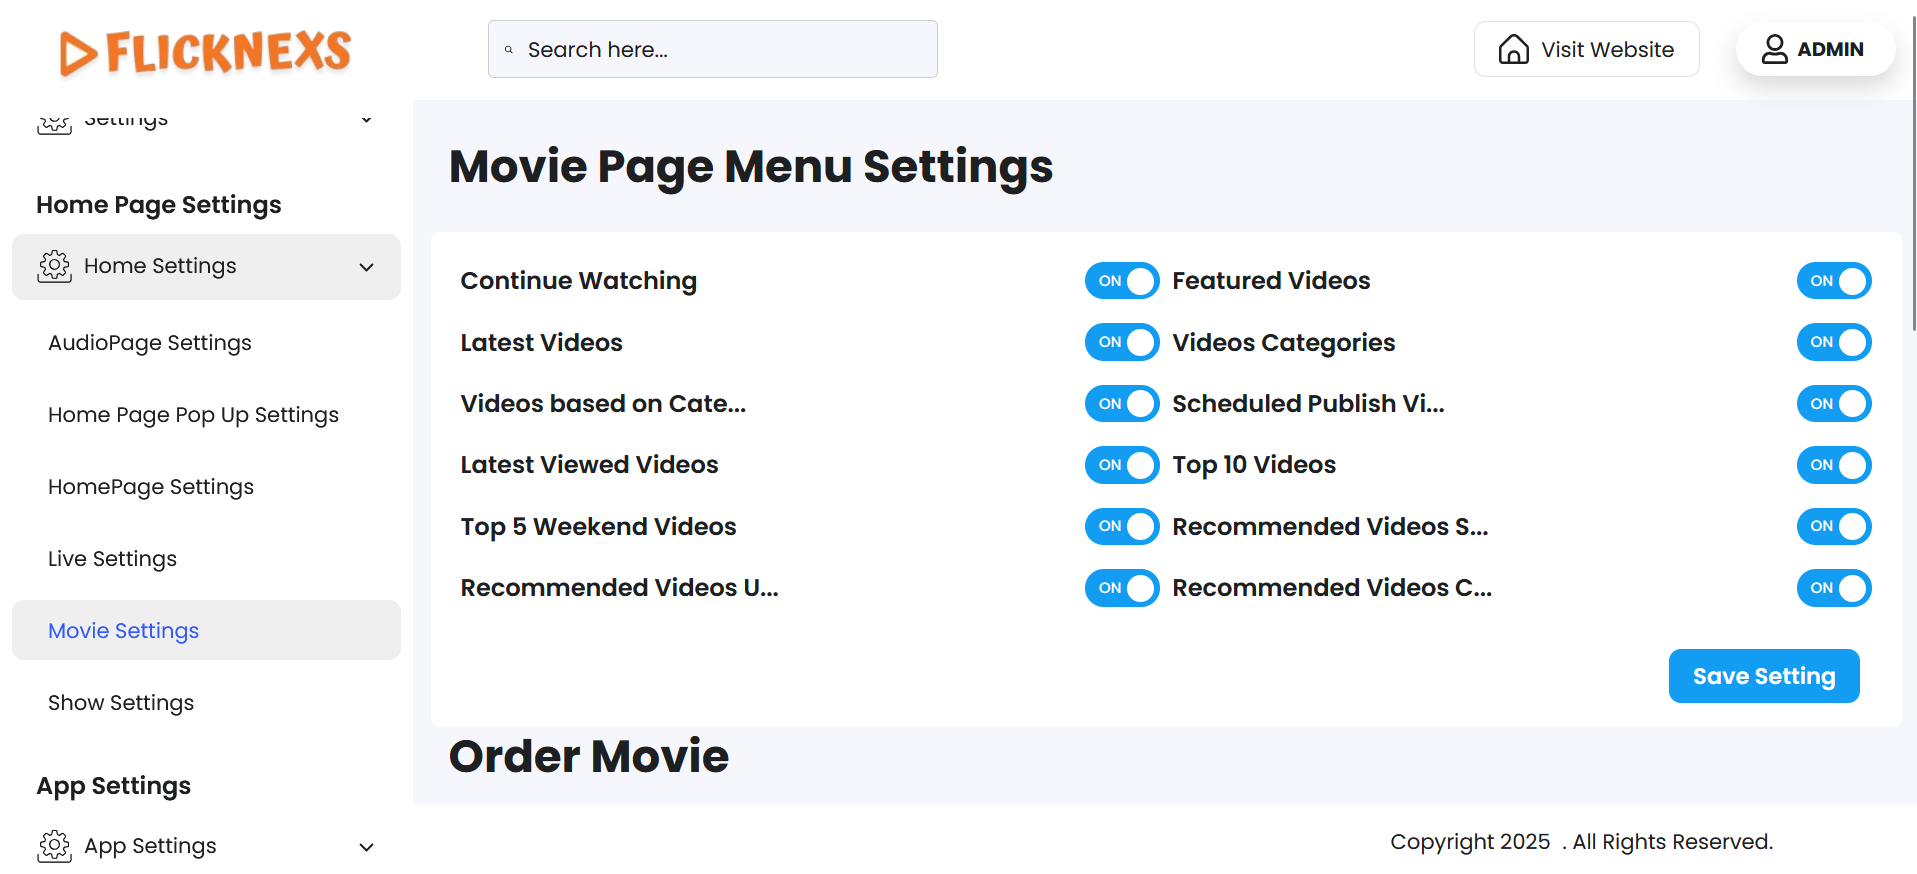
- You will find a list of all the menu options related to the video section, such as Featured videos, Latest videos, Continue Watching, and more. These menus help users navigate and explore the audio content more effectively.
- If you want these menus to appear on the video page of your platform, you can enable the toggle for each one individually. If you prefer not to show certain menus to users, you can simply disable them.
- This gives you full control over the visibility and structure of the video page based on your platform’s content strategy or user experience preferences.
Movie Page Menu Settings
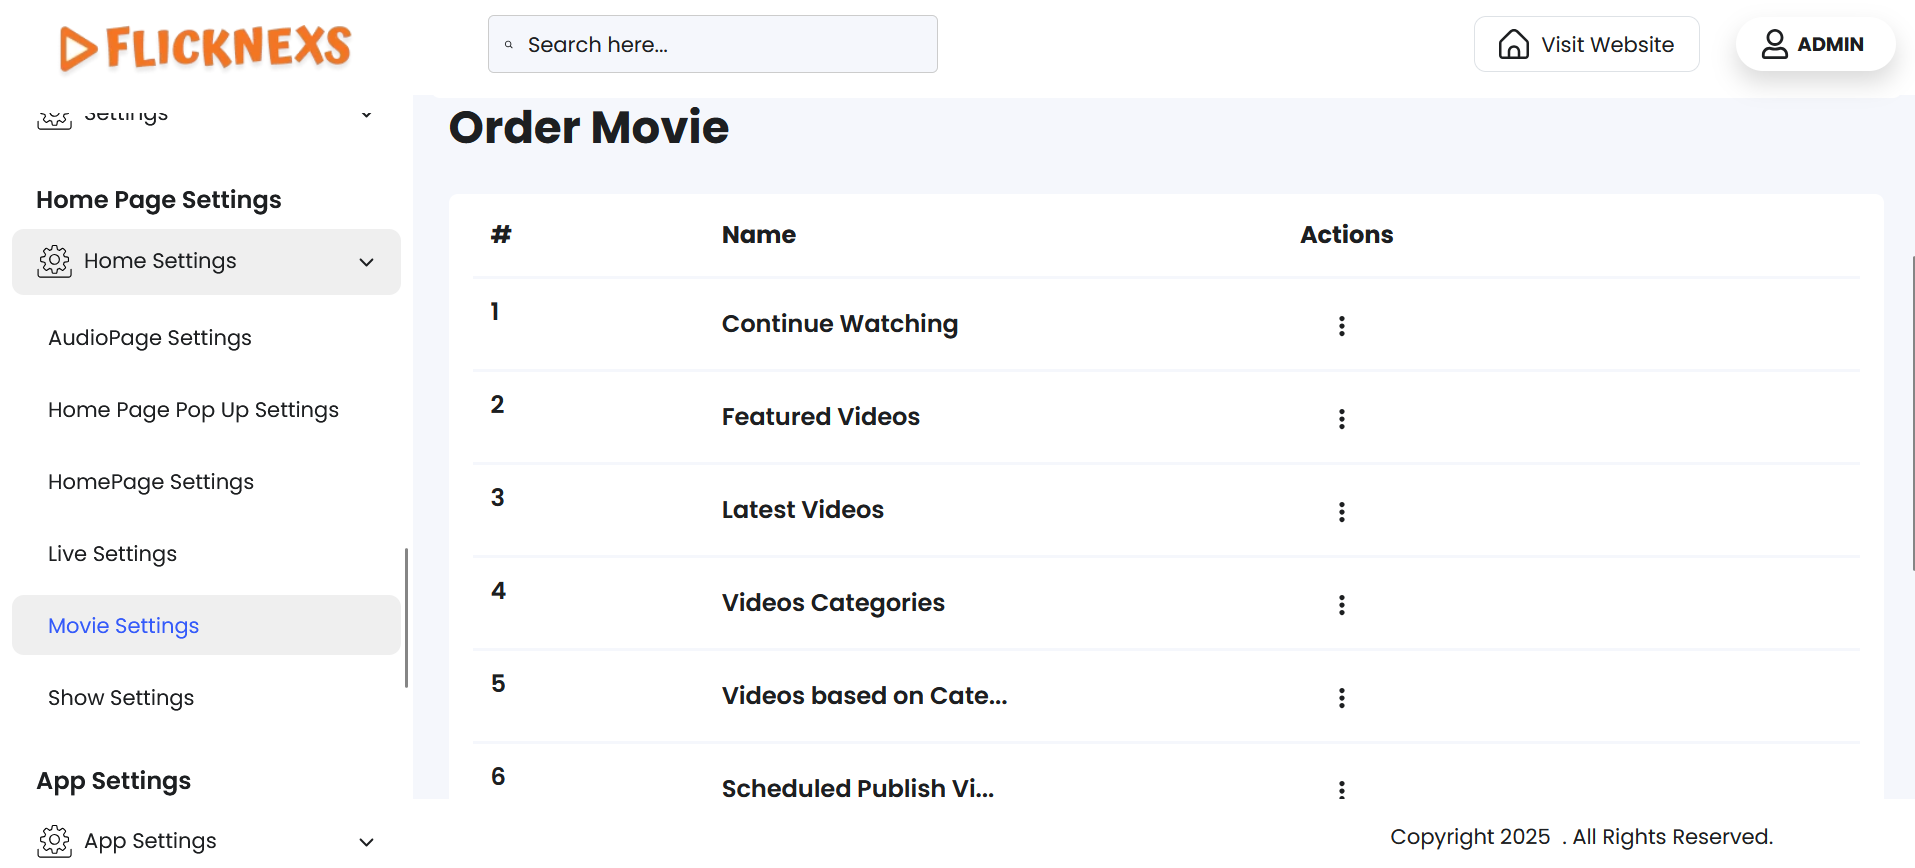
Order Video Page
- In this section, you will see a list of all the menus associated with the audio section of your platform, such as Featured videos, Latest videos, Continue Watching, and others, displayed in a predefined order.
- If you wish to rearrange these menus to better suit your platform’s layout or user experience, you can easily drag and drop each menu item to change its position. This allows for full customization of the display order based on your preferences.
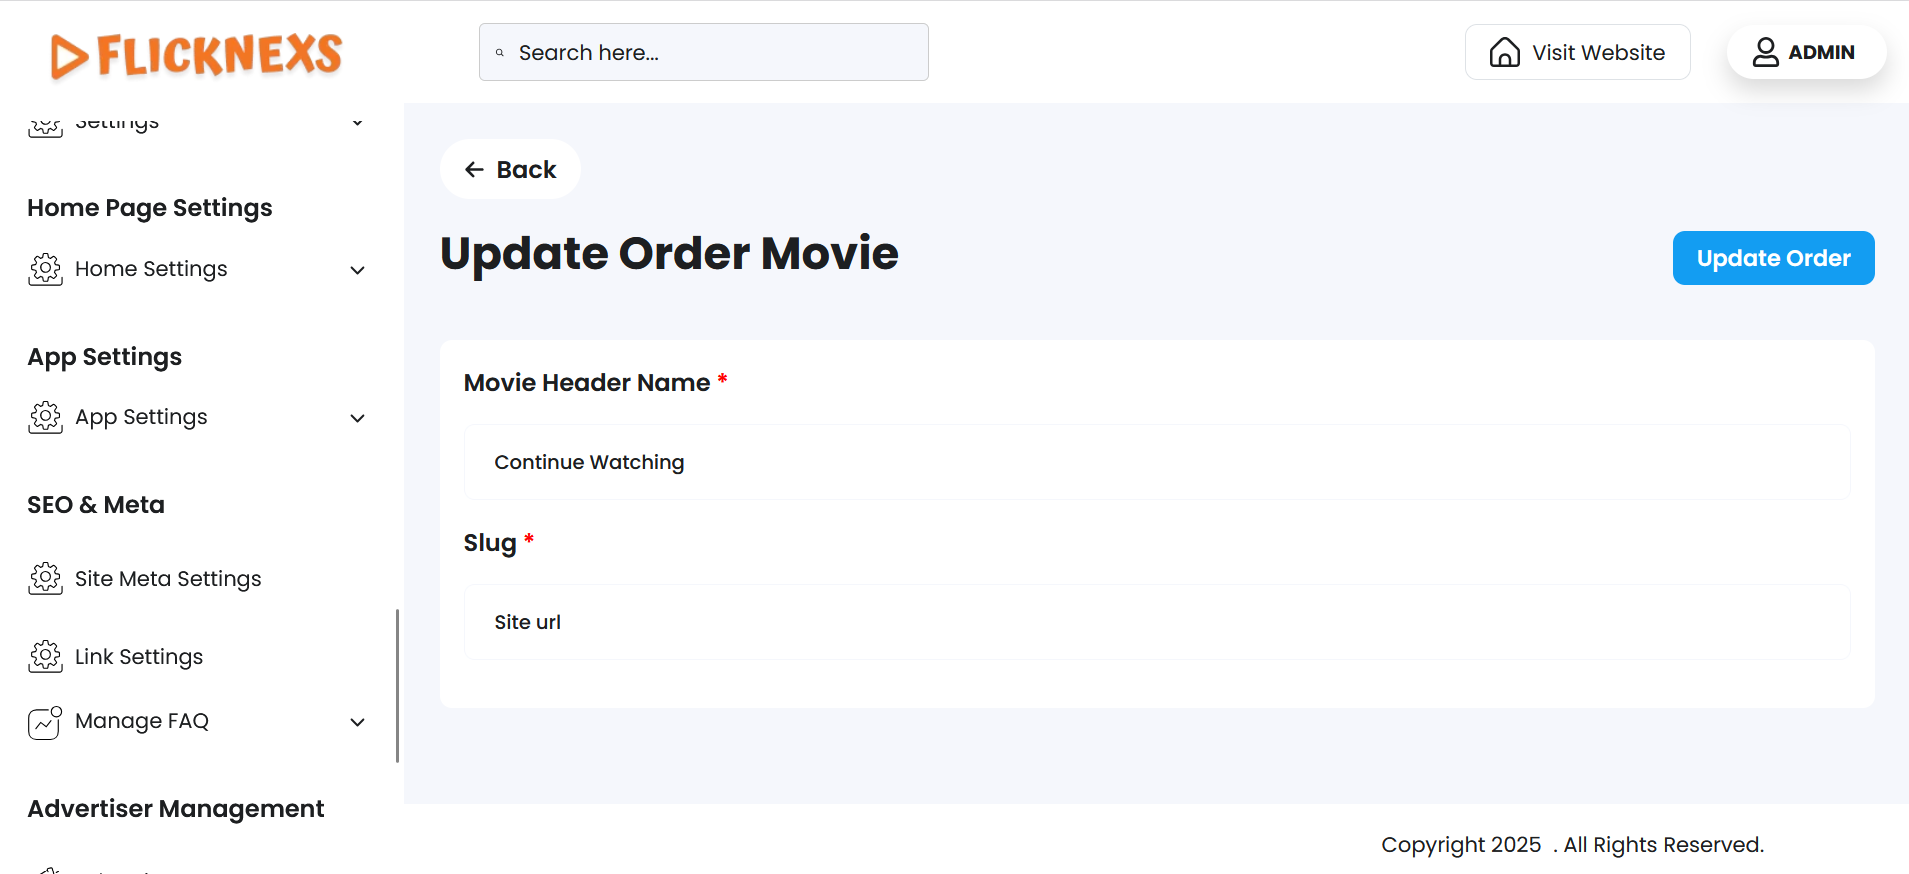
- Additionally, under the Action column, you have the ability to edit any menu. When editing a menu, you can update the Movie Header Name — the label that appears to users — as well as modify the Slug, which defines the URL-friendly identifier for that menu.
- This provides flexibility to maintain consistent branding, improve SEO, or adjust navigation naming based on content strategy.
Show Settings
- The Show Home Page Settings section is divided into three parts: Web shows Homepage, Mobile shows Homepage, and TV shows Homepage. Each of these sections allows you to independently configure and manage the layout and content displayed on that specific platform type.
- You can customize the Mobile shows Homepage and TV shows Homepage in the same way as the Web Homepage. This includes adding or removing content sections, reordering blocks, enabling or disabling specific content rows like Featured, Trending, Categories, etc., and adjusting display settings to suit the screen type and user experience for mobile and TV devices.
- This structure ensures a responsive and optimized experience tailored to each device type, providing flexibility in design and content presentation for different viewing platforms.
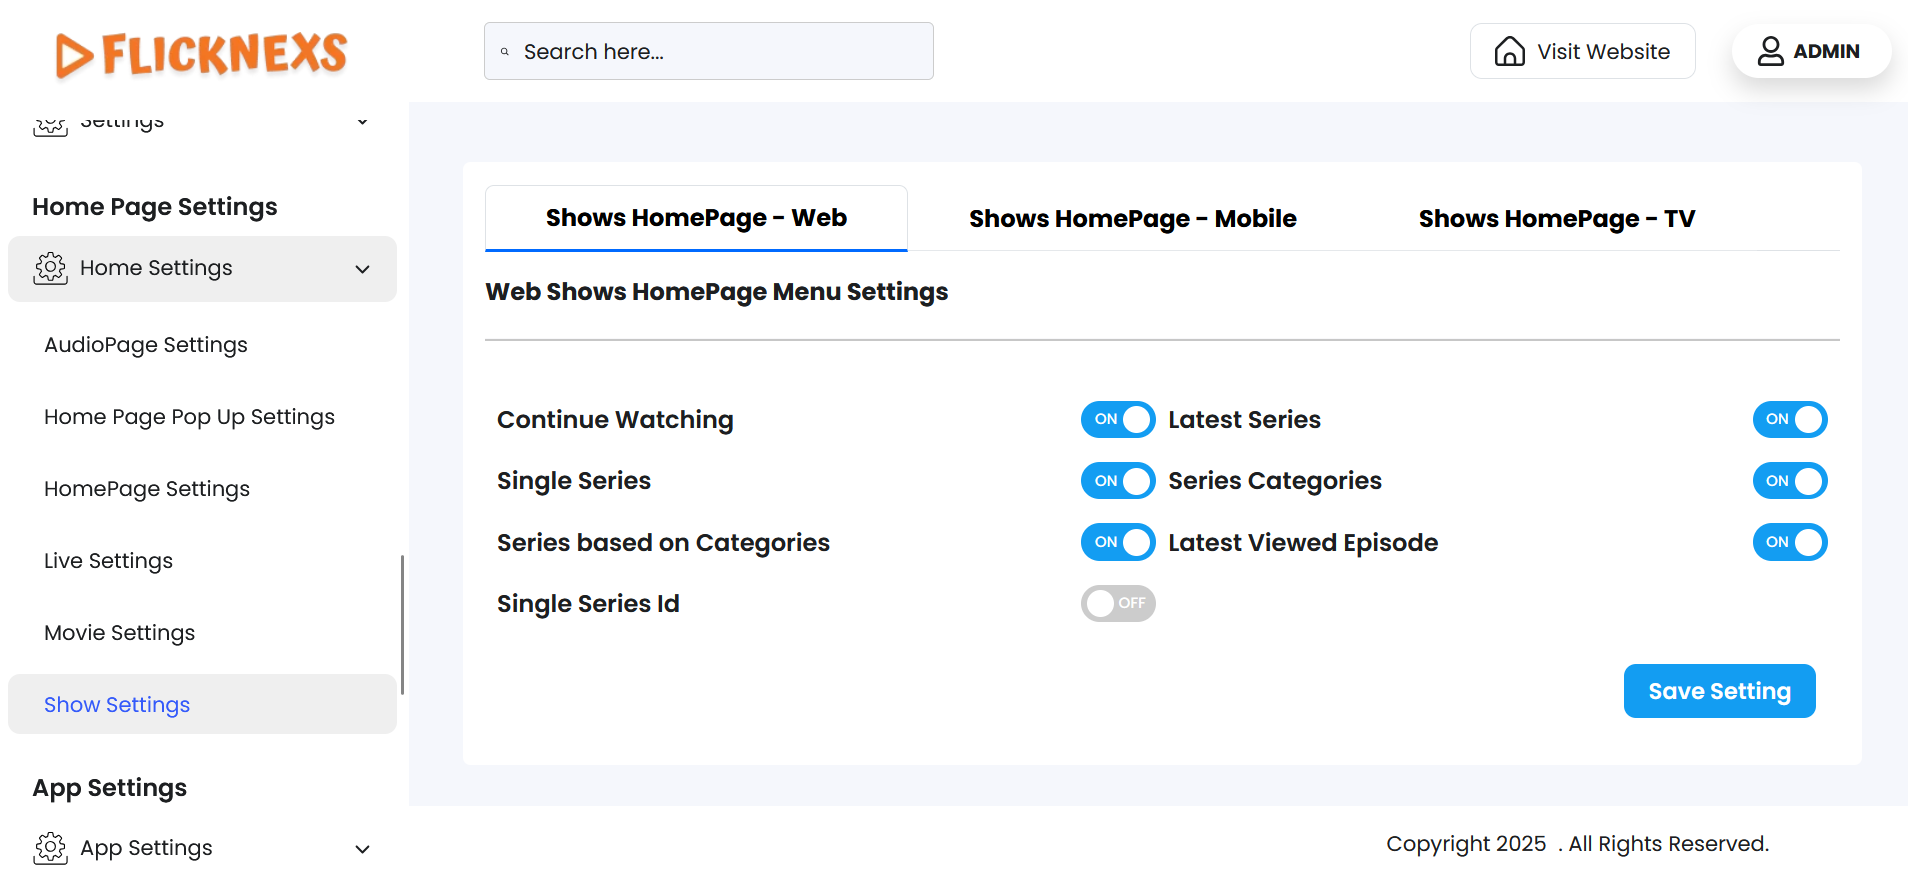
Web Shows Home Page Menu Settings
- You will find a list of all the menu options related to the entire section, such as Latest Series, Single Series, and more. These menus help users navigate and explore the entire content more effectively.
- If you want these menus to appear on the Shows page of your platform, you can enable the toggle for each one individually. If you prefer not to show certain menus to users, you can simply disable them.
- This gives you full control over the visibility and structure of the show’s page based on your platform’s content strategy or user experience preferences.
Order TV Shows
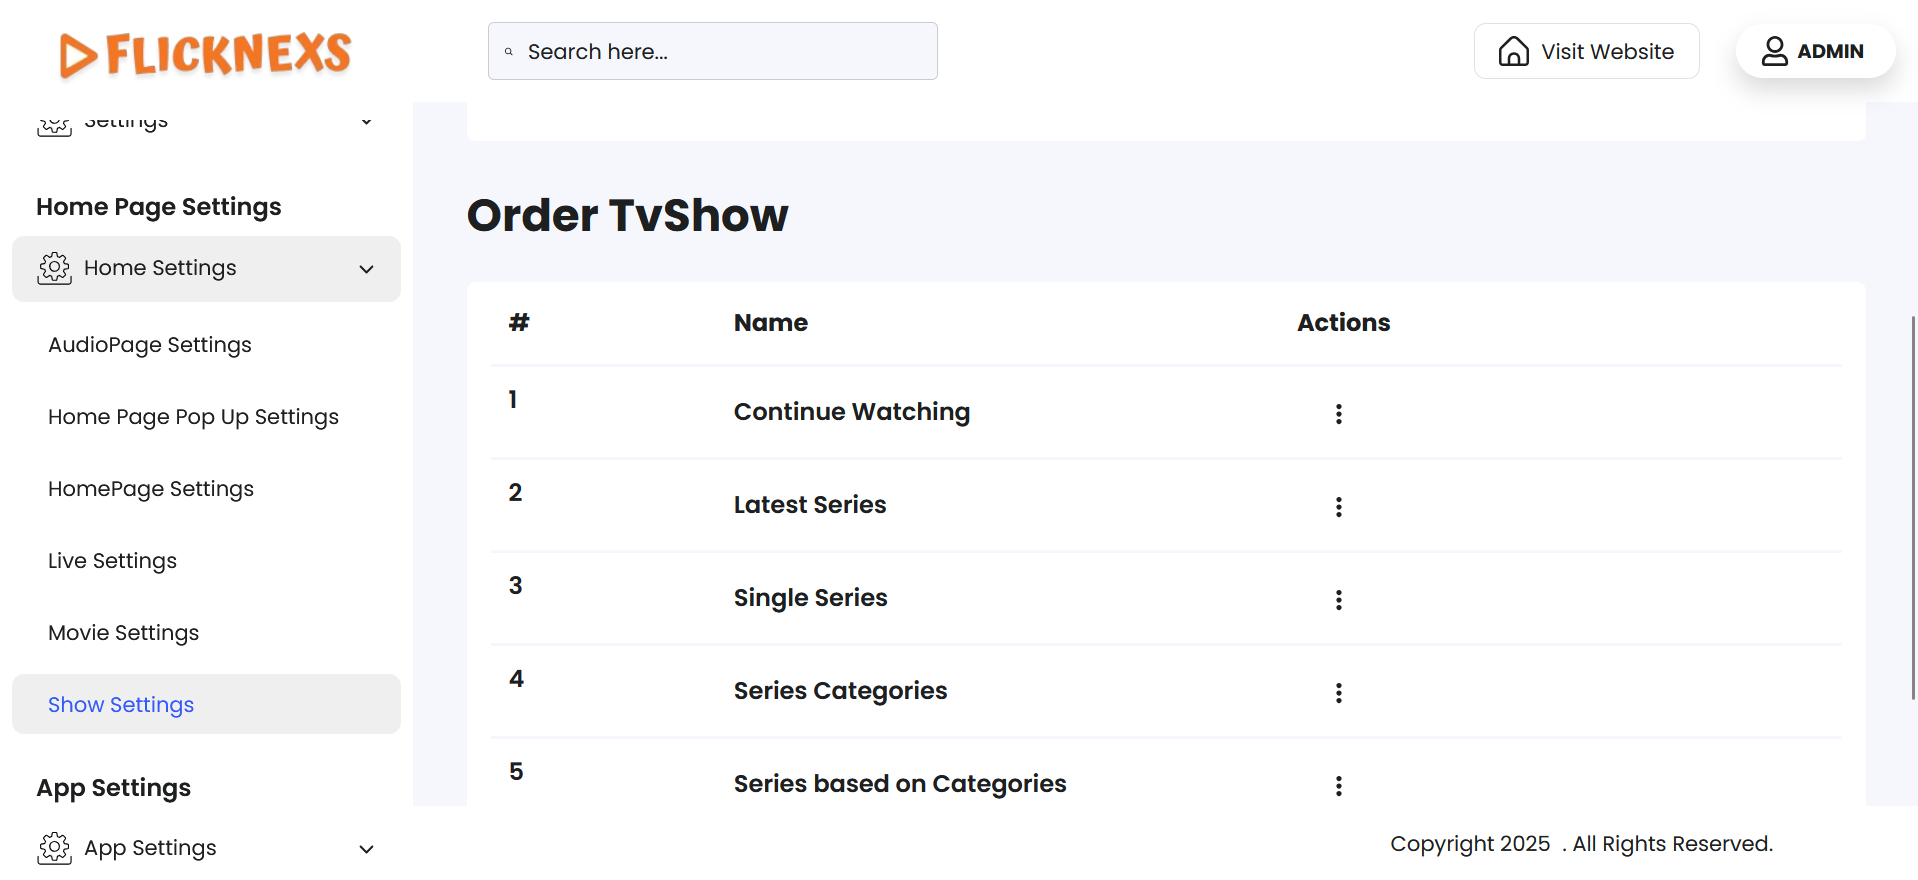
- In this section, you will see a list of all the menus associated with the entire section of your platform, such as Latest Series, Single Series, and others, displayed in a predefined order.
- If you wish to rearrange these menus to better suit your platform’s layout or user experience, you can easily drag and drop each menu item to change its position. This allows for full customization of the display order based on your preferences.
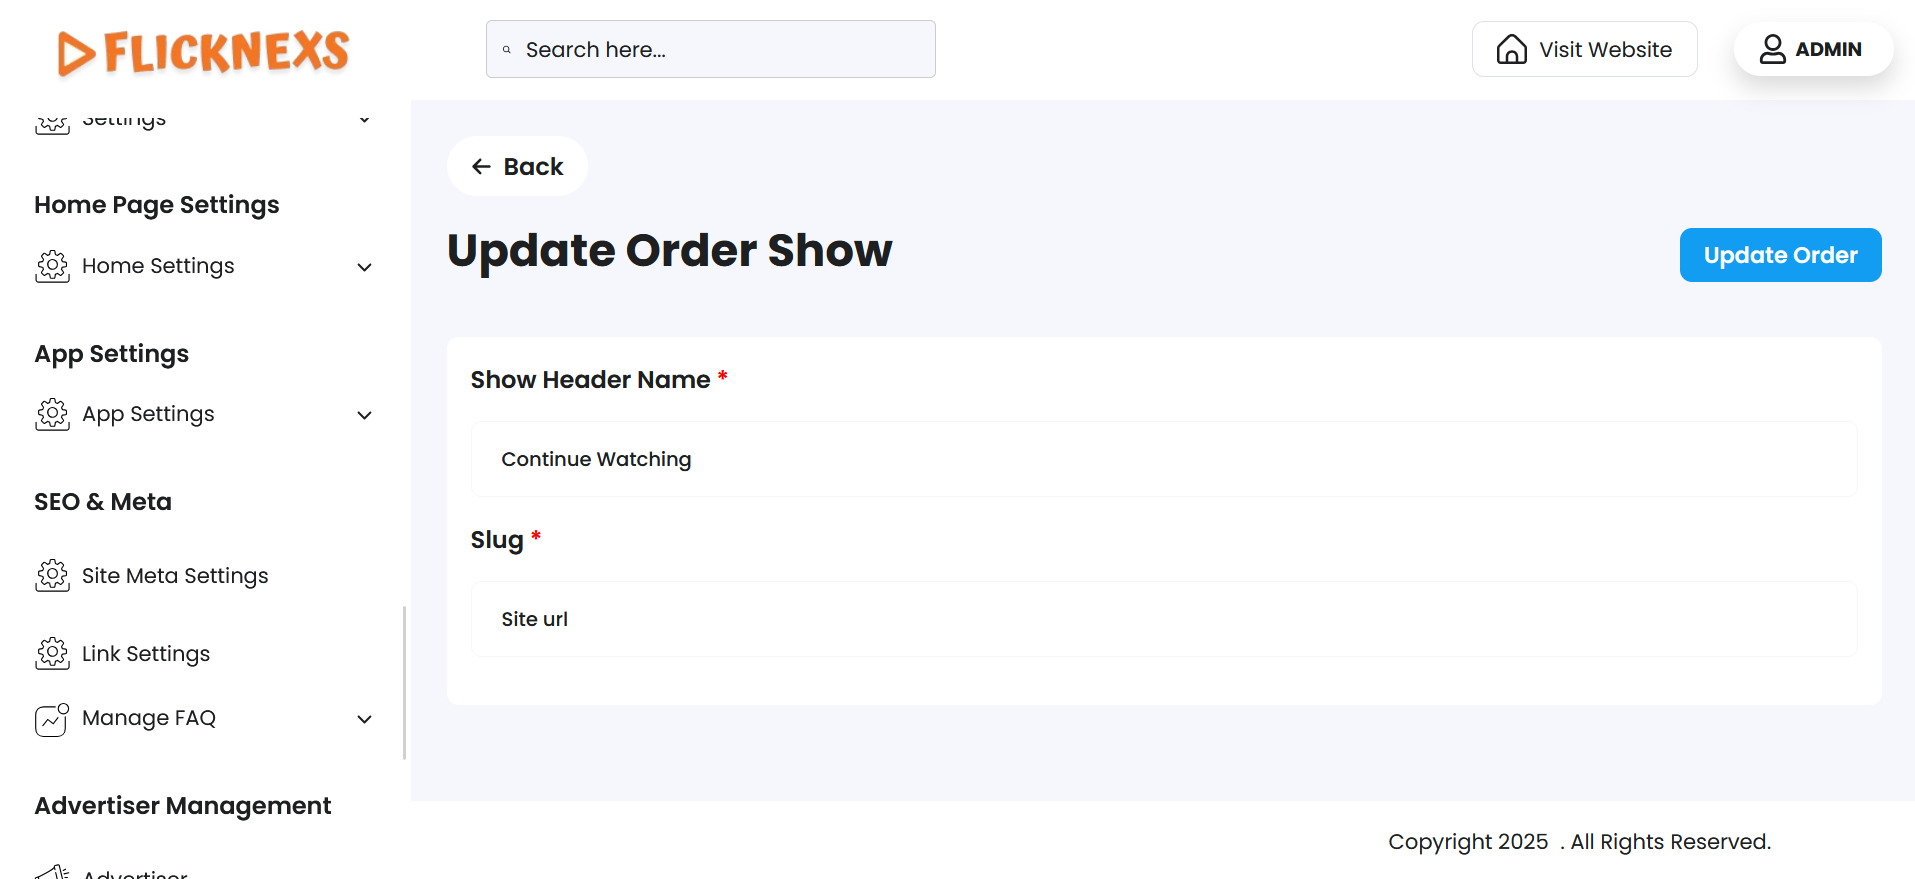
- Additionally, under the Action column, you have the ability to edit any menu. When editing a menu, you can update the Show Header Name — the label that appears to users — as well as modify the Slug, which defines the URL-friendly identifier for that menu.
- This provides flexibility to maintain consistent branding, improve SEO, or adjust navigation naming based on content strategy.