The Import/Export Users feature enables administrators to efficiently manage user data by allowing the bulk uploading and downloading of user information through the admin dashboard. This functionality streamlines the process of onboarding, updating, and maintaining user records within the platform.
Export Users
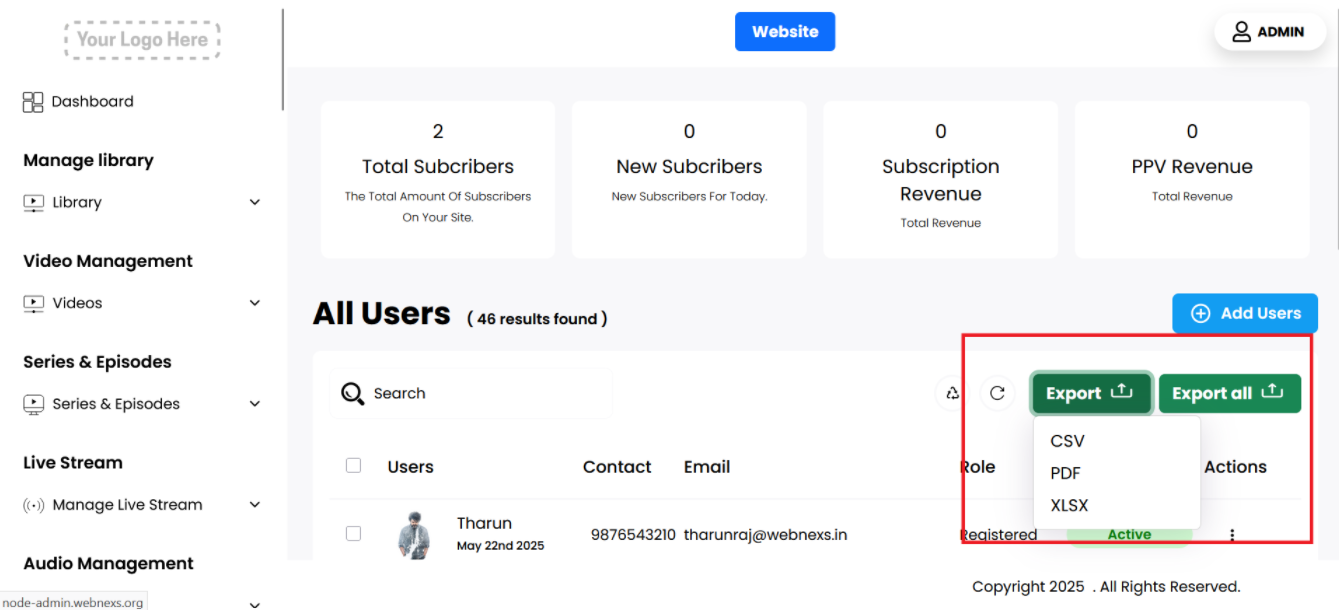
This feature provides a convenient way to extract and manage user data for various operational, analytical, or reporting purposes. When using the export function, the system allows you to choose from multiple file formats such as:
- CSV (Comma-Separated Values)
- PDF (Portable Document Format)
- XLSX (Microsoft Excel Spreadsheet)
What Data is Included
The exported file includes the following user-related details:
- Index
- ID
- User Name
- Email Address
- Role
- Mobile
Benefits of Exporting User Data
- Data Analysis: You can import the file into analytics tools or Excel to filter, sort, and analyze user trends and behaviors.
- Backup: Maintain offline backups of your user database for data security or recovery purposes.
- Reporting: Generate internal reports for stakeholders or compliance audits.
- Migration or Integration: Easily transfer user data to another system or CRM by importing the CSV/XLSX file.
File Format Details
- CSV is a lightweight and universal format supported by nearly all spreadsheet and data-processing tools.
- XLSX provides structured formatting and better compatibility with Microsoft Excel features.
- PDF is ideal for sharing user data in a non-editable, presentation-ready format.
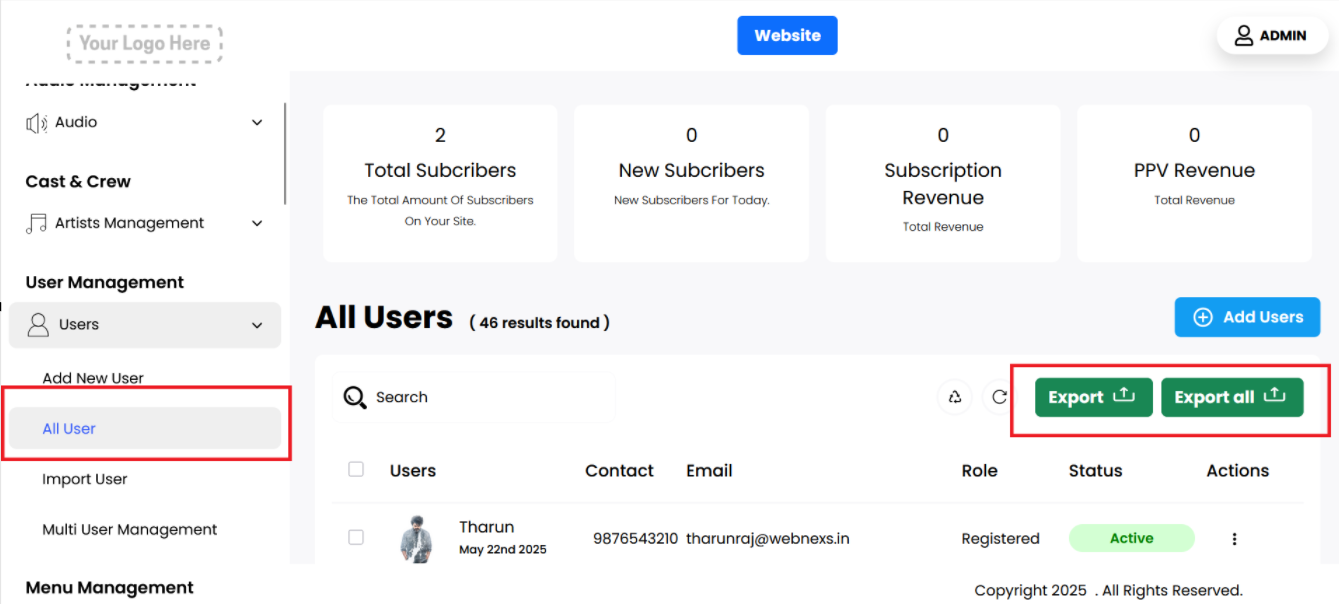
Import Users
To efficiently onboard multiple users at once, the platform provides a bulk import feature through the admin panel.
Follow these step-by-step instructions to ensure a smooth and accurate import process:
1. Access the User Import Interface
- Click on “Users”, and then select the “Import Users” option from the available actions.
- Log in to your Admin Panel.
- Navigate to the “User Management” section from the sidebar.
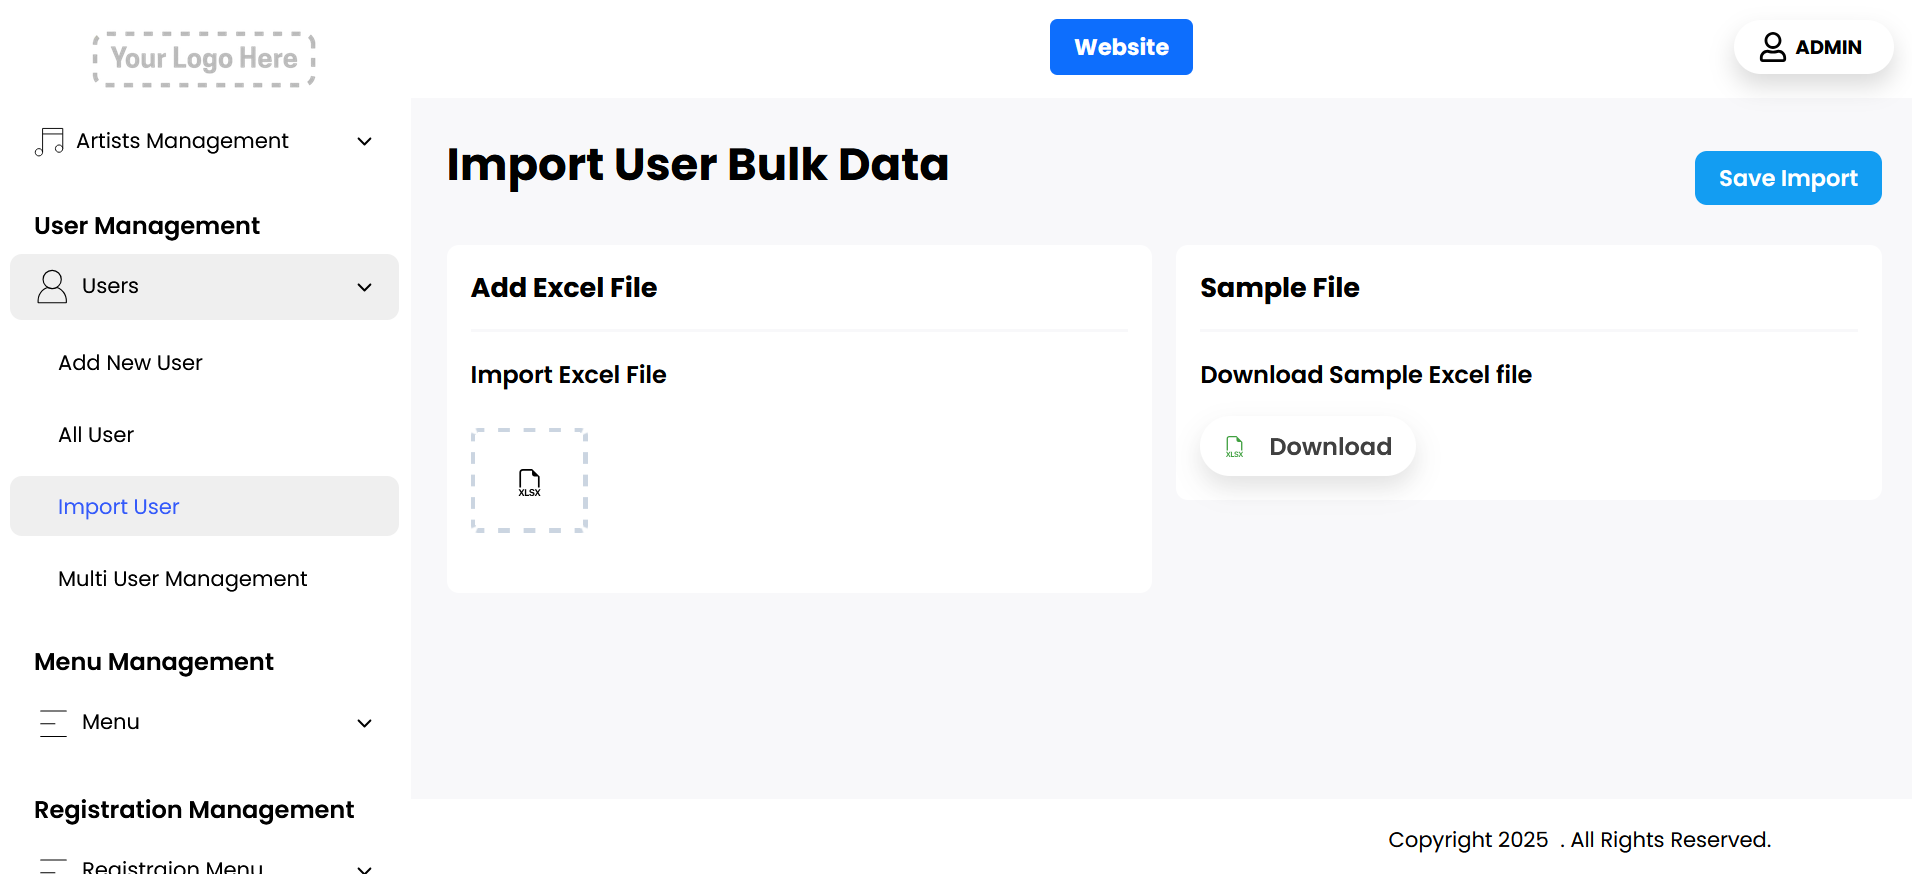
2. Download the Sample Excel Template
- Before preparing your own user data file, download the Sample Import Excel File provided in the interface.
- This template is formatted with the required columns and headers necessary for a successful import.
- Important: Do not modify the column headings in this template, as the system relies on them to map data accurately.
3. Populate the Excel File with User Data
- Fill in each row with user-specific information under the following headers:
- Active Status: Mark the user’s account status. Use
activeto indicate an active user or0to indicate that the user is inactive. - Role: Define the user’s role on the platform. Example values include
Subscriber,Admin,Moderator, etc. - Email: Enter the user’s valid email address. This will serve as their primary identifier for login and communication.
- Subscription End Days: Specify how many days remain before the user’s subscription expires. This number is used to calculate access duration.
- Package: Indicate the user’s subscription package, such as
Basic,Pro,Premium, orBusiness. Ensure the package names align with those configured on the platform. - Package End Date: Optionally, provide the exact end date of the user’s subscription package. Use the format
YYYY-MM-DD.
Note: Ensure that all data is correctly formatted and validated before importing to avoid errors during the process.
4. Upload and Import the Excel File
- The system will process the data and notify you of any errors or successful imports.
- Return to the “Import Users” section in the admin panel.
- Click on the Upload button and select your completed Excel file.
- Once uploaded, click “Import” to initiate the process.
Final Tips
- Double-check your Excel file for spelling errors, date formatting, and valid email addresses.
- If the import process fails, review the error log provided by the system to correct specific issues.
- You can always perform a test import with just a few users to ensure everything works before doing a full upload.
By following these detailed steps, you can quickly and accurately import user data into your platform, streamlining user onboarding and reducing manual data entry.