The Landing Page is the front-facing entry point of your platform, designed to engage visitors, showcase your content, and drive user actions such as sign-ups, subscriptions, or content discovery. This page sets the tone for your brand and plays a crucial role in user conversion and retention.
To Access the Pages Section:
- Log in to the Admin Panel: Begin by logging into your platform’s admin panel with your credentials. This panel is your central hub for managing and customizing the platform.
- Locate the Menu: Once you’re logged in, you’ll see a vertical menu on the left side of the screen. This menu provides access to various sections, allowing you to manage and update different aspects of your platform, including content, settings, and user management.
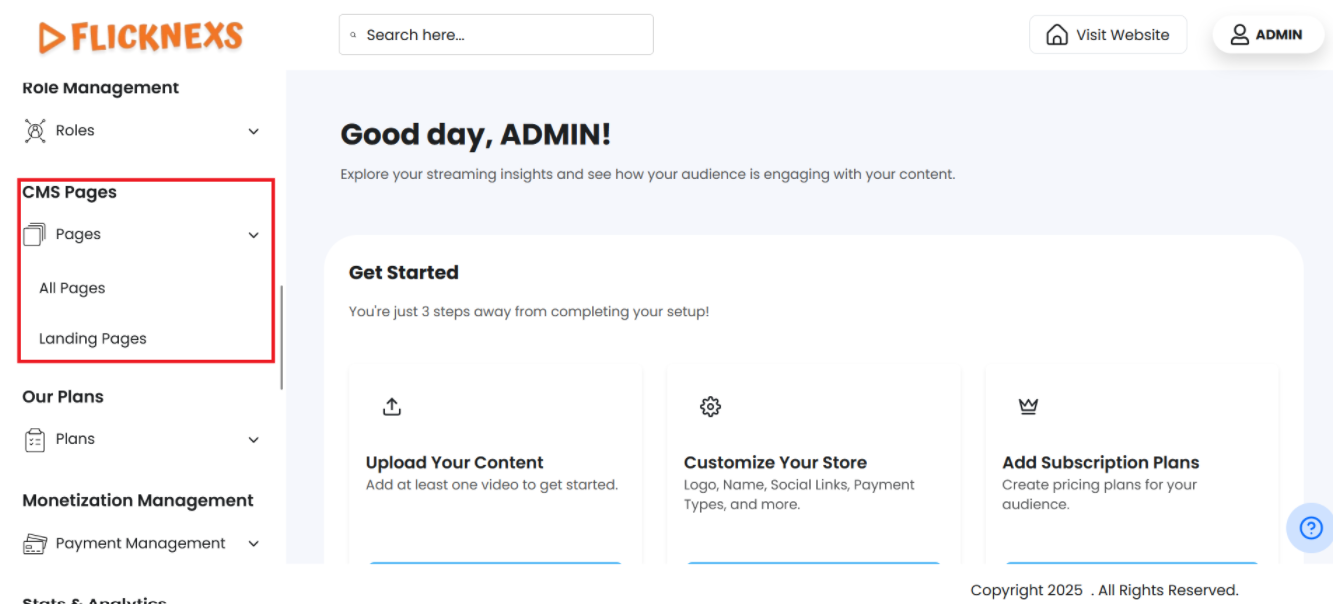
- Navigate to the CMS Pages Section: Scroll down through the menu options until you locate the “CMS Pages” section. This is where you’ll be able to view, create, and edit the content pages on your platform.
- Access Page Options: Click on “CMS Pages” to enter the section. Here, you’ll find options to manage your pages, including adding new pages, updating existing content, or organizing the structure of the pages to enhance user navigation.
These steps will help you manage your platform’s pages effectively, ensuring a seamless user experience as needed.
Landing page
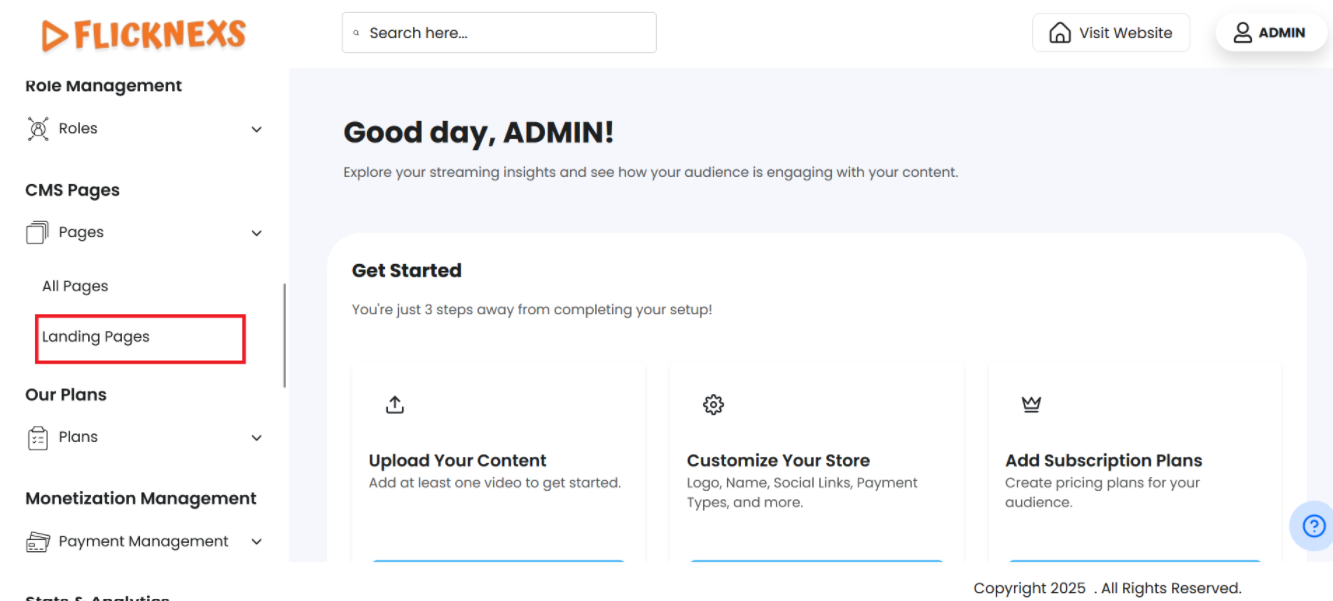
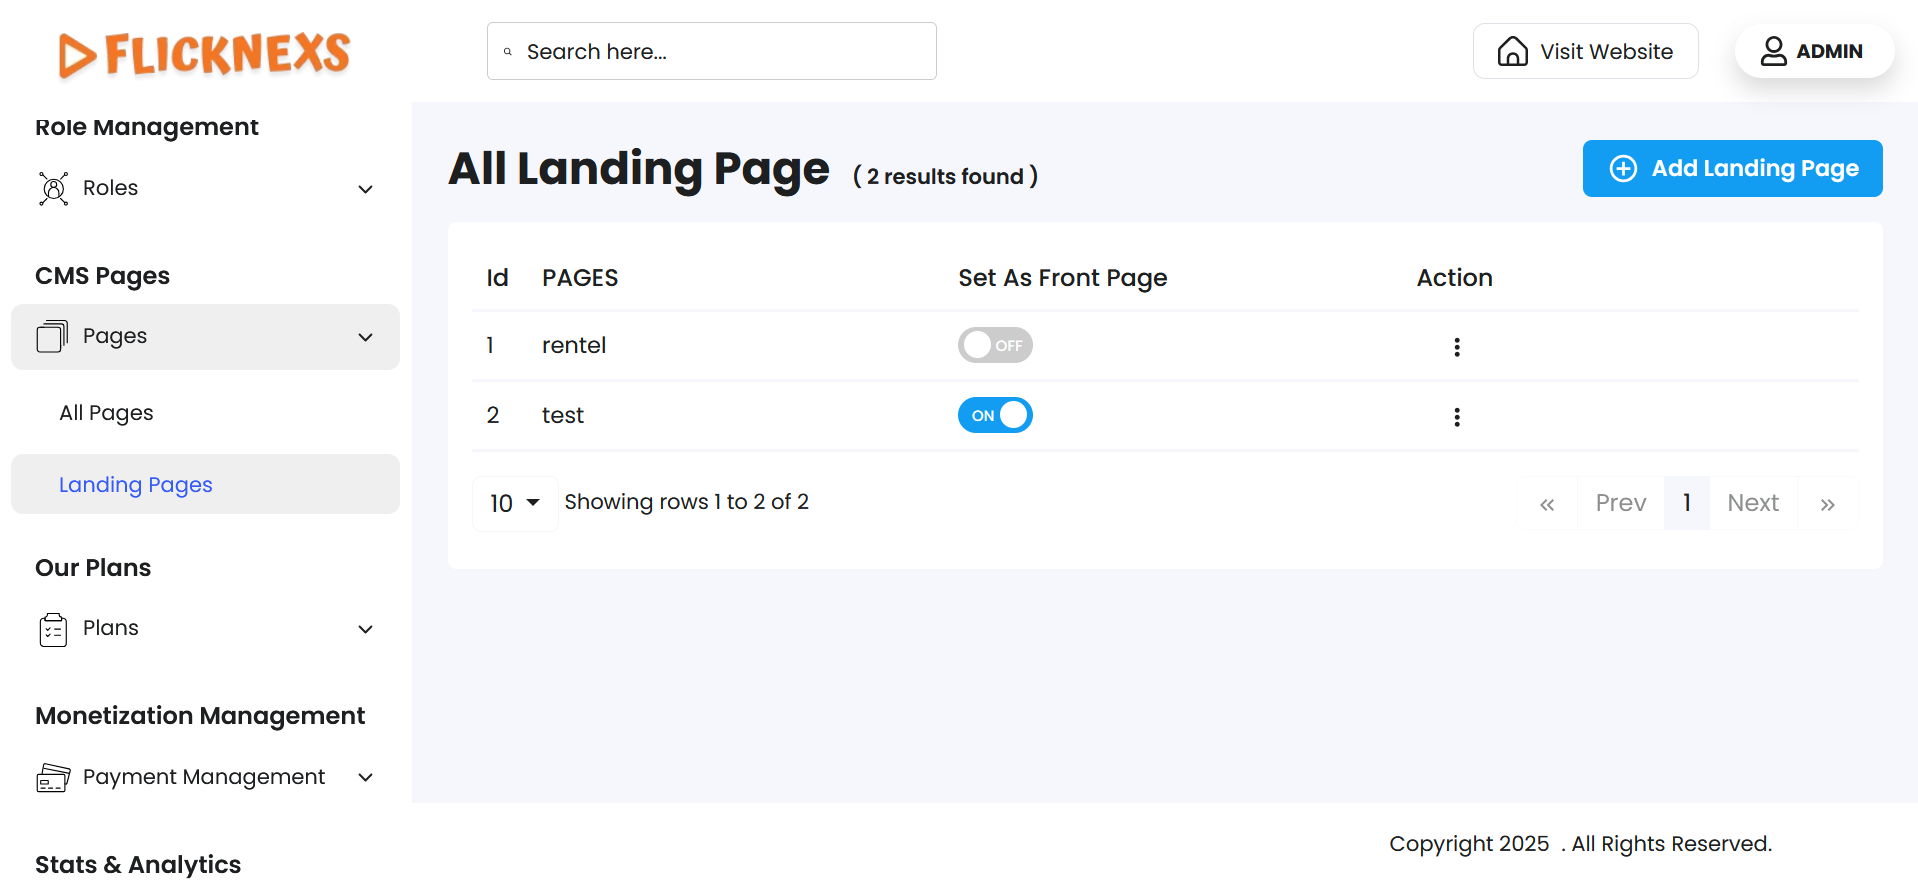
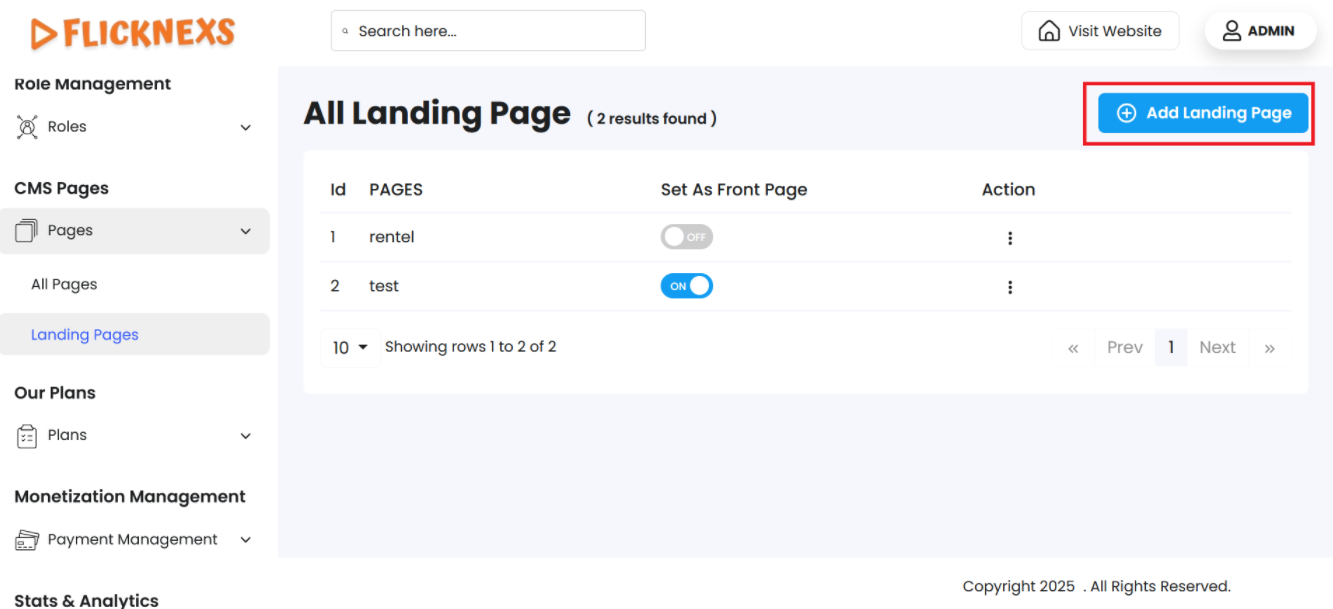
In the Landing Pages section, you can view and manage all landing pages on your platform. Each entry provides key details and management options:
Landing Page List Overview
- Pages: Displays the name of each landing page.
- Set As Front Page: This toggle option allows you to set any landing page as the platform’s main front page. Enabling it will display this landing page as the homepage; disabling it will remove it from the front page position.
Action Options
- View:
- By selecting “Vview,” you can view the landing page as it would appear to visitors when set as the front page, allowing you to confirm its design and layout.
- Edit:
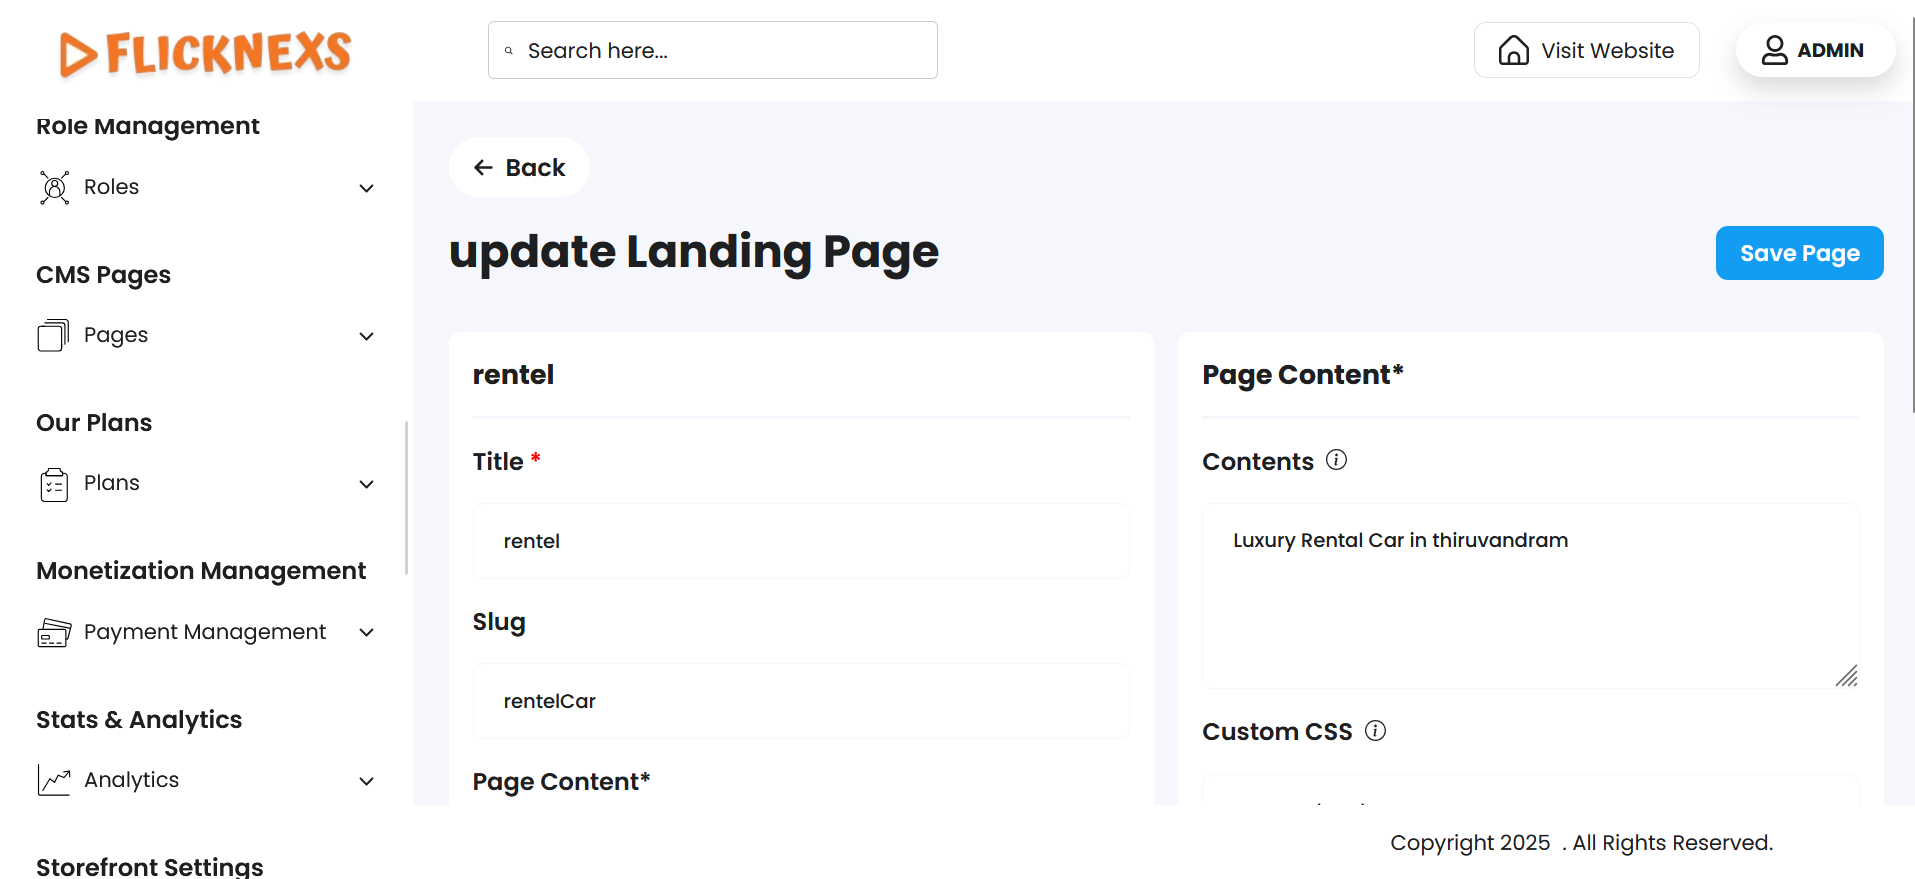
- Title: You can modify the landing page title to reflect the content and purpose of the page.
- Slug: Change the slug, which is the URL-friendly version of the page title, to align with SEO or branding requirements.
- Custom CSS: Add custom CSS here to style the page as needed.
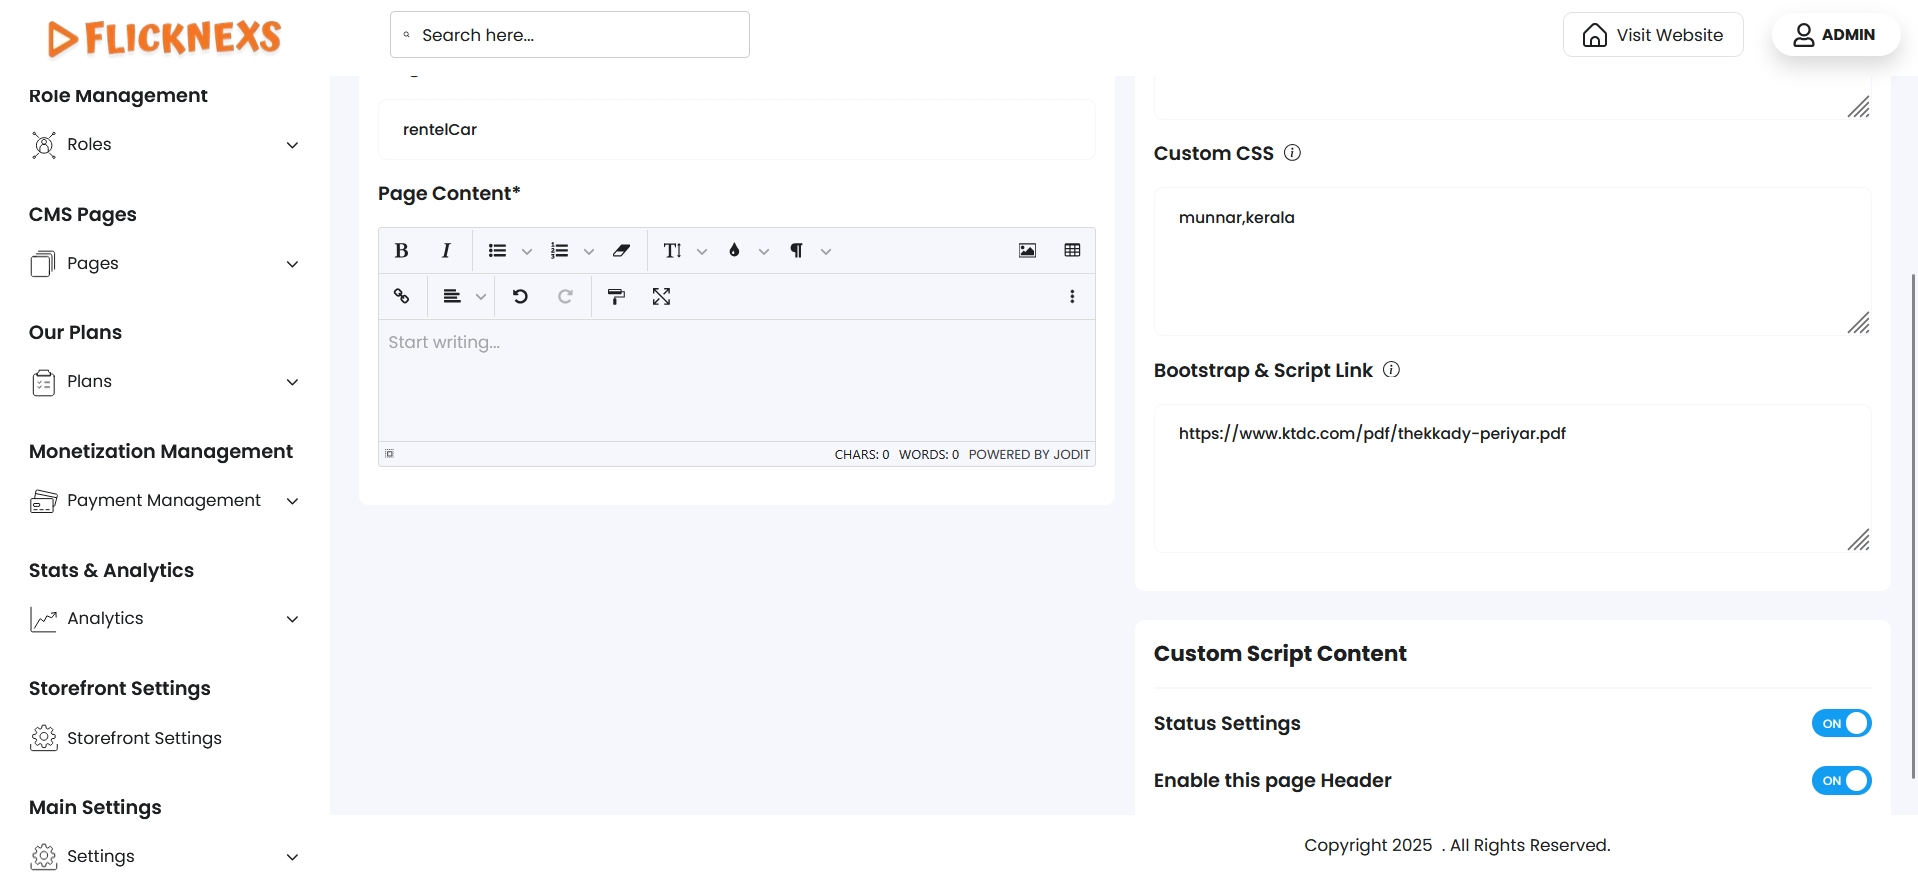
- Bootstrap & Script Links: If additional scripts or Bootstrap styles are required, add the links here for enhanced design and functionality.
- Enable this page Header: Toggle this option to display or hide the header on the landing page.
- Status settings: Toggle this option to display or hide on the landing page.
These settings allow full customization of each landing page, letting you adjust visibility, layout, and functionality to meet your branding and user experience goals.
Create Landing Page
In the Landing Pages section, you have the option to create a new landing page tailored to your platform’s needs. This feature allows you to design and customize a unique page that aligns with your branding, offers specific content, or serves as a specialized entry point for your visitors. Here’s how you can create and configure a new landing page:
Steps to Create a New Landing Page

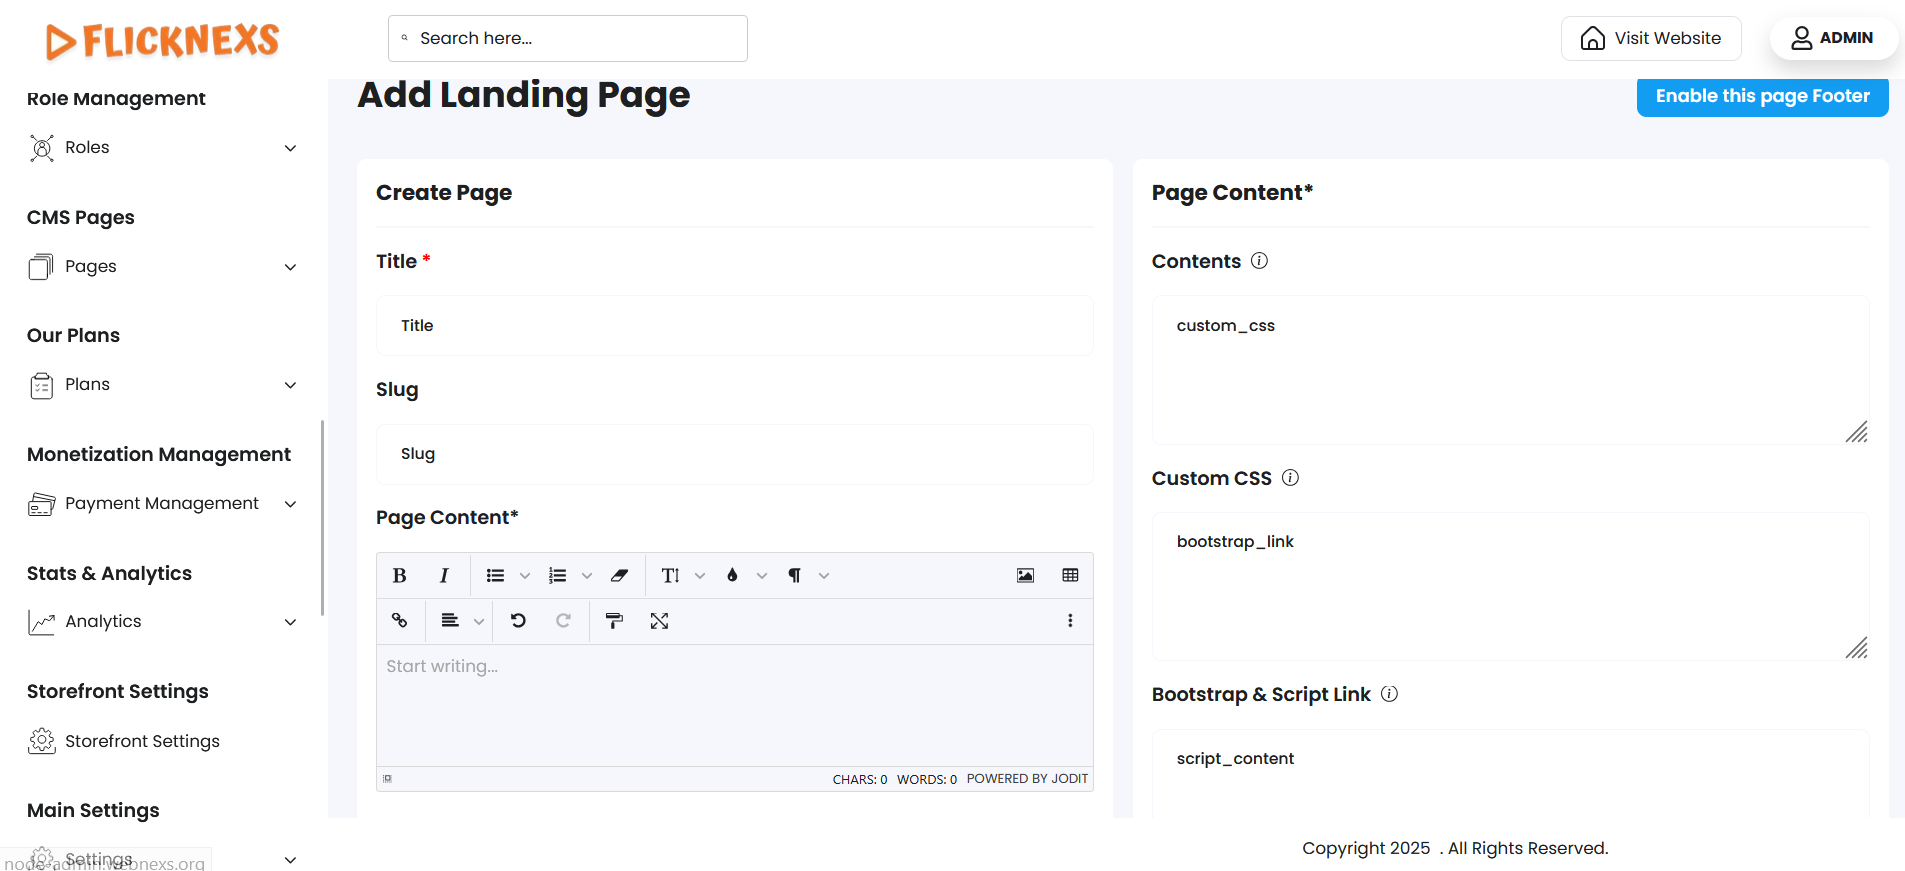
- Title: You can modify the landing page title to reflect the content and purpose of the page.
- Slug: Change the slug, which is the URL-friendly version of the page title, to align with SEO or branding requirements.
- Custom CSS: Add custom CSS here to style the page as needed.
- Bootstrap & Script Links: If additional scripts or Bootstrap styles are required, add the links here for enhanced design and functionality.
- Enable this Header: Toggle this option to display or hide the header and footer on the landing page.
- Status settings: Toggle this option to display or hide on the landing page.
These settings allow full customization of each landing page, letting you adjust visibility, layout, and functionality to meet your branding and user experience goals.
After creating a Landing page
After creating a new landing page, you can make it visible to users by enabling it in the Storefront Settings. Here’s how to set your newly created landing page as the main entry point for your platform:
Steps to Enable a New Landing Page
- Access Settings:
- Go to your platform’s Admin Panel and log in using your credentials.
- From the main dashboard, locate and select Settings to access various platform configuration options.
- Navigate to Storefront Settings:
- Within the Settings menu, select Storefront Settings. This section contains options to customize the main display and user interface settings for your platform.
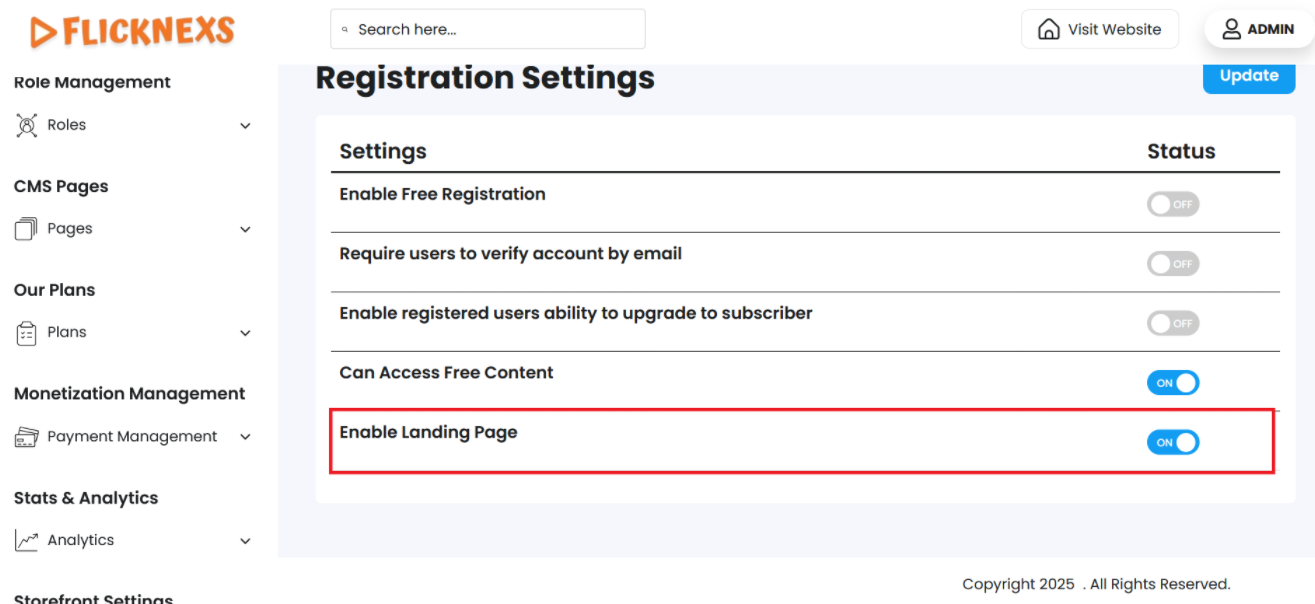
- Open Registration Settings:
- Inside Storefront Settings, find and click on Registration Settings. Here, you will find controls related to how users access and interact with the site upon landing.
- Enable Landing Page:
- Locate the Enable Landing Page toggle.
- Turn on this option to set your newly created landing page as the main page users see when they visit the platform.
- If you enable this option, your landing page will act as the primary entry point, showcasing the customized content and design you created.
- If you choose to disable this option, the platform will retain the default entry page, and users won’t see the custom landing page upon entry.
- Save Changes:
- After enabling or disabling the landing page option, make sure to save the changes by clicking the Save or Apply button at the bottom of the settings page.
Enabling the custom landing page through Registration Settings allows you to fully control the user’s first experience with your platform, helping to direct traffic, promote new features, or provide targeted content to visitors as they arrive. This flexibility ensures that you can tailor the initial impression to best fit your branding or strategic goals.