Language and translation features are critical for OTT platforms to cater to a global and multilingual audience. These settings allow you to organize content by language, offer subtitles, and create an inclusive viewing experience for users with diverse linguistic preferences.
- First, log in to the admin panel by entering your username and password on the login page. Once logged in, you will be directed to the main dashboard of the admin panel. On the left side of the screen, you’ll notice a vertical menu that contains various options for managing different aspects of the platform.
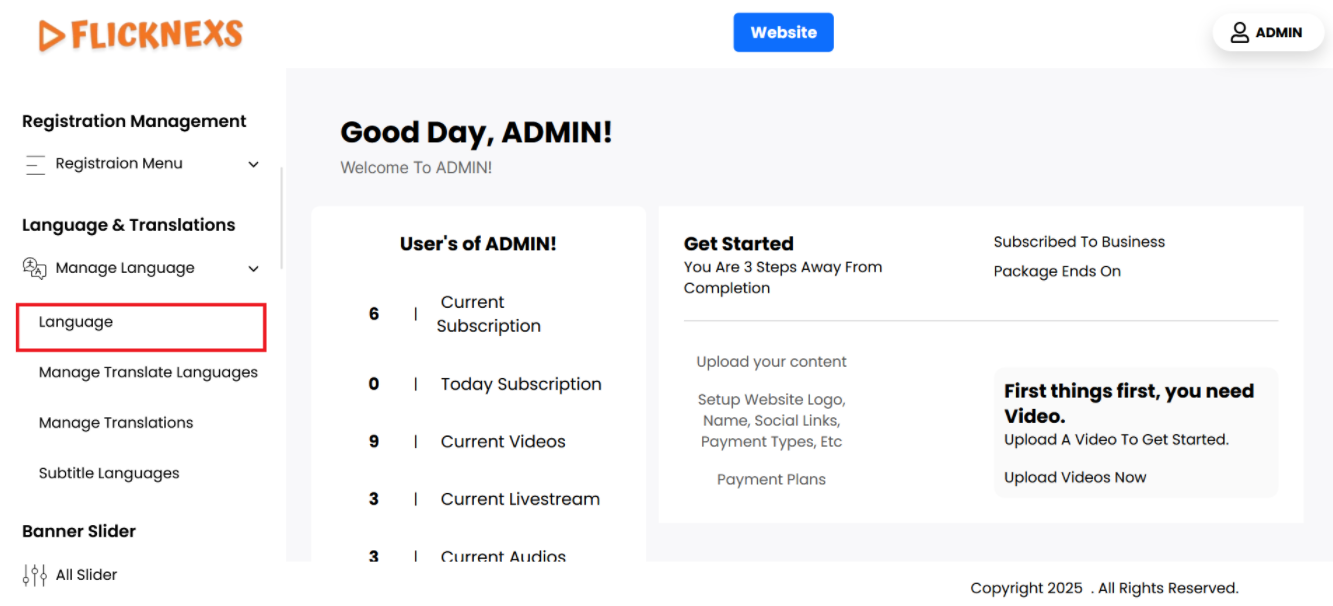
- Scroll through this left-side menu until you find the section labeled ‘Language’. Once located, click on ‘Language’ to open a submenu or a new page where you can manage the language settings.
- Here, you will be able to select different languages, add new language options, or configure the translations for your platform. This section allows you to customize language-related features to ensure the platform is available in multiple languages or tailored to your audience’s preferences.
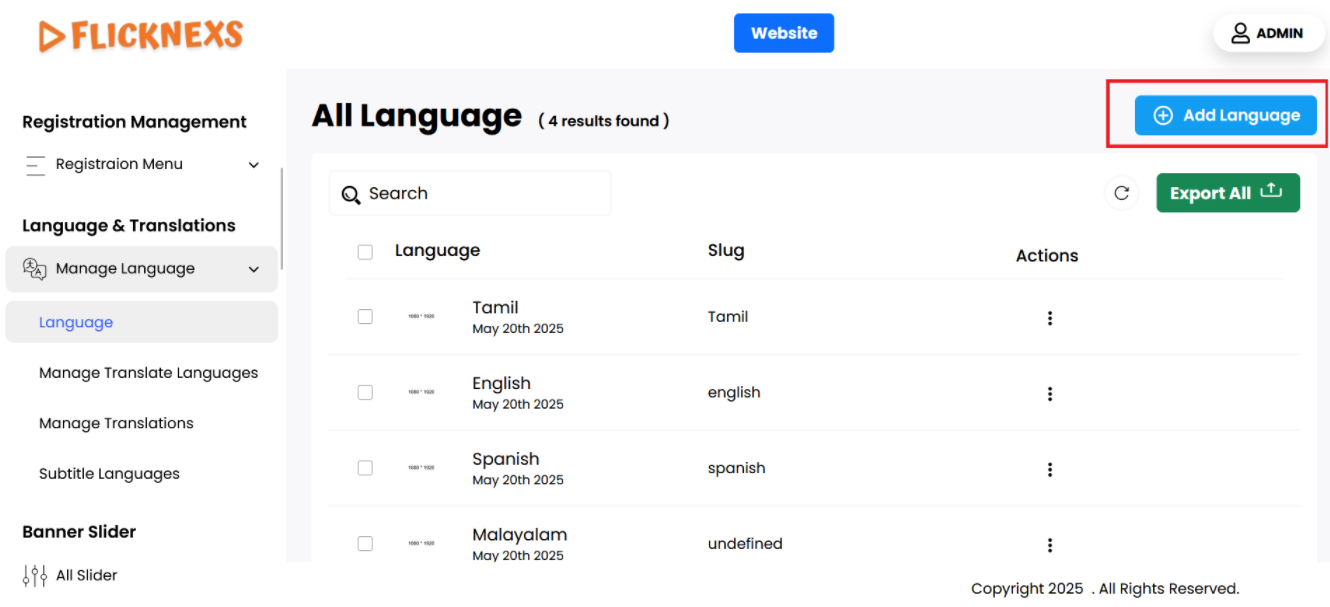
Manage Languages
Language
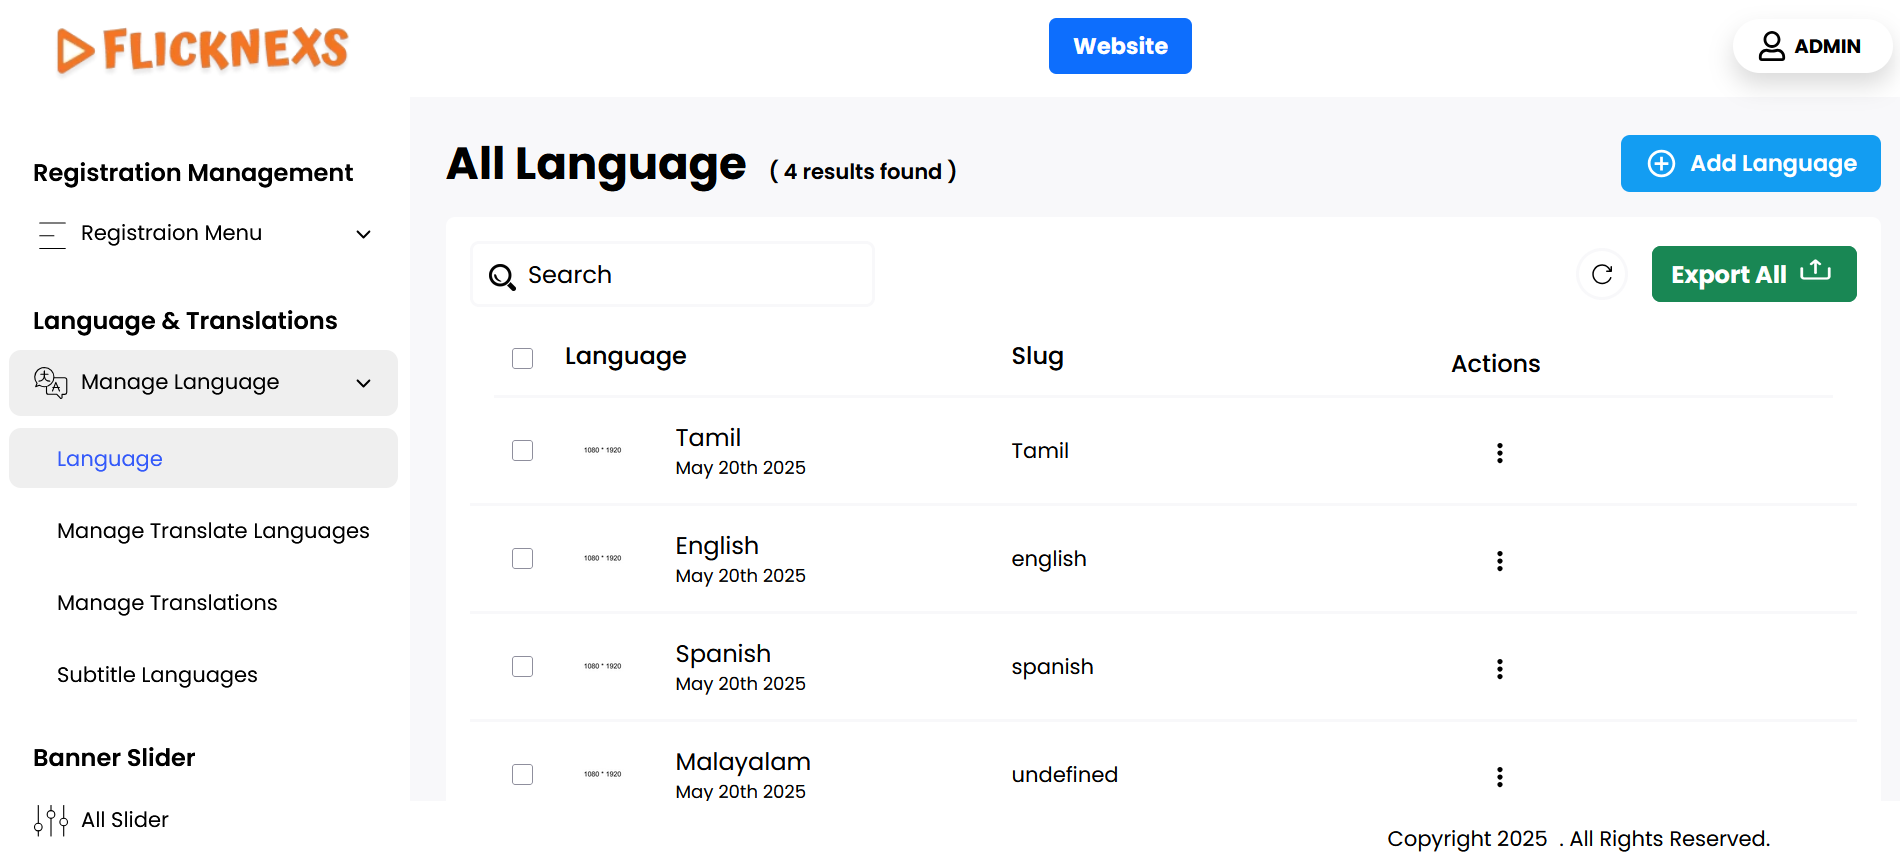
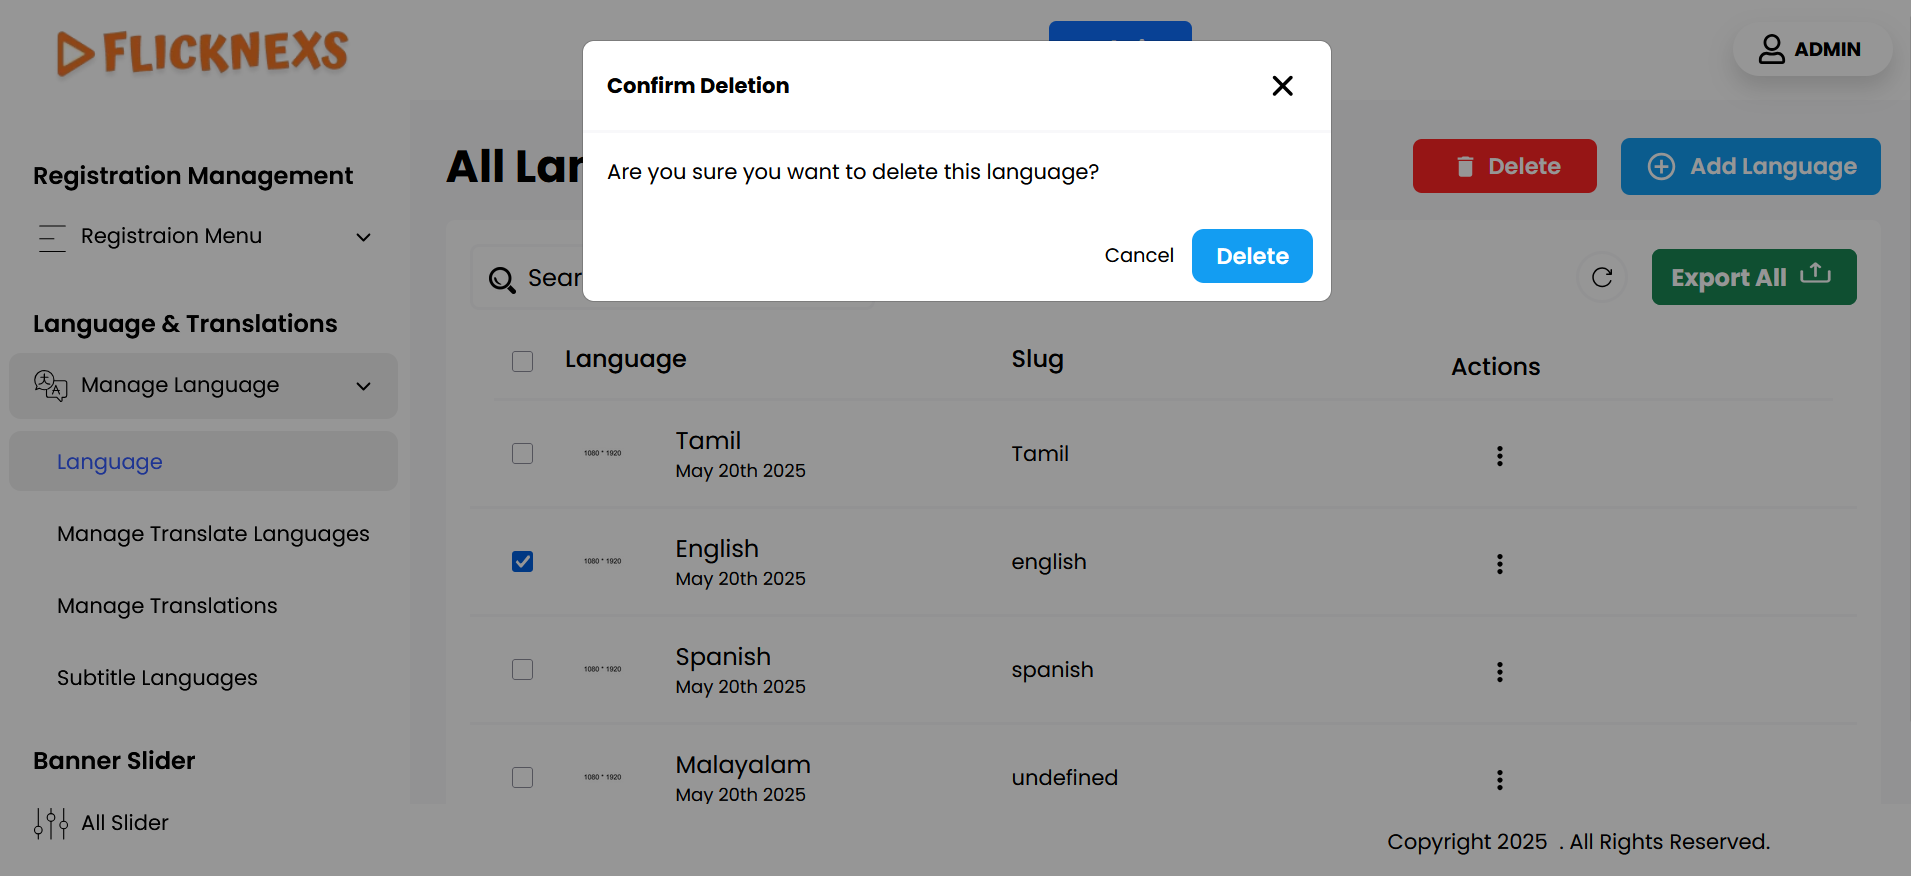
In the ‘Language’ section, you will see a comprehensive list of all the video languages that have been added to the platform. Each entry in this list is displayed alongside a thumbnail image representing the language, making it easy to visually identify each option. Additionally, you will find the name of each language clearly labeled next to its corresponding thumbnail.
For each language, there are two action options available: Edit and Delete.
- Edit Option:
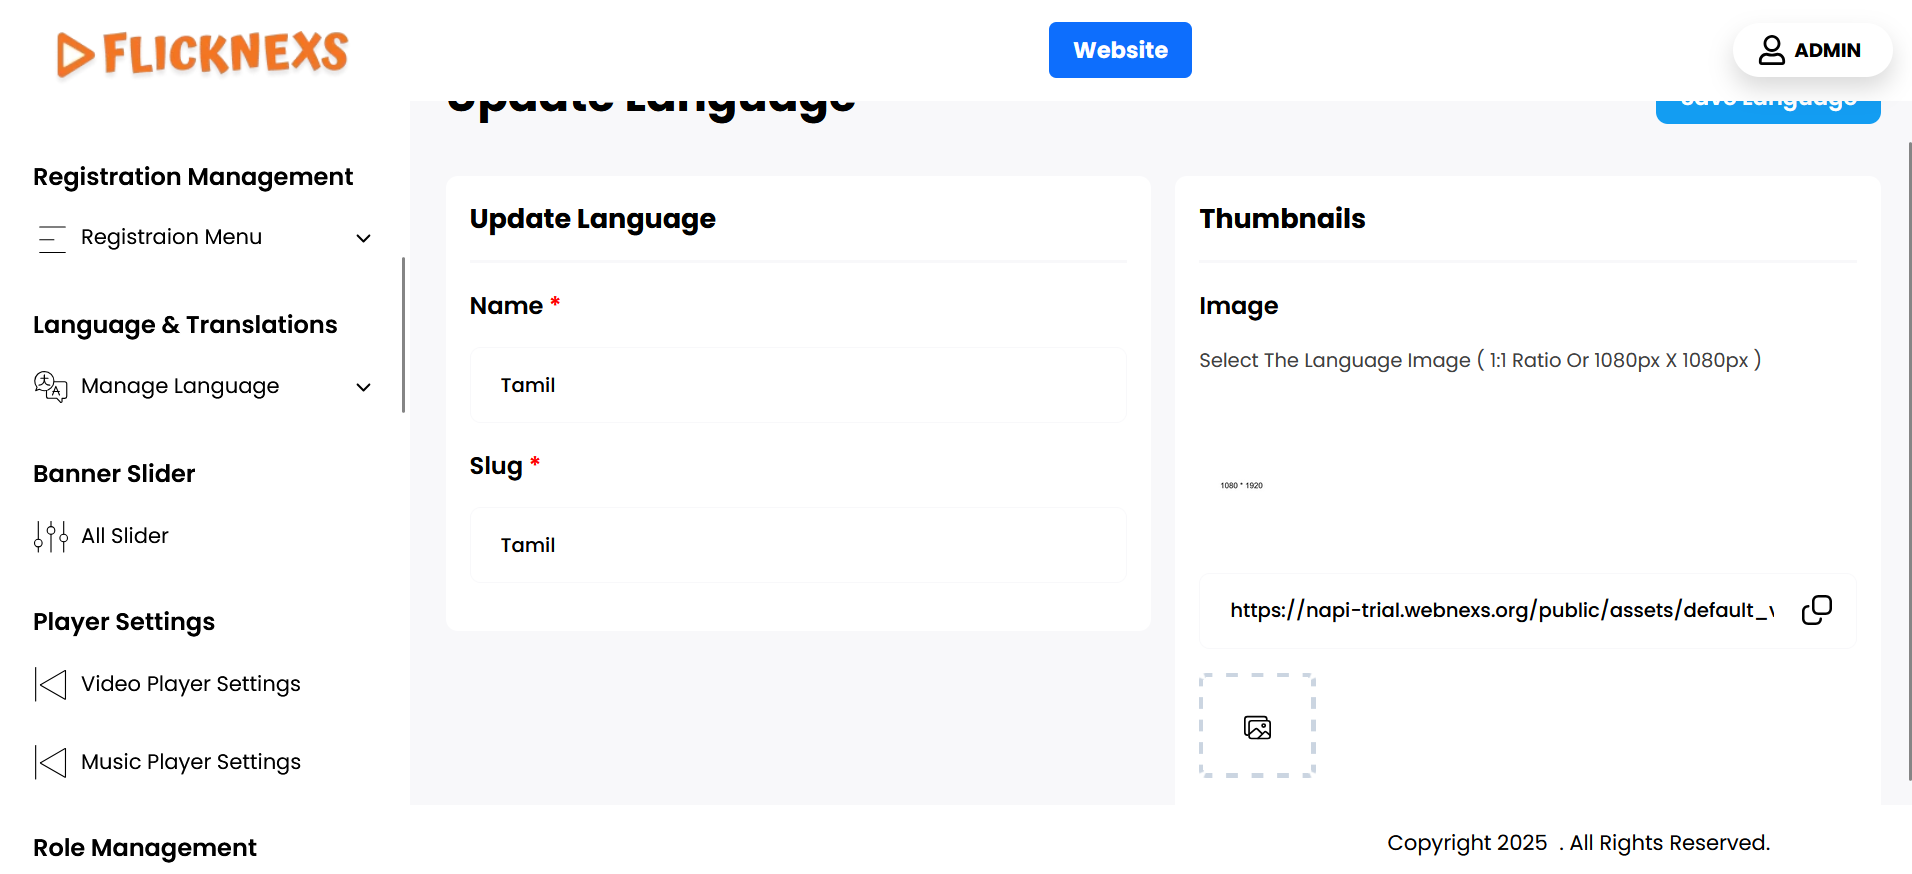
- By clicking the ‘Edit’ button, you can make changes to the existing language entry. This allows you to update the thumbnail image associated with the language, as well as modify the name of the language if necessary. Once you make the desired changes, be sure to save them to ensure they are applied.
- Delete Option:
- If you choose to delete a language, you will first encounter a confirmation message prompting you to confirm the deletion. This safeguard ensures that you do not accidentally remove a language without considering the implications. The confirmation message typically includes options to confirm the deletion or to cancel the action, allowing you to reconsider your choice before proceeding.
Overall, this section provides a user-friendly interface for managing the languages available on your platform, ensuring that you have control over how languages are presented and organized for your users.
Add New
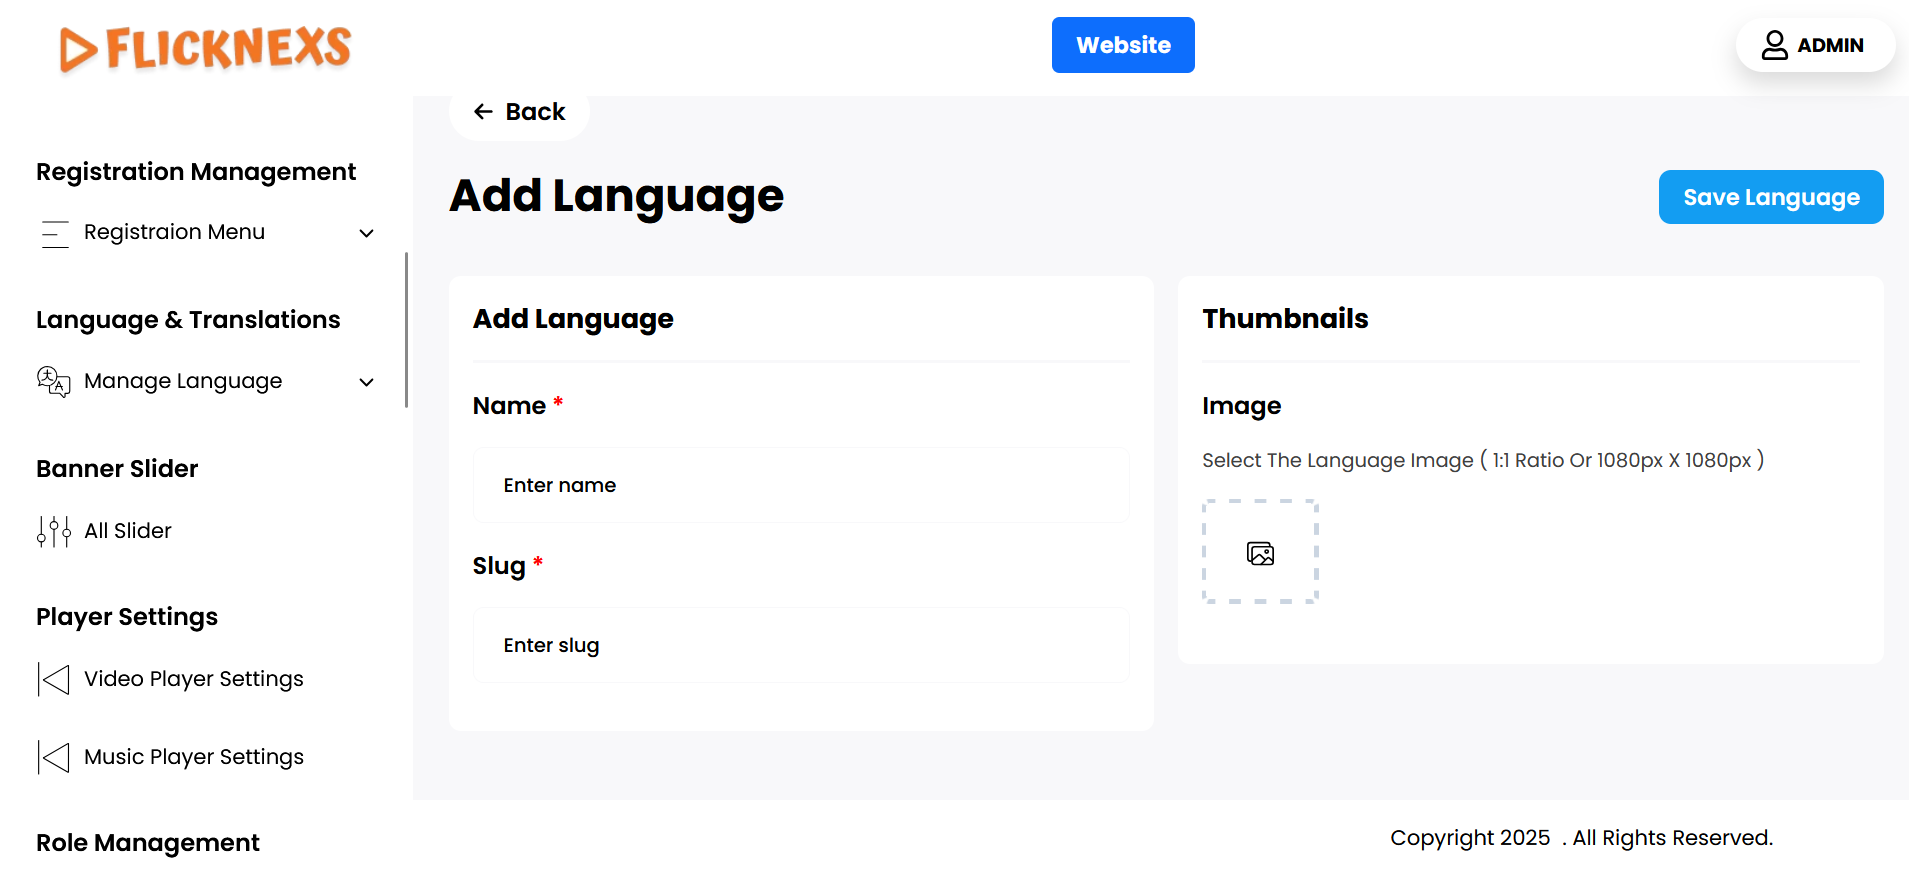
You can easily add a new video language to your platform by following these steps:
- Enter the Name of the Video Language:
- Begin by providing the name of the new language you want to add. This will be the label that appears on your platform for users to identify the language. Make sure the name is accurate and clear, especially if you are adding multiple languages.
- Select the Thumbnail Image for the Language:
- Next, you will need to upload a thumbnail image that visually represents the language. This image will be displayed alongside the language name in various parts of your platform, such as in the language selection dropdown or settings.
- The image must adhere to the following specifications:
- Aspect Ratio: 1:1 (Square format)
- Size: 1080 x 1080 pixels
- Make sure the image is of high quality and appropriate for representing the language. You can use national flags or other culturally significant symbols that help users quickly identify the language.
After you fill in the required details and upload the image, save the new language to make it available on your platform. This process ensures that your platform can support multiple languages with a clear visual representation for your users.
Manage Translate Languages
You can view a list of all available translation languages, each displayed with the name of the language. Alongside each language entry, there are action options for managing the languages. These actions include two options:
- Edit: When you click the Edit option, you can modify the details of the language. Specifically, you’ll be able to change the name of the language to update how it is displayed across the platform. This allows you to correct or update the language name as needed.
- Delete: This option lets you remove a language from the list entirely. Before proceeding with deletion, a confirmation message is displayed to prevent accidental removal of languages.
This list helps in efficiently managing the various languages available for translations on your platform, ensuring that you can keep the names up to date or remove languages no longer required.
Add New

You can add new translation languages to your website by filling in the following fields:
- Name of the Translation Language: This is where you specify the name of the language you are adding. For example, if you are adding French, you would enter “French” here.
- Short Code: Provide the short code for the language, such as “fr” for French or “es” for Spanish. This code is often used in URLs or configuration settings to identify the language.
- Language Status: This option allows you to decide whether the newly added language is immediately available on the website. If you want the language to be available for users to select and interact with, you should enable this option. If not, you can leave it disabled, meaning the language will be added but not yet visible or usable on the site.
- Set As Default Language: If you want the newly added language to be the primary or default language for your website (the language users will see by default if no other preferences are set), you can enable this option. If the newly added language is not intended to be the default, leave this option disabled.
After filling out these fields, click Save Changes to add the new language to your website’s available translations. The language will be available based on the settings you chose, either active for use or inactive for future activation, and potentially set as the default language for your website.
Manage Translations
You can view a comprehensive list of all the translation words on your website, organized in a clear format. For each word, you will see the following information:
- Key: This is the main word or phrase that needs to be translated. It acts as the identifier for that specific word or phrase across different languages on your site. For example, a key might be “Welcome” or “Submit”.
- Translation Words: Under this section, you will find the translations for the key in multiple languages. The translations are listed based on the languages you support on your website. For instance, if your website supports English, French, Italian, Polish, Hindi, and Malayalam, you will see the translation of each key in these languages. For example:
- Key: “Welcome”
- English: “Welcome”
- French: “Bienvenue”
- Italian: “Benvenuto”
- Polish: “Witamy”
- Hindi: “स्वागत है”
- Malayalam: “സ്വാഗതം”
- Key: “Welcome”
- Action: Next to each word, there is an action button that allows you to Delete the word from the list. This is useful if a particular word or phrase is no longer used or relevant on your website. Once deleted, the word and its translations will be removed from your site’s translation list.
- Search: To help you easily manage a large number of translation words, a search option is available. You can use this feature to quickly locate a specific word by typing the key into the search bar. This saves time when you need to edit or review translations for a particular term.
This organized system allows for efficient management of all the words and phrases used in translations across your website, ensuring that all necessary languages are supported and that irrelevant words can be removed as needed.
Add new
To add new words to be translated on your website, follow these steps using the Key and Value options:
- Key: The “Key” is where you enter the word or phrase that needs to be translated. This key acts as the reference or identifier for the specific word or phrase across different languages. It should be written in your website’s default language. For example, if you want to translate the word “Login,” you would enter “Login” as the key. Each key must be unique, as it helps link the word with its translations across languages.
- Value: The “Value” is where you add the translations for the key in different languages. For each key, you can input the corresponding translations in various languages. You can add as many language translations as your website supports. For example, if the key is “Login,” the values might be:
- English: “Login”
- French: “Connexion”
- Italian: “Accesso”
- Polish: “Zaloguj się”
- Hindi: “लॉग इन करें”
- Malayalam: “ലോഗിൻ”
- You would enter each translation under the “Value” field corresponding to the correct language.
Example:
- Key: “Login”
- Values:
- English: “Login”
- French: “Connexion”
- Italian: “Accesso”
- Polish: “Zaloguj się”
- Hindi: “लॉग इन करें”
- Malayalam: “ലോഗിൻ”
Steps:
- Enter the word or phrase in the Key field.
- Provide the corresponding translations in the Value fields for each supported language.
- Once you’ve filled in all the required translations, click Save to add the word and its translations to your website’s translation system.
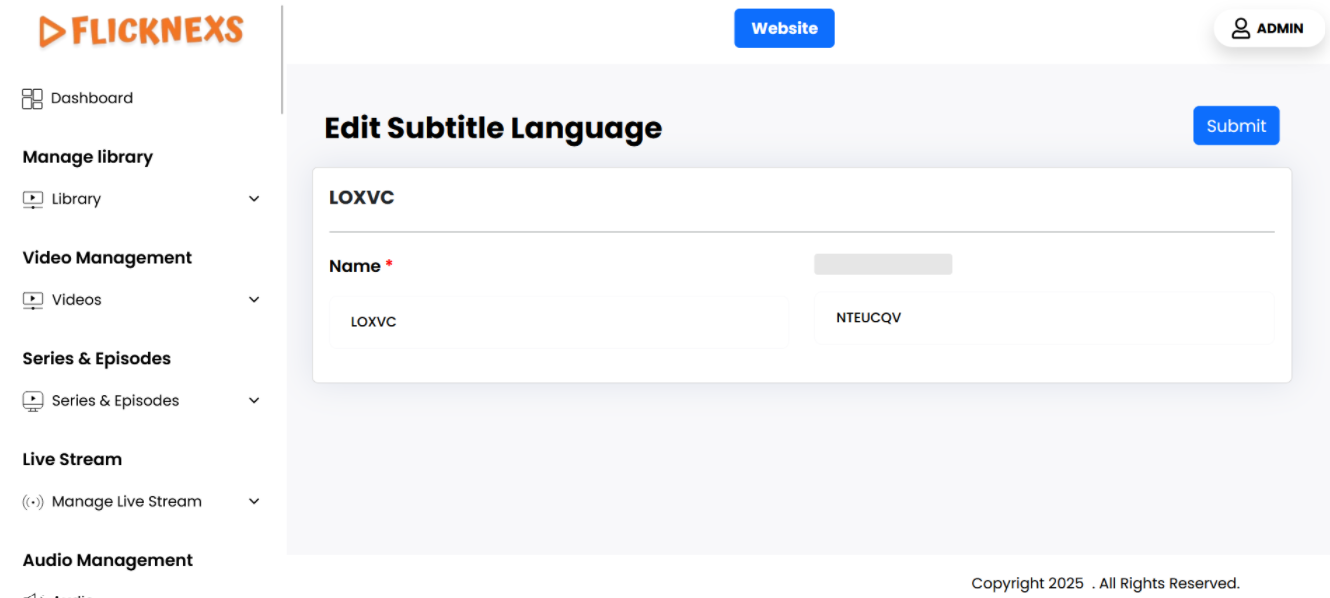
Subtitle Language
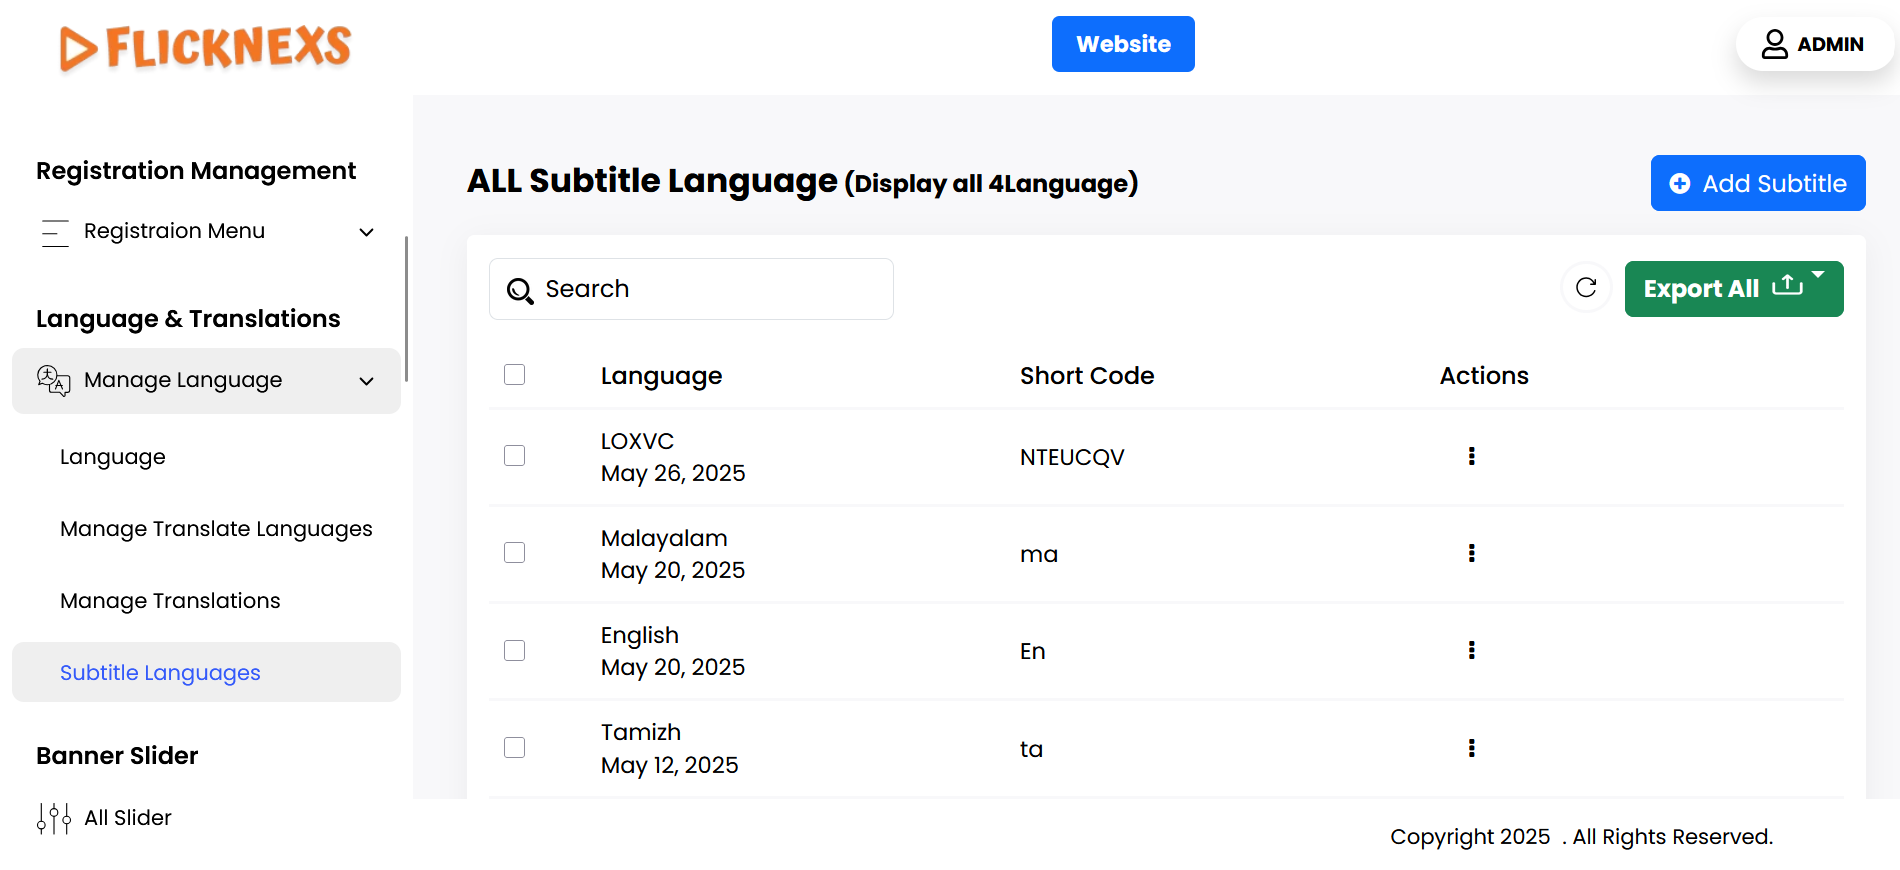
You can view and manage a list of subtitle languages with the following details:
- Language: The name of the subtitle language, like English, French, etc.
- Short Code: A unique identifier or slug for the language, such as “EN” for English or “FR” for French.
Action Options:
- Edit: Allows you to modify the name of the subtitle language and the shortcode (slug). You can update these values as needed.
- Delete: Enables you to remove a subtitle language from the list. Before deletion, a confirmation message will appear to ensure you want to proceed with the deletion.
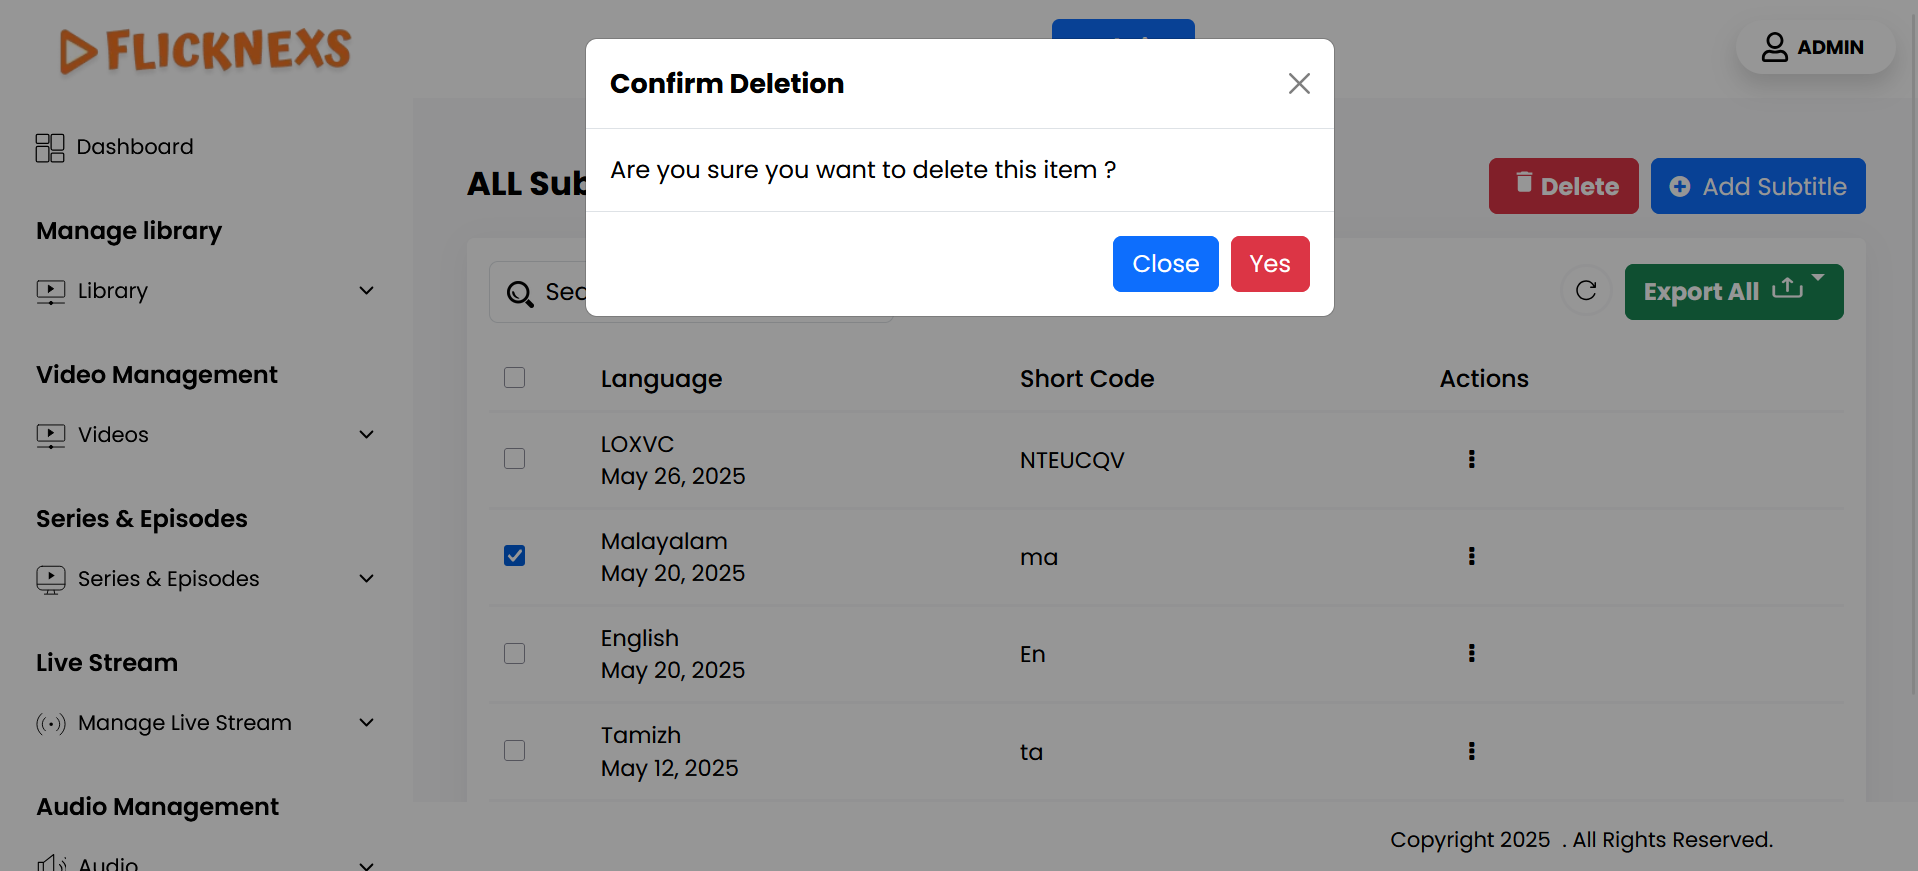
This setup gives you control over the language data, ensuring easy updates and safe deletions with confirmation prompts.
Add Subtitle


You can add a new subtitle language by specifying the following details:
- Language Name: The full name of the subtitle language (e.g., “Spanish” or “German”).
- Short Code: A short code for the language (e.g., “ES” for Spanish, “DE” for German). This slug is used to reference the language in various system settings.
By providing these two fields, a new subtitle language can be created and added to your platform’s list, making it available for use in subtitle settings across the system.
This process allows you to seamlessly manage and update the translation of specific terms used on your website, ensuring users can interact with the content in their preferred language.