Manage Live Stream
In the Admin panel, you will find various options listed on the left side of the page. To manage Live stream videos, please follow these steps:
1. Access the Admin Panel: Log in to the Admin panel from your platform.
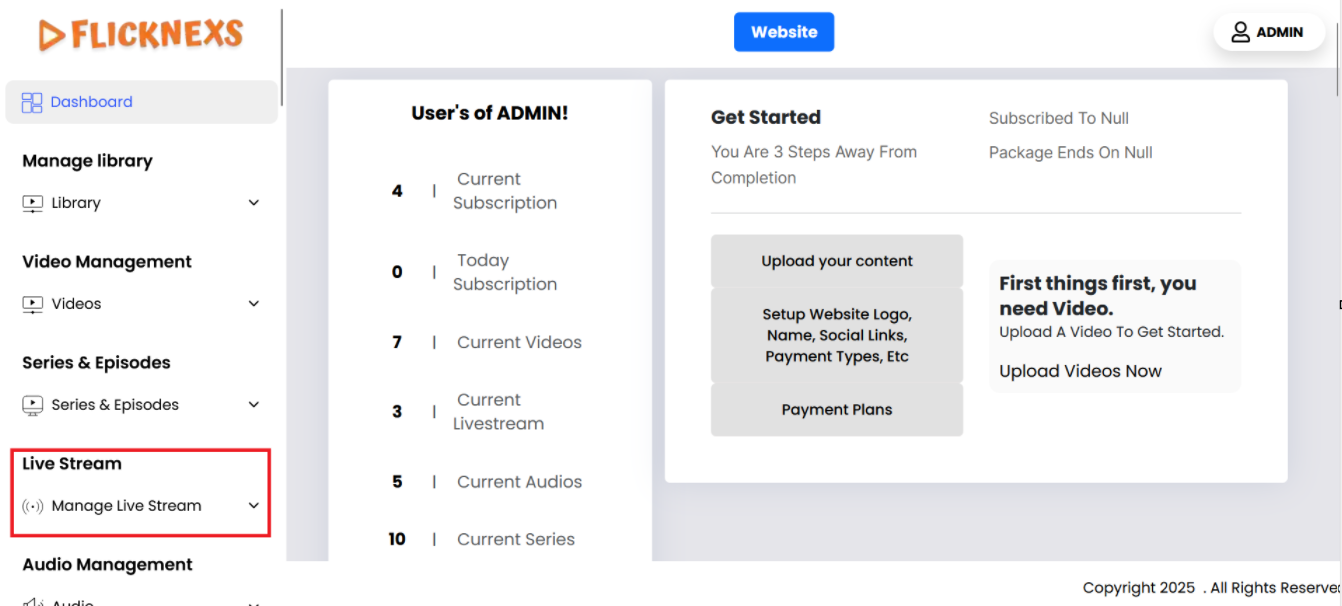
2. Locate the Sidebar: On the left side of the page, you will see a sidebar containing multiple options.
3. Select ‘Manage Live Stream’: From the sidebar, click on the ‘Manage Live Stream’ option.
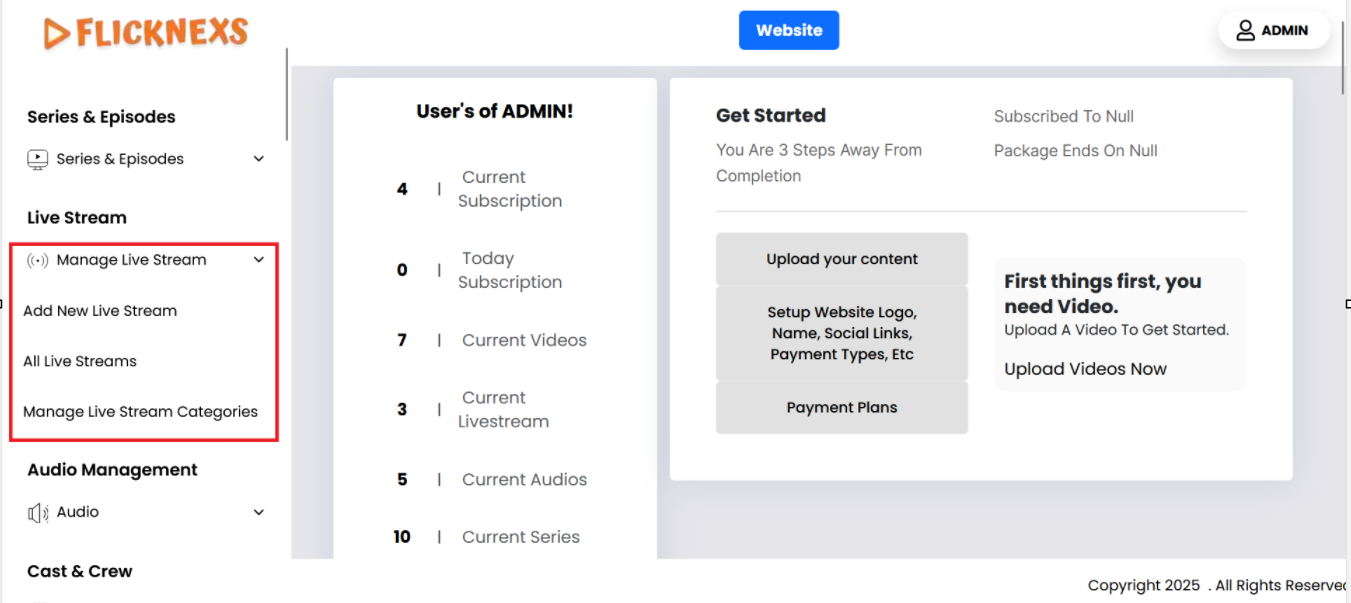
4. Navigate to the Manage Live Stream Section: After selecting ‘Manage Live Stream’, you will be directed to the Manage Live Stream section where you can upload, edit, delete, and organize Live Stream videos.
By following these steps, you can efficiently manage your Live Stream content through the Admin panel.
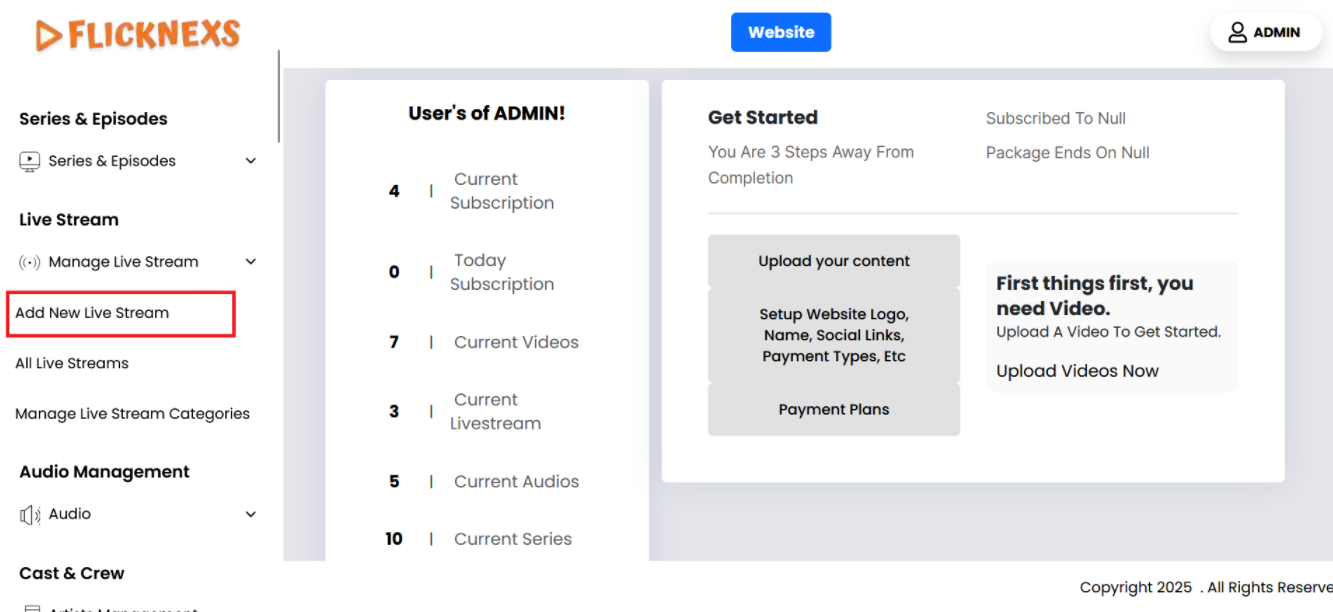
Add New Live Stream
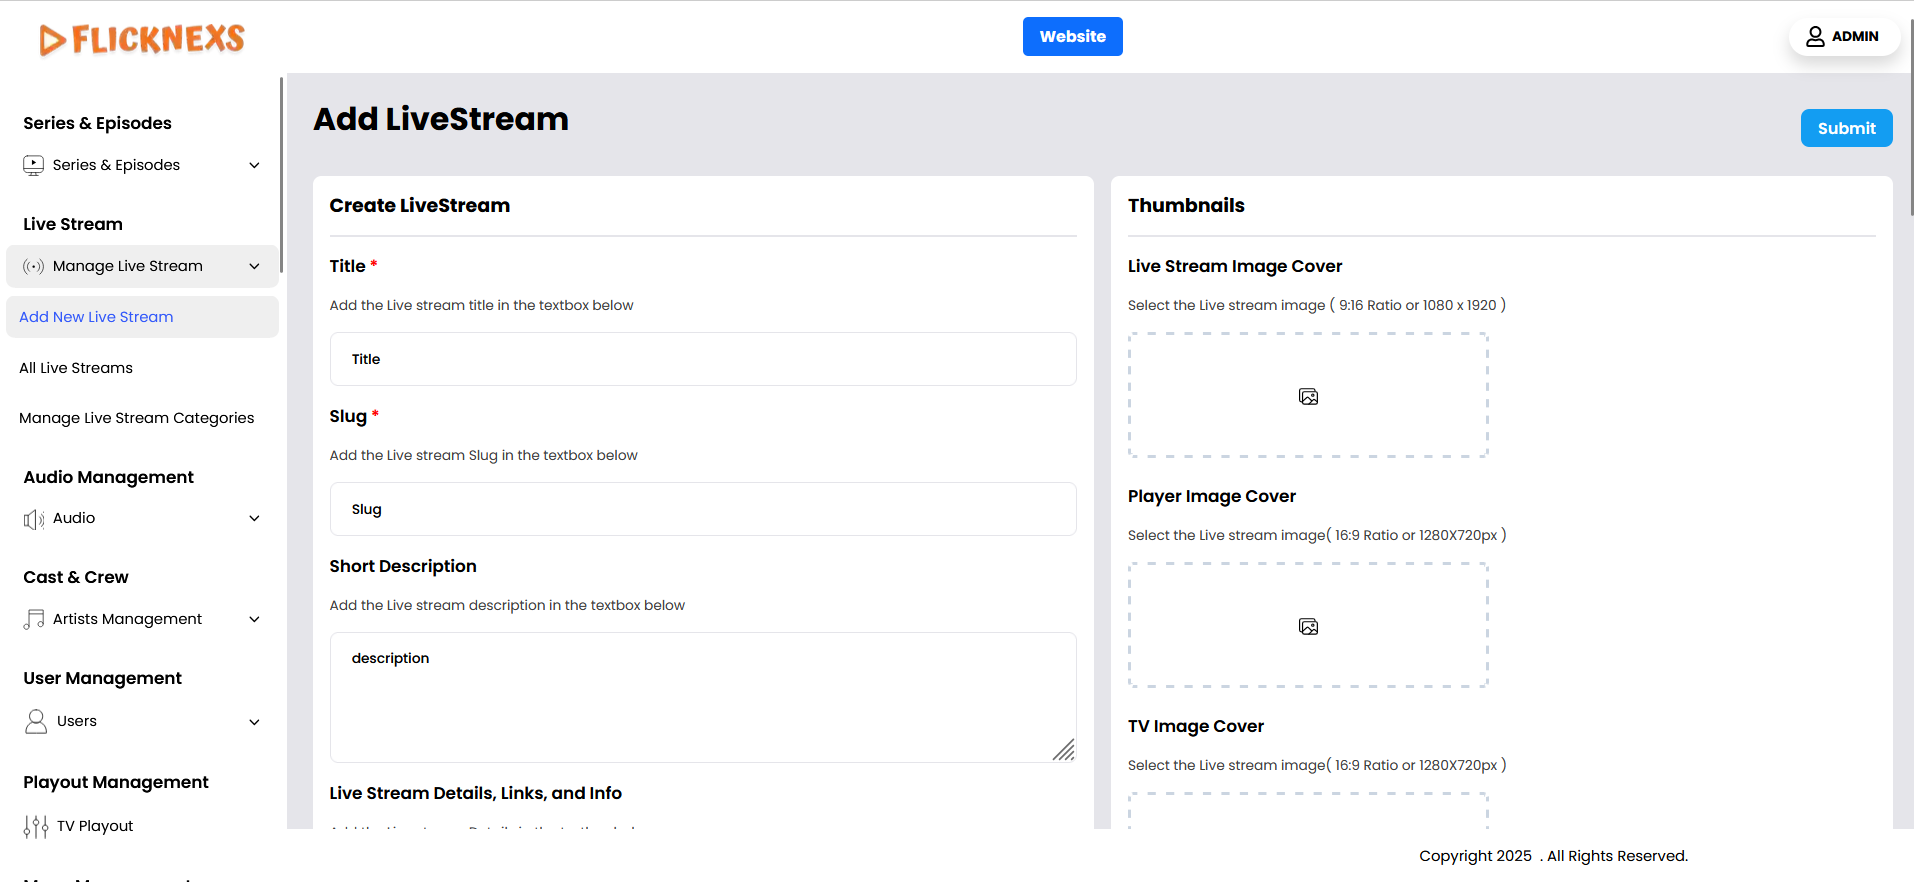
Title
- Enter the title of the live stream, which will appear to users and help identify the content.
Slug
- Add a custom URL slug for the live stream, making it easy to link and share.
Short Description
- Add a brief description of the live stream, summarizing the content for viewers.
Live Stream Image Cover
- Upload an image that will serve as the cover or thumbnail for the live stream.
Player Image Cover
- Upload the image that will be displayed on the player interface when the live stream is not playing.
TV Image Cover
- Upload the image that will be used as the thumbnail for TV displays. This is specifically designed for optimal viewing on TV screens.
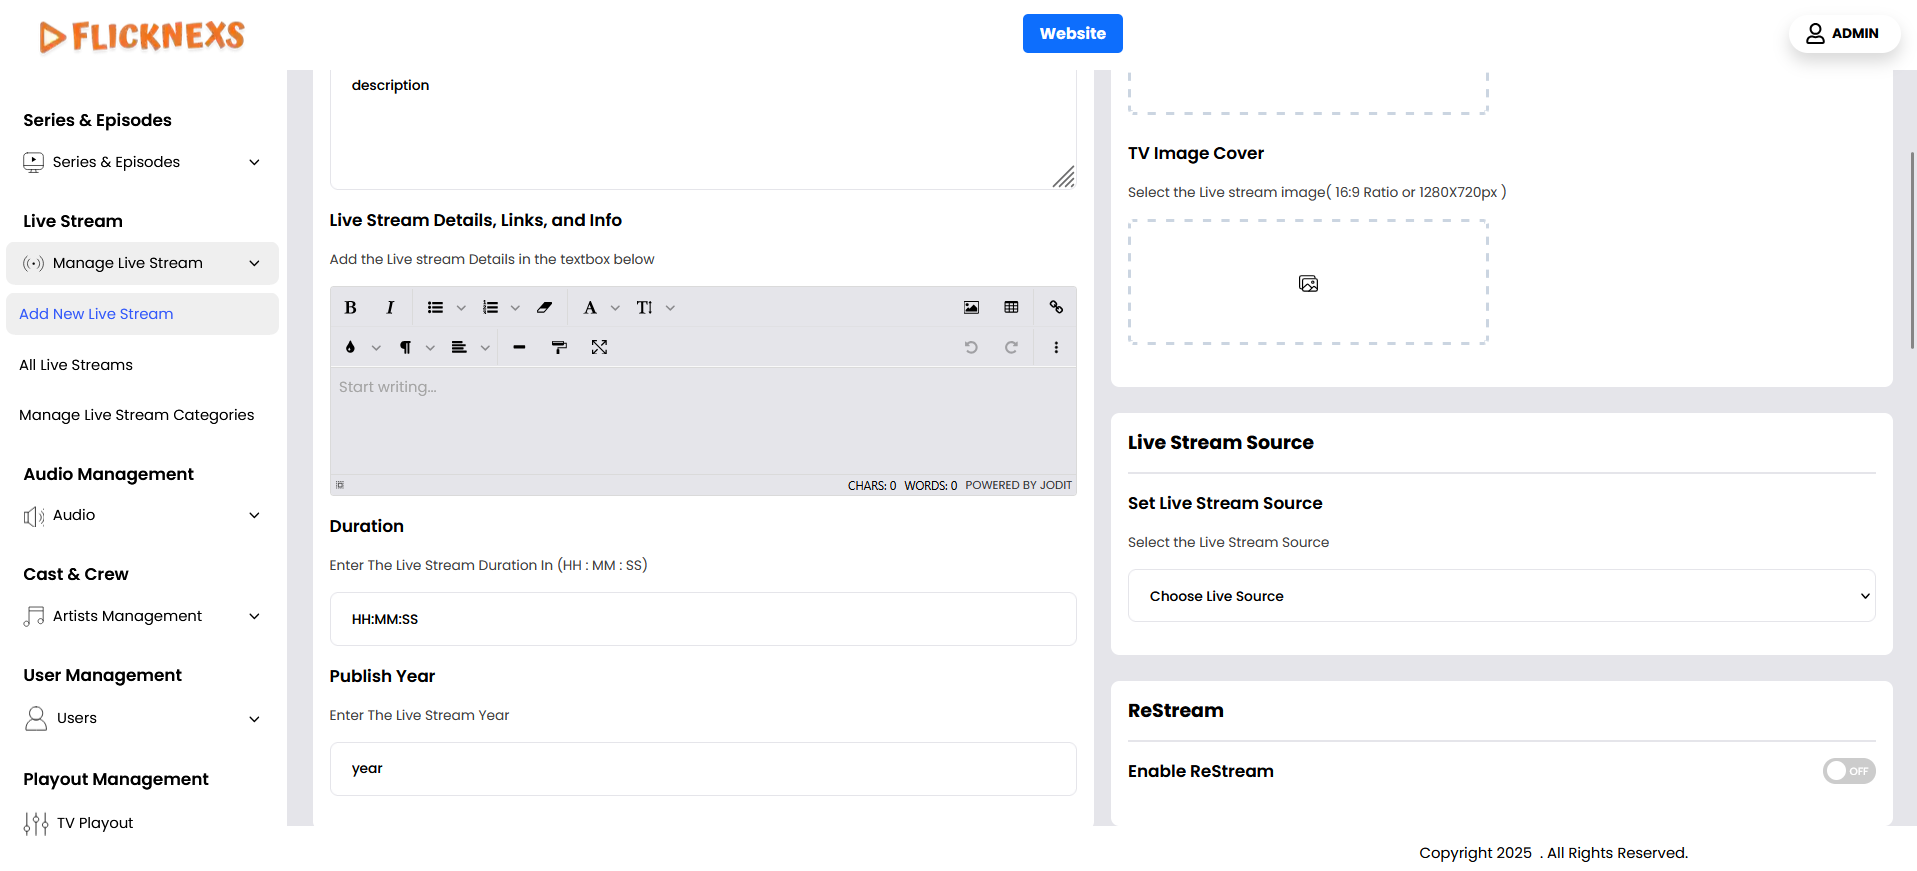
Live Stream Details, Links, and Info
- If you would like to add additional details, relevant links, or important information, you can include them here under “Live Stream Details, Links, and Info.” This section allows you to provide a comprehensive overview, including descriptions, streaming URLs, related resources, and any other essential content for the live stream.
Live Stream Source
- Select the type of live video source. Options include:
- MP4/M3U8 URL: Provide the URL of the MP4 or M3U8 file.
- Embed URL: Add an embedded video URL.
- Live stream video: Upload the video stream directly.
- M3U URL: Use an M3U playlist URL.
- MP3/AAC Audio File: Upload an audio file.
- MP3/AAC Audio URL: Provide an audio file URL.
- RTMP Streaming: Use an RTMP stream URL for real-time streaming.
Duration
- Indicate the total duration of the live stream.
Publish Year
- Specify the year when the live stream was created or broadcasted.
Enable Restream
- Enable this option to allow the live stream to be restreamed to other platforms.
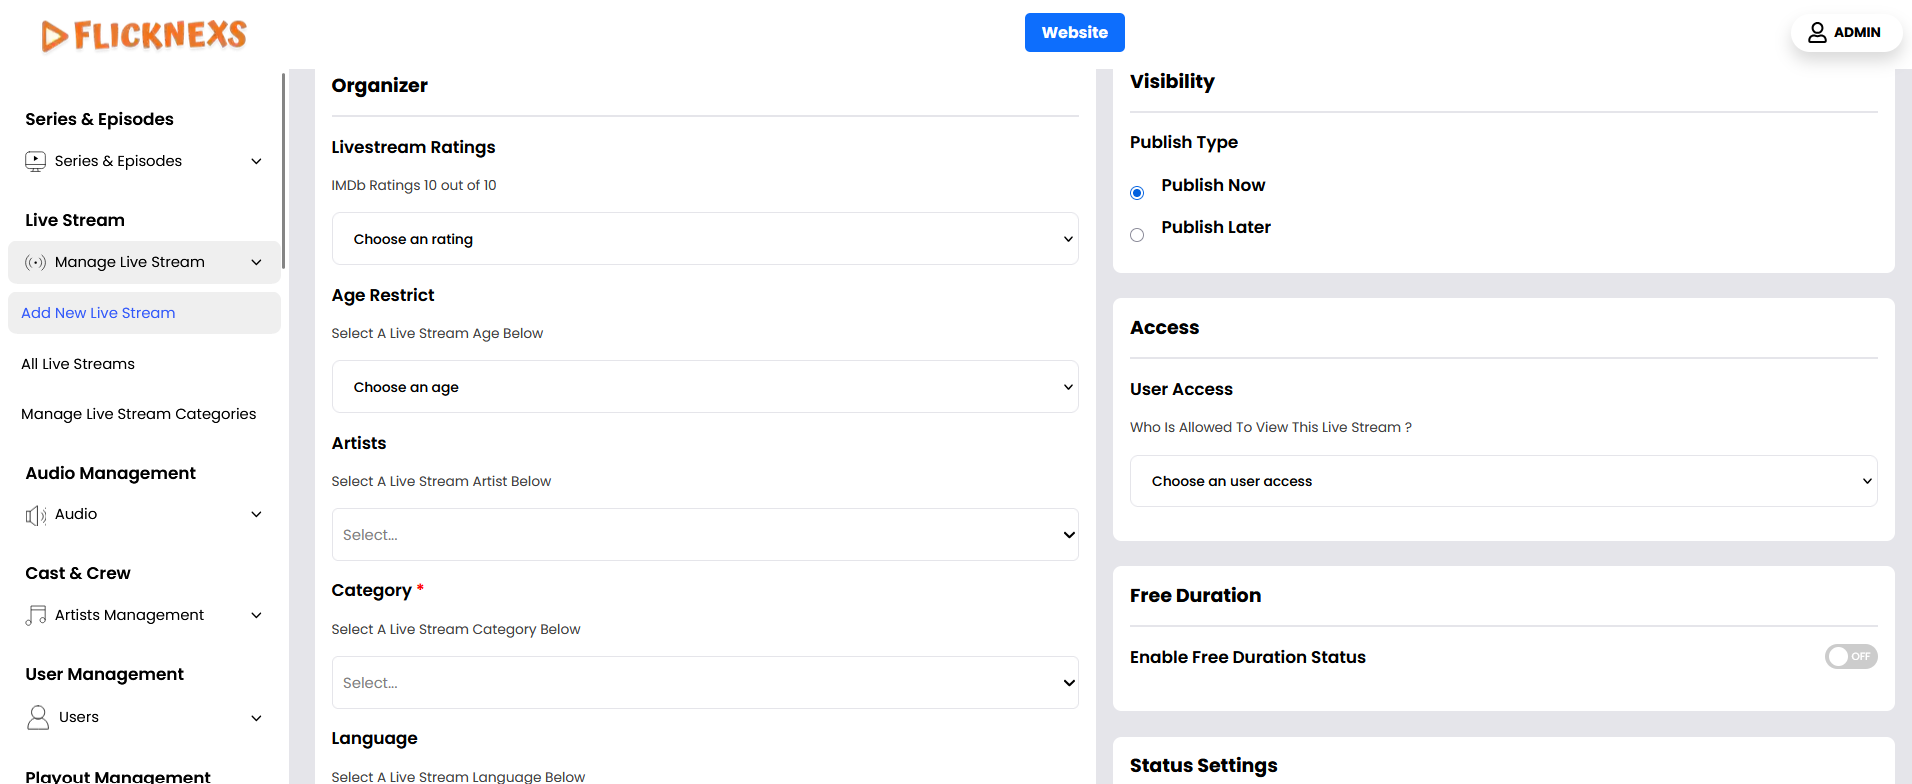
Live Stream Rating
- Provide a rating for the live stream based on its content (e.g., G, PG, R).
Age Restrict
- If you want to apply an age restriction to this live-stream video, you can select the appropriate option from the drop-down menu. This allows you to control the accessibility of the content based on the viewer’s age, ensuring compliance with content guidelines and regulations. Selecting an age restriction helps prevent underage audiences from accessing content that may not be suitable for them.
Artist
- If you want to add the Cast & Crew or Artists associated with the live stream video, you can select them from the drop-down menu. This feature allows you to credit the individuals involved, such as actors, hosts, musicians, or other key contributors.
- Before selecting an artist from the drop-down menu, make sure they have already been added in the Artist Management Section. If the artist is not listed, you will need to first add them in the Artist Management module, ensuring that all relevant details, such as their name, role, and profile image, are available.
- This helps in maintaining an organized and well-structured database of artists while ensuring accurate attribution for the live stream content.
Category
- Select the appropriate category for the live stream from the provided options (e.g., Sports, Music, etc.).
Publish Type
- Choose the published schedule:
- Publish Now: Make the live stream available immediately.
- Publish Later: Set a specific date and time to publish the live stream.
- Recurring Program: Set up recurring live streams at specific intervals.
User Access
- Define the access level for users:
- Guest (Everyone): Open to all users.
- Subscriber: Only available to paid subscribers.
- PPV User (Pay-Per-View): Users must pay for one-time access to the live stream.
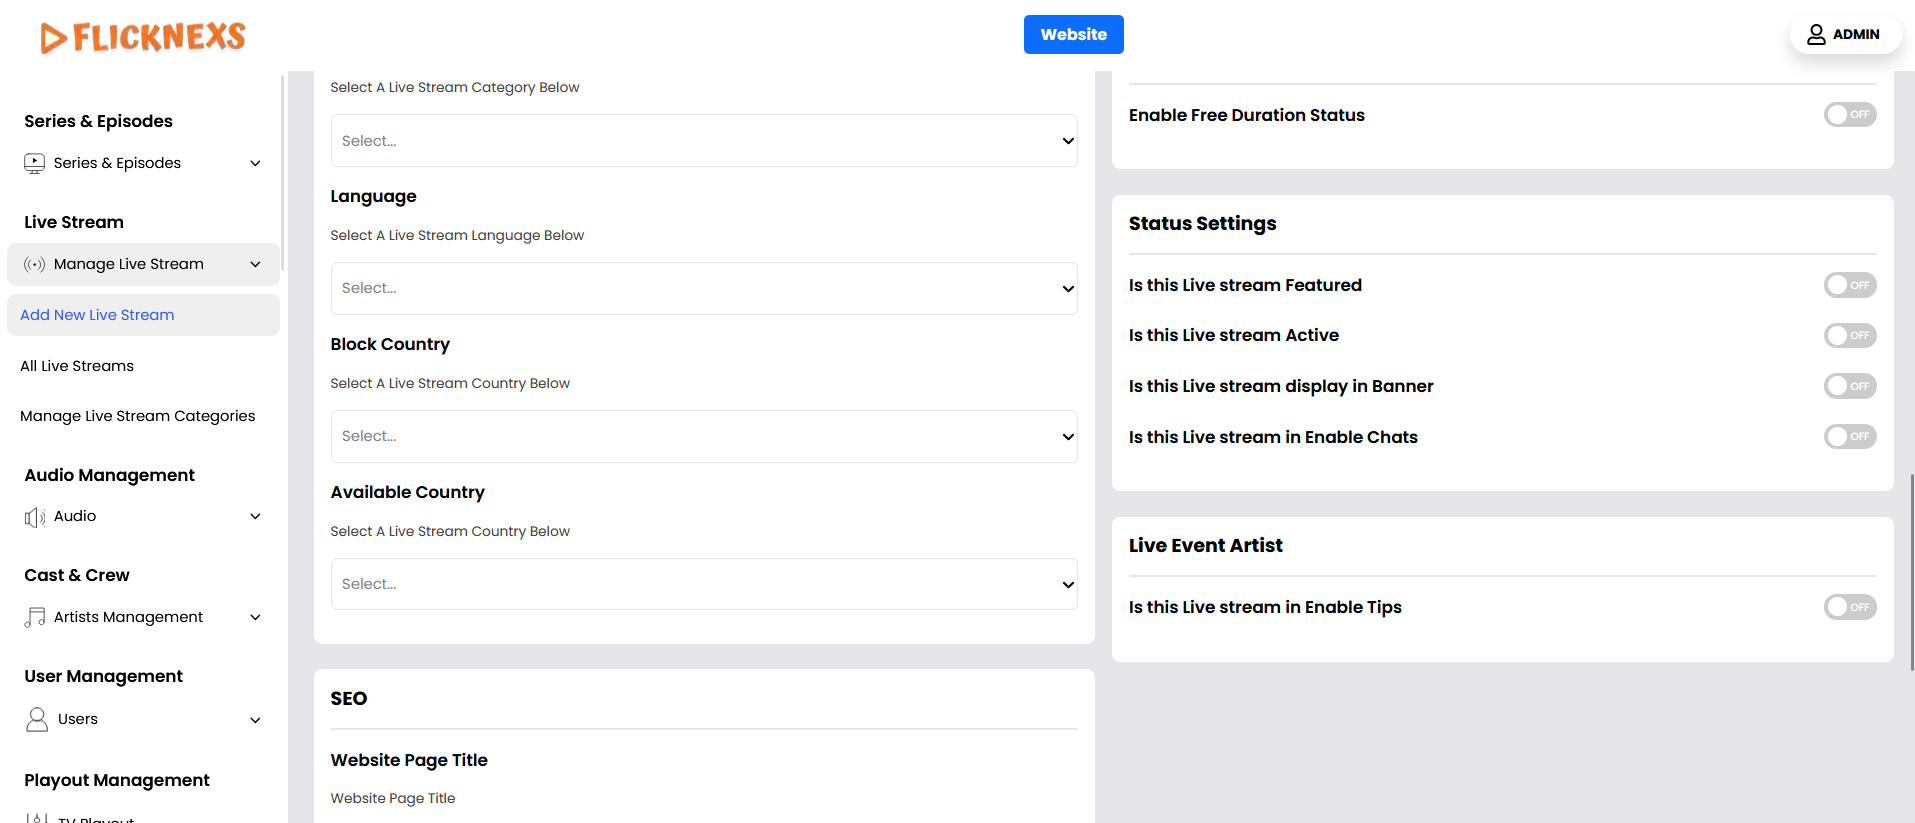
Language
- Choose the language in which the live stream will be broadcast.
Enable Free Duration
- Enable or disable the option to provide free viewing for a limited duration of the live stream.
Free Duration
- Specify how long the free viewing period will last (e.g., first 10 minutes).
Block Country
- Choose specific countries where access to the live stream will be restricted or blocked.
Available Country
- Select the specific countries where the live stream will be accessible.
Status Settings
- Enable or disable the following options based on how you want the live stream to appear:
- Is this Live Stream Featured?: Feature the live stream prominently on your platform.
- Is this Live Stream Active?: Activate or deactivate the live stream.
- Is this Live Stream Displayed in the Banner: Display the live stream in the banner section for greater visibility.

SEO
- Website Page Title – You can enter the title for the webpage here to optimize it for SEO (Search Engine Optimization). This title will appear as the clickable headline in search engine results, so it’s important to make it relevant to the content of the page. Ideally, the title should be concise, include important keywords related to the page’s content, and be designed to attract clicks from users searching for relevant topics. A well-crafted SEO title can improve the page’s visibility and ranking in search engines, ultimately driving more traffic to your website.
- Website URL – You can enter the website URL here to optimize it for SEO (Search Engine Optimization). This URL will be used as the web address that appears in search engine results, and it plays a crucial role in search engine ranking. It’s important to ensure that the URL is clean, descriptive, and includes relevant keywords that reflect the content of the page. A well-structured URL helps search engines understand what the page is about and makes it easier for users to find. Additionally, short and meaningful URLs are more user-friendly and likely to improve the page’s SEO performance.
- Meta Description – You can enter the meta description for the webpage here to enhance its SEO (Search Engine Optimization). The meta description is a brief summary of the page’s content that appears below the page title in search engine results. While it doesn’t directly impact search rankings, a well-written meta description can influence click-through rates by providing users with a clear, compelling reason to visit the page. It should be concise (usually around 150-160 characters), include relevant keywords, and accurately reflect the content of the page. A good meta description helps search engines understand the page’s topic and encourages users to click on your link over others.
Live Event Artist
- Is this Live stream in Enable Tips – If you would like to enable the “Tips” feature for the live stream, simply activate the option and specify the details of the donations, including the types or categories of contributions allowed. This will ensure that viewers can contribute directly during the live stream. If you do not wish to use this feature, you can leave it disabled, and the option will not be available to viewers.
Search Tags
- Create search tags that make it easier for users to find the live stream when searching for related topics.
This setup will give you full control over your live stream content, allowing you to manage access, monetization, and promotion effectively.
Embed URL
To stream a video using the Embed URL feature, follow these detailed steps:
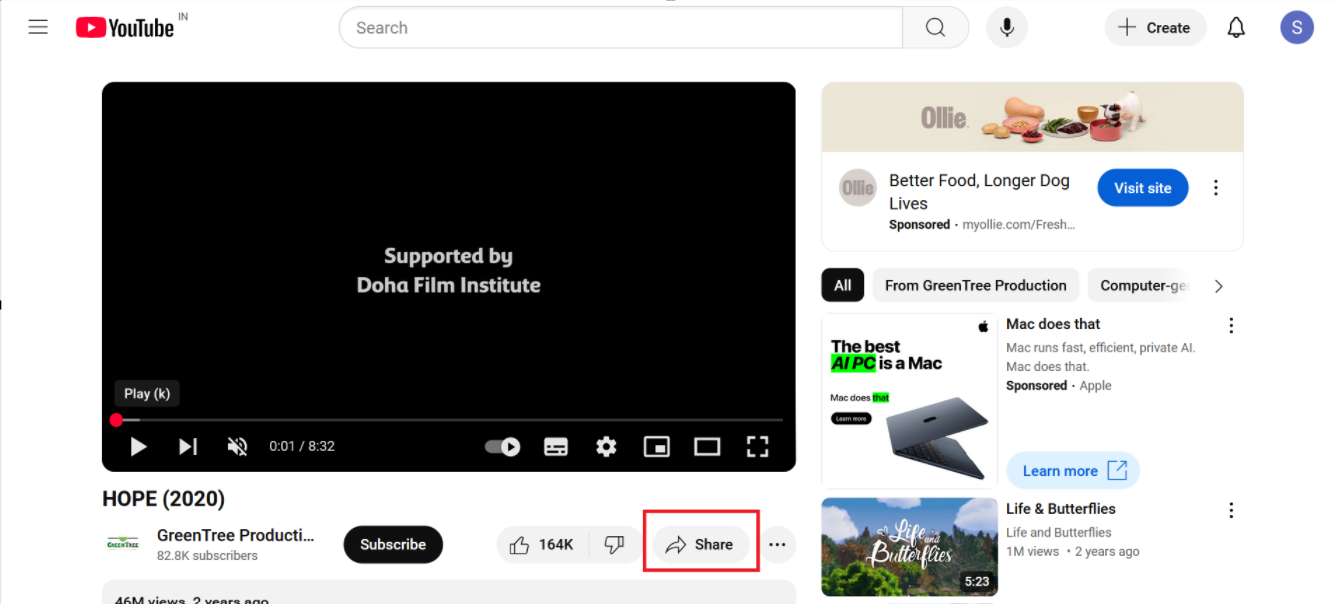
- Locate the Video: Begin by navigating to the specific video you want to stream.
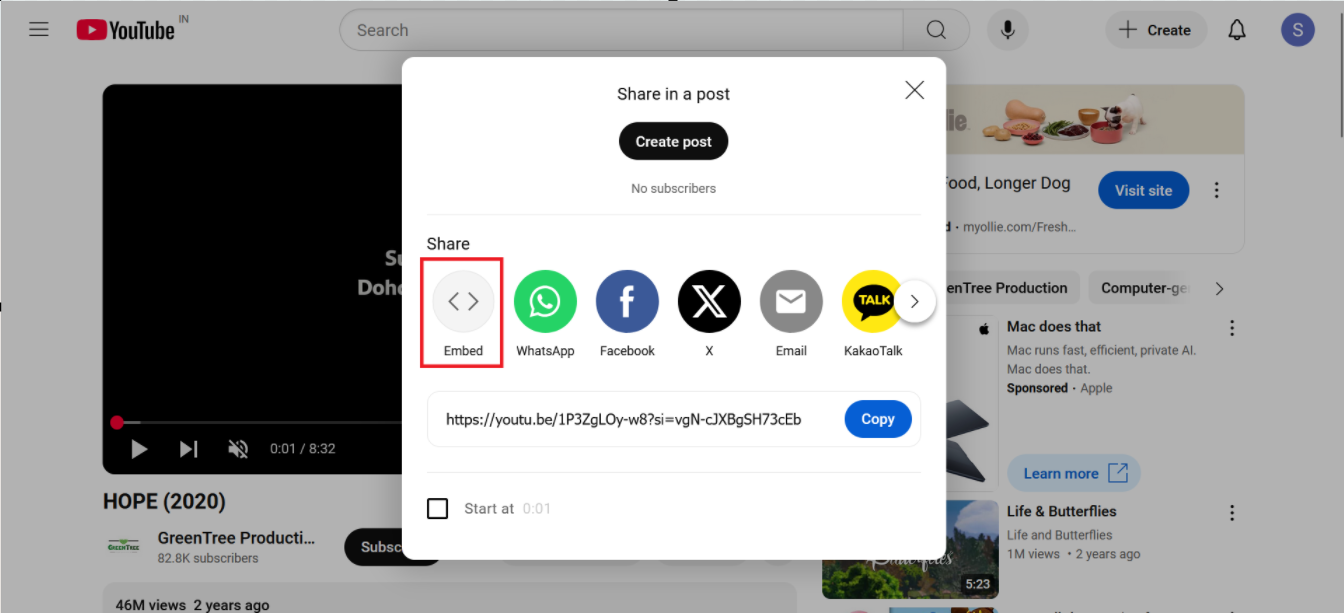
- Click on the Share Option: Most video platforms provide a Share button or icon, typically represented by an arrow or a chain-link icon. Click this option.
- Select Embed Option: After clicking share, you will often see multiple sharing options such as direct URL, social media sharing, and Embed. Choose the Embed option.
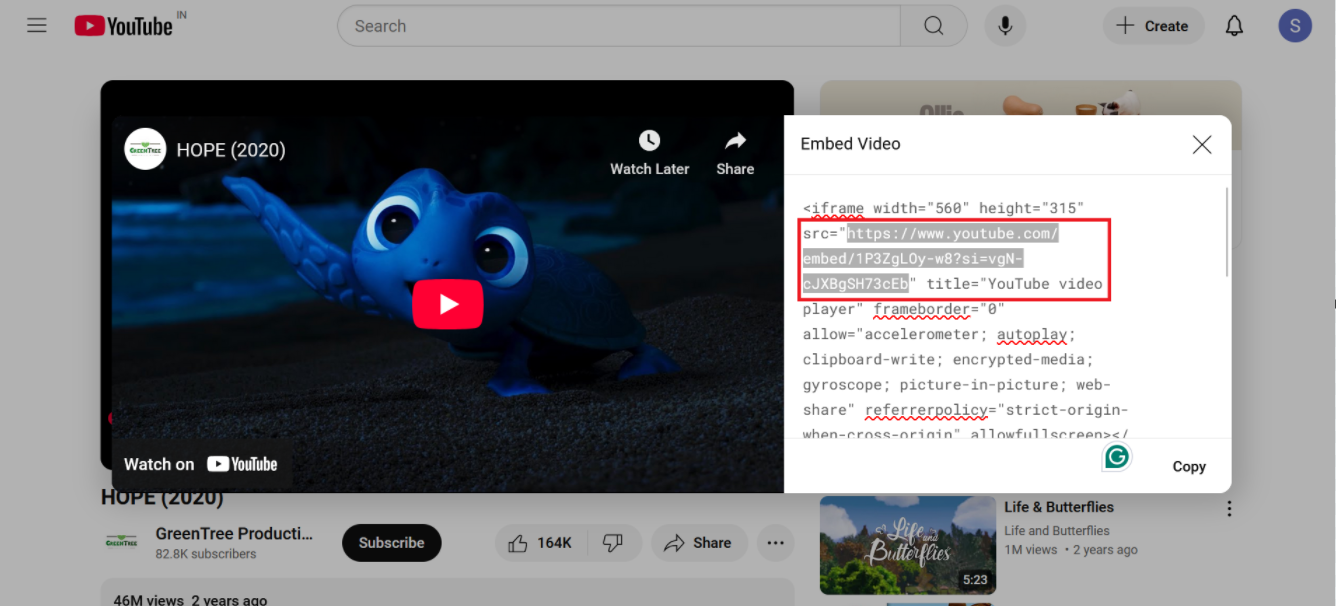
- Copy the Embed Code: Once you select the embed option, a box containing the embed code will appear. This code is usually HTML-based and will look something like:
<iframe src=”https://example.com/embed/xyz123” width=”640″ height=”360″ frameborder=”0″ allowfullscreen></iframe>
From this embed code, locate the part that starts with src=”https:// and ends with the closing quotation mark. This is the URL of the video source.
In the example above, you would copy:
- Navigate to Add New Live Stream Section: In your platform’s admin panel or wherever live streams are managed, go to the section where you can add a new live stream.
- Paste the Embed URL: In the designated field (typically marked for the stream source or URL), paste the copied URL from the src attribute.
- Complete the Live Stream Upload Process: Fill out any additional details required for the live stream (such as title, description, category, etc.) and then save or publish the stream.
By following these steps, the video will be embedded and streamed directly through your platform using the URL from the embed code.
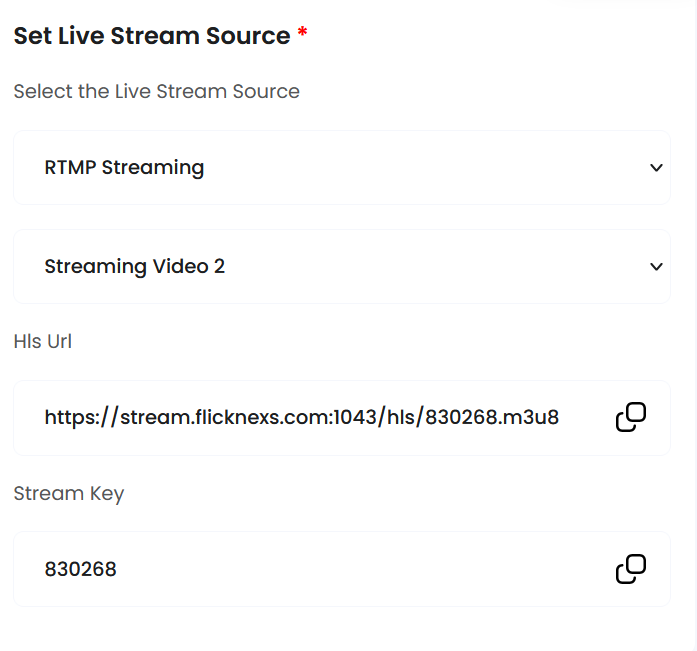
RTMP Live
We have configured the default RTMP on the platform to stream live. To stream your videos you can configure the RTMP generated after adding the live stream on admin in OBS and start streaming.
The stream key and RTMP URL are generated after the video has been added.
OBS (Open Broadcaster Software)
Copy the above RTMP URL and configure this in OBS.

Click settings in OBS and then select the Stream option in settings

Add the RTMP URL, and the stream key, then click apply. The stream has been set up now.


Click the + symbol in the source tab. By selecting the media source, you can add the video using the browse option.

After adding the video you can start streaming to the platform.
All Live Stream


All uploaded live streams will be displayed in this section with key details and management options:
- Videos: The name of the live stream video as it was uploaded.
- Uploaded by: The user who uploaded the live stream.
- Status (Draft/Published): Shows whether the video is still in draft mode (not visible to users) or has been published (visible and accessible).
- Slider (Enable/Disable): Allows you to enable or disable the video from being featured on the homepage slider. When enabled, the video will appear prominently on the main page carousel.
- Upload Type: This section will display the format of the video that has been uploaded to the platform, indicating the file type and encoding details.
- Actions:
- Preview: View the video as it would appear to users.
- Edit: Modify the live stream details such as title, image, or access settings.
- Delete: Remove the video from the platform.
This setup allows you to manage live stream videos easily, control access levels, and promote content through the homepage slider.
Live Stream to Channel Partner

All channel-uploaded live streams will be displayed in this section with key details and management options:
- Title: The name of the live stream video as it was uploaded.
- User Name: The user who uploaded the live stream.
- Year: Uploaded year
- Video Access (Guest/Registered User/Subscriber/PPV): Defines who can watch the live stream:
- Guest: Anyone can view the video without signing in.
- Registered User: Only users who have created an account can access the stream.
- Subscriber: Only paid subscribers have access.
- PPV (Pay-Per-View): Users must pay for one-time access to the video.
- Status (Draft/Published): Shows whether the video is still in draft mode (not visible to users) or has been published (visible and accessible).
- Actions:
- Preview: View the video as it would appear to users.
- Edit: Modify the live stream details such as title, image, or access settings.
- Delete: Remove the video from the platform.
Live stream to content partner


All content partner-uploaded live streams will be displayed in this section with key details and management options:
- Title: The name of the live stream video as it was uploaded.
- User Name: The user who uploaded the live stream.
- Year: Uploaded year
- Video Access (Guest/Registered User/Subscriber/PPV): Defines who can watch the live stream:
- Guest: Anyone can view the video without signing in.
- Registered User: Only users who have created an account can access the stream.
- Subscriber: Only paid subscribers have access.
- PPV (Pay-Per-View): Users must pay for one-time access to the video.
- Status (Draft/Published): Shows whether the video is still in draft mode (not visible to users) or has been published (visible and accessible).
- Actions:
- Preview: View the video as it would appear to users.
- Edit: Modify the live stream details such as title, image, or access settings.
- Delete: Remove the video from the platform.
Manage Live Stream Categories


This section will display a comprehensive list of all live stream categories available on the platform. Each category helps organize live stream content, making it easier for users to discover videos based on their interests. The categories are primarily used to classify and group live streams by genre, topic, or type, enabling better content management and enhancing user experience.
Fields Displayed for Each Category:
- Video Category Name:
- This field lists the name of each live stream category (e.g., Sports, Music, News, Entertainment). The category name reflects the type of content within that group, helping both administrators and users to quickly identify the nature of live streams associated with each category.
- Action (Enable or Disable):
- This column allows administrators to control the status of each category:
- Enable: When a category is enabled, it becomes active and visible on the platform, allowing live streams to be assigned to it. Users will be able to browse and select live streams that fall under this category.
- Disable: If a category is disabled, it is marked as “unused” and will no longer be active on the platform. This means that live streams can no longer be assigned to this category, and it won’t be displayed in user searches or recommendations. Disabling categories is useful for managing outdated or irrelevant groups without fully deleting them.
- This column allows administrators to control the status of each category:
- Operation (Edit and Delete):
- This column provides administrators with options to manage each live stream category:
- Edit: Selecting this option allows the administrator to modify the category’s details, such as the category name, description, or any related metadata. Editing ensures that categories remain accurate, relevant, and aligned with the platform’s evolving content.
- Delete: This option permanently removes the live stream category from the platform. Deleting a category should be done with caution, as it may affect any live streams currently assigned to that category. Once deleted, the category will no longer exist, and any associated live streams must be reassigned to other categories.
- This column provides administrators with options to manage each live stream category:
This section serves as an essential tool for managing the various live stream categories on the platform. It allows administrators to view and organize categories, enabling or disabling them based on platform needs, and performing necessary operations such as editing or deleting categories. The Enable/Disable action provides flexibility in managing categories dynamically, while the Edit and Delete options ensure that the platform’s content remains relevant and well-structured.
Add New


- Action: Click an “Add New” button.
- Details: Provide the following information to create a new category:
- Category Name: Enter the name for the new category.
- Slug: Create a URL slug for the Category.
- Home Page Genre Name: Assigning a genre name for the homepage category helps in organizing and labelling the content displayed on the homepage, making it easier for users to find videos related to specific interests or themes.
- Display In Home page:
Option 1: Select “Yes”:
- Action: Choose “Yes” if you want this category to be displayed on the homepage.
- Outcome: The category will appear prominently on the homepage, allowing users to easily access videos within this category. This option is ideal for highlighting popular or featured content.
Option 2: Select “No”:
- Action: Choose “No” if you do not want this category to be displayed on the homepage.
- Outcome: The category will not be shown on the homepage, but it will still be available within the site’s overall navigation or in other sections. This option is useful for categories that are less relevant or should not be highlighted at the moment.
- Image: Upload an image or icon that represents the category.
- Category: You can organize your content more effectively by creating sub-categories within a main category. From the options provided, select the main category under which you want the new sub-category to be placed.
Move Live Stream to Partner


- Overview: This functionality allows you to transfer Live videos to a specific content or channel partner for further management, promotion, or distribution. It helps in organizing content and ensuring that live videos are correctly assigned to the appropriate partners.
- This feature supports effective content organization and management by allowing you to easily move live videos to the designated content or channel partners, ensuring that videos are properly assigned and managed.
- Choose Channel Partner: You can select the channel partner to which you want to transfer or assign the live stream. This allows you to collaborate with specific partners or platforms that will host or distribute the live stream content. Selecting the right channel partner ensures proper visibility and reach for your live stream.
- Choose Video: Once you have chosen a channel partner, you can select the specific video that you want to move to the selected partner. This enables you to manage and distribute content efficiently, ensuring that the correct live stream is associated with the appropriate partner for broadcasting or streaming.