We need to start by creating the series, followed by setting up individual seasons, each with its own trailer. After that, we can create episodes within those seasons. The structure allows for an unlimited number of seasons within a series, as well as an unlimited number of episodes within each season.
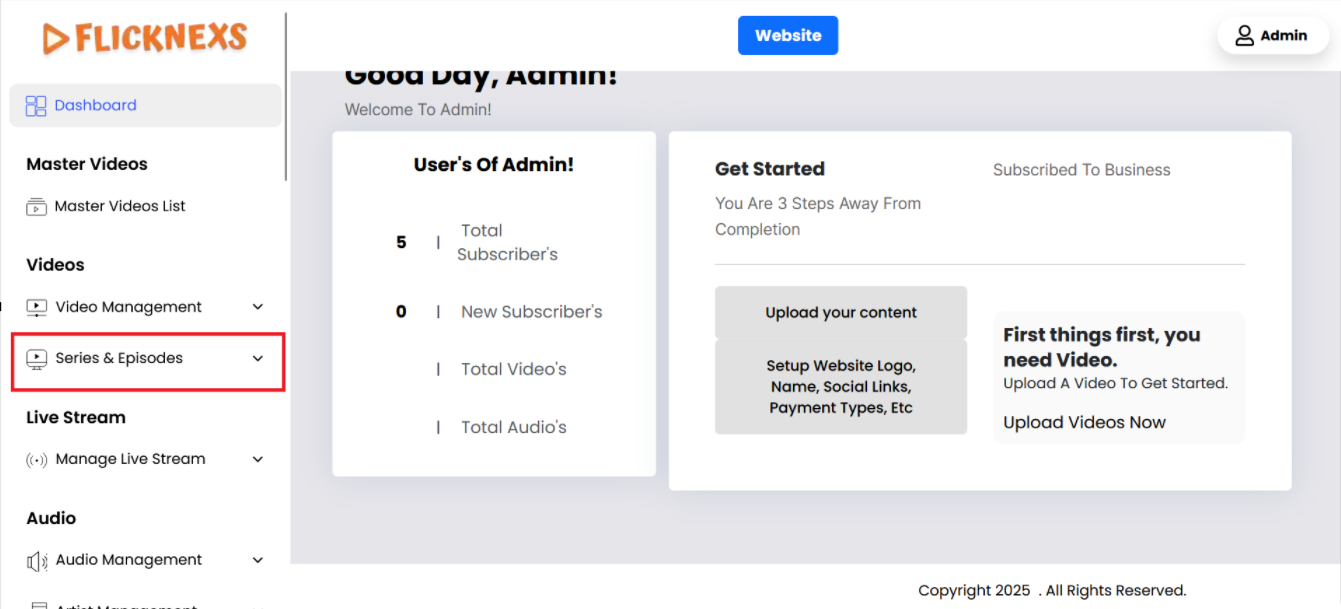
In the Admin panel, you will find various options listed on the left side of the page. To manage Series & Episodes, please follow these steps:
1. Access the Admin Panel: Log in to the Admin panel from your platform.
2. Locate the Sidebar: On the left side of the page, you will see a sidebar containing multiple options.
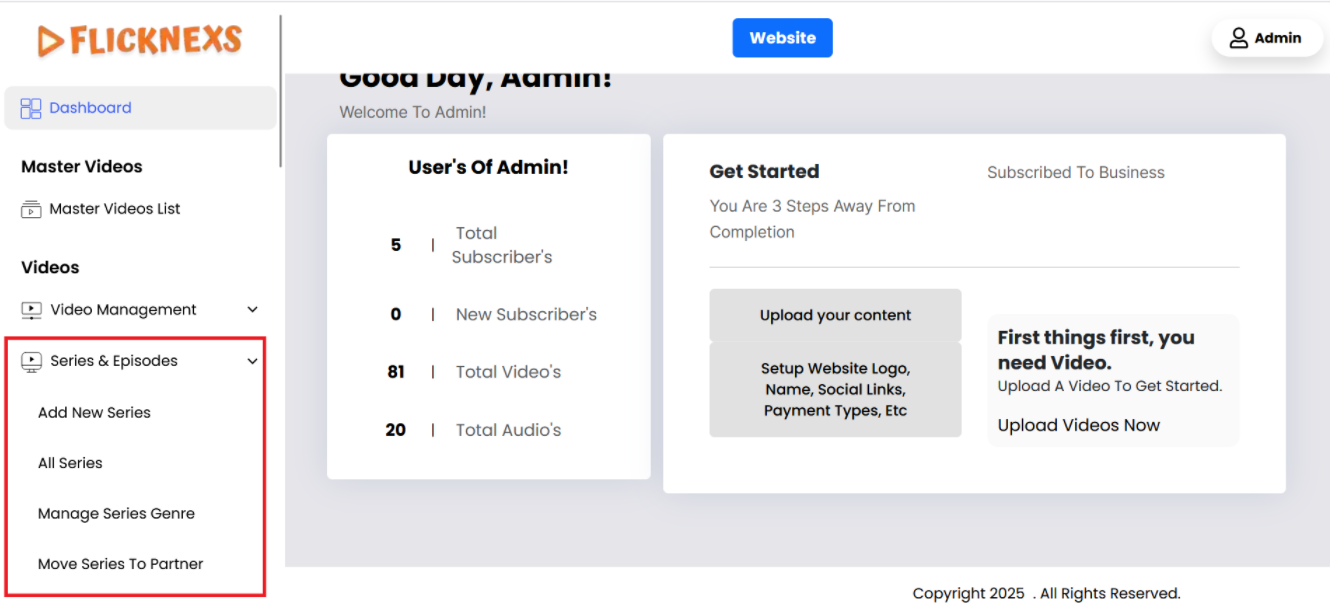
3. Select ‘Series & Episodes’: From the sidebar, click on the ‘Series & Episodes’ option.
4. Navigate to the Series & Episodes Section: After selecting ‘Series & Episodes’, you will be directed to the Series & Episodes section where you can upload, edit, delete, and organize Series.
Following these steps, you can efficiently manage your Series content through the Admin panel.
List Series
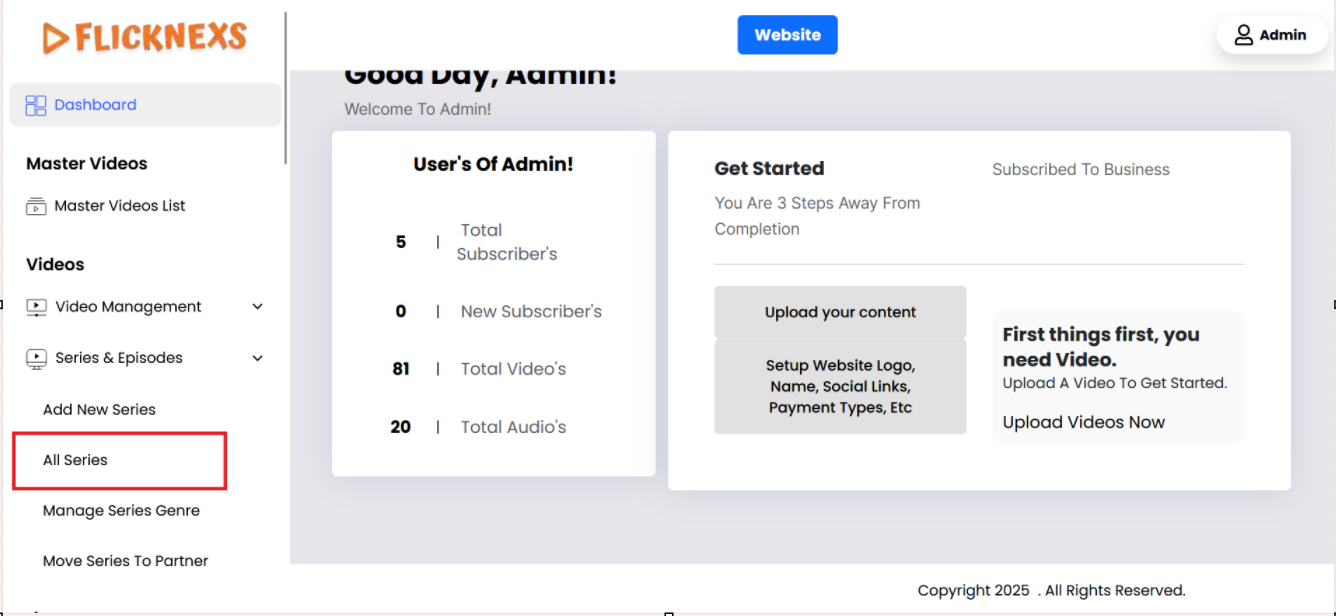
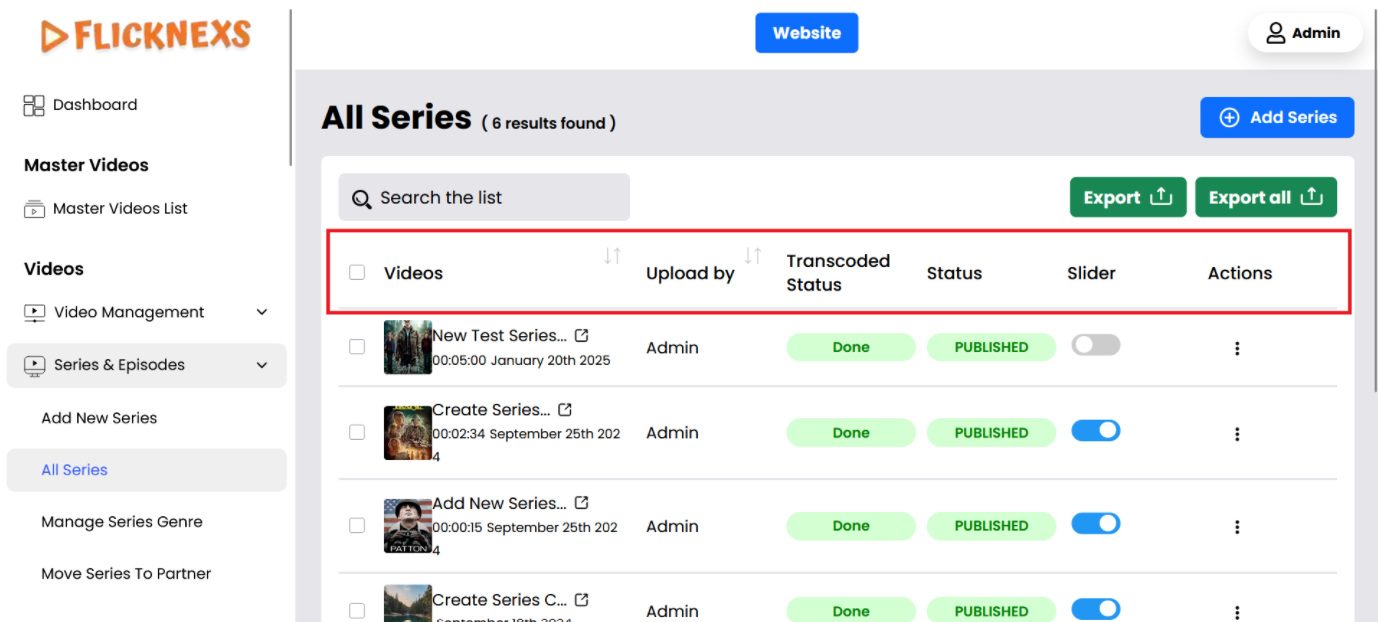
Within the Series & Episodes section, you’ll find the All Series subsection, which provides a comprehensive view of all the Series uploaded to the platform. Here’s a breakdown of what you can see and do in this section:
List Series Section
- Videos:
- Description: Displays the name of each Series that has been uploaded to the platform. This helps you quickly identify and differentiate between various Series.
- Uploaded By:
- Description: This field shows the name of the person who uploaded the video.
- Status:
- Description: This denotes the current state of the video, which will include options like published and draft. It helps the uploader and administrators manage the video’s lifecycle. If the video’s status is “Draft,” it is waiting in a queue for the transcoding process.
- Slider:
- Description: This option allows you to enable or disable the Series displayed in a slider on the homepage.
- Enable Slider: When enabled, the Series will appear in a prominent slider on the homepage, making it more visible to viewers and potentially increasing its exposure.
- Disable Slider: If disabled, the Series will not appear in the homepage slider but will still be accessible through other sections of the platform.
- Actions:
- Edit:
- Description: Allows you to make modifications to the Series. You can update the Series’s title, description, image, and other relevant details. This is useful for keeping the Series information current and accurate.
- Delete:
- Description: Enables you to remove the Series from the platform. Deleting a Series will also remove all associated episodes and data, so use this option with caution if you no longer wish to display the Series on the platform.
- Edit:
- Search:
- In the List Series section, you’ll find a Search option that allows you to search for Series by their name. This feature helps you quickly locate a specific Series within the list by entering the Series’s title.
By using the All Series section, you can effectively manage the Series on your platform, control their visibility on the homepage, and make necessary adjustments to ensure that the Series meet your needs and those of your viewers.
Add New Series

To create a new Series, follow these steps:
- Locate the Add Series Button:
- In the All Series section, find and click the Add Series button. This button is typically positioned at the top of the page or in a prominent location within the section.
- Navigate to the Create Series Page:
- Clicking the Add Series button will direct you to the Create Series page. This page is designed for entering detailed information about the new Series you wish to add.
By following these steps, you can efficiently start the process of adding new Series to the platform.
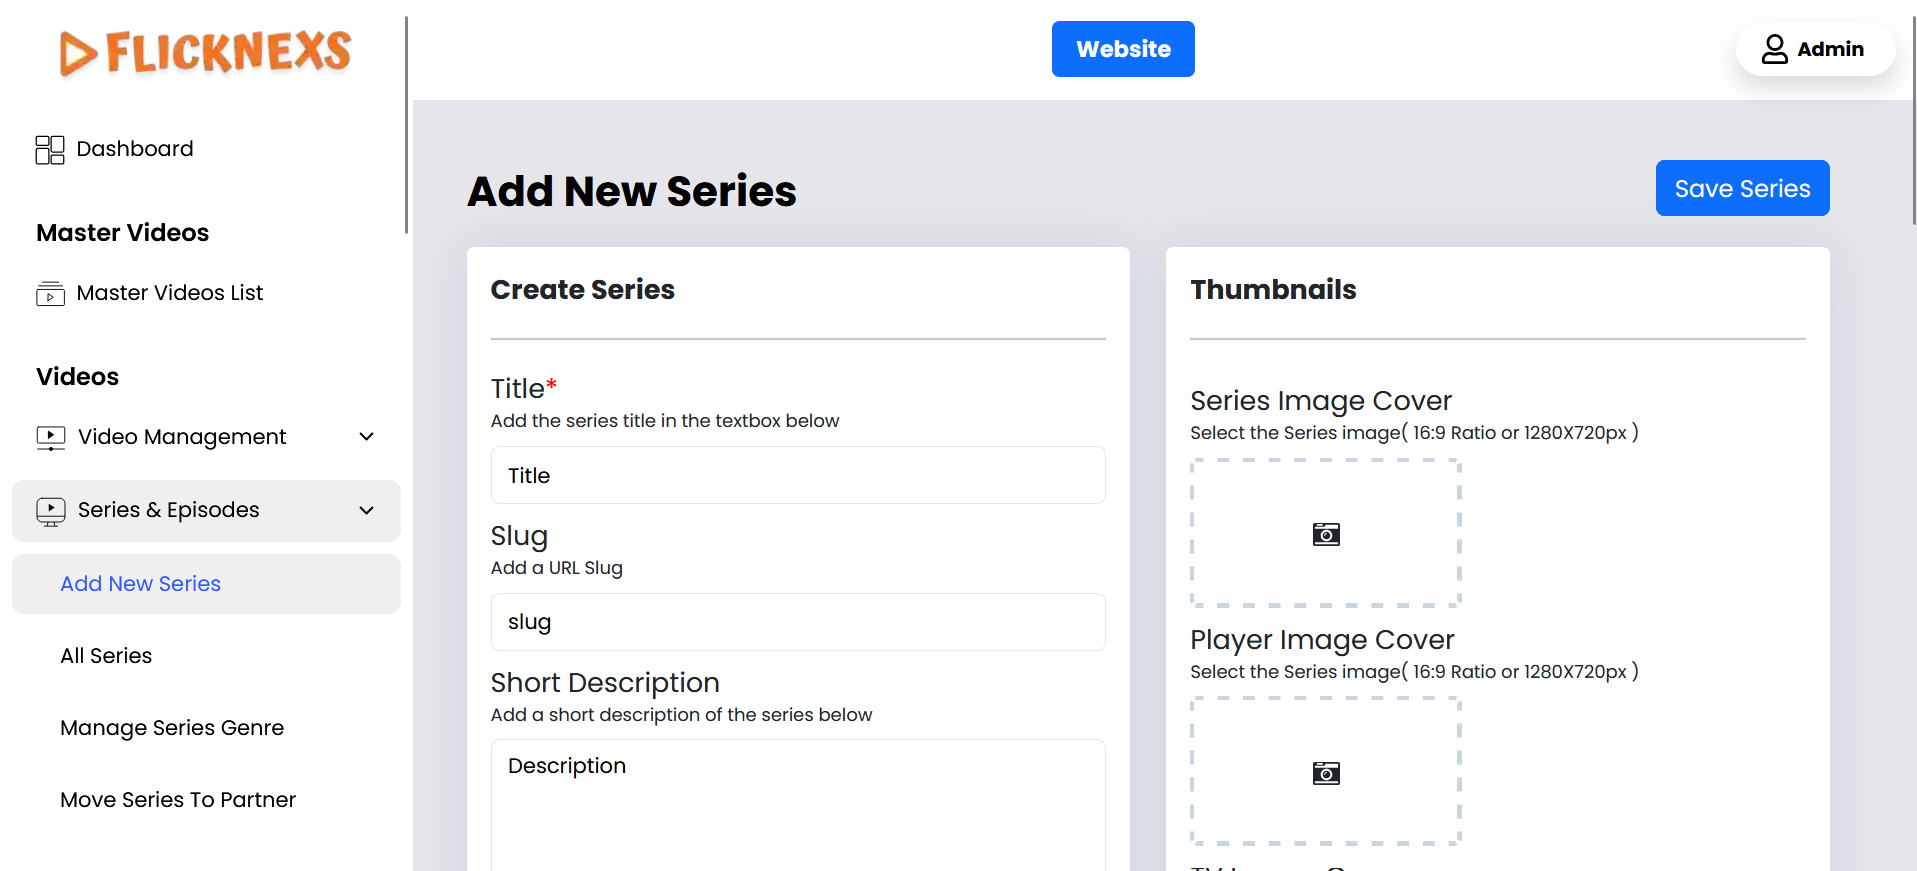
Title – Add the Series Title
- Purpose: The Series title is the main identifier for the Series. It should be clear, memorable, and indicative of the show’s content or theme.
- Details: Enter the full title of the Series. This title will appear in listings, search results, and on the Series main page.
Slug – Add a URL Slug for the Series
- Purpose: A URL slug is the part of the web address that identifies a specific page on your platform. It makes the Series easily accessible via a unique URL.
- Details: Create a concise and relevant slug that reflects the Series title. For example, if the Series title is “Epic Adventures,” the slug might be “epic-adventures.” Avoid spaces and special characters, and use hyphens to separate words.
Series Image Cover – Upload the Series Image
- Purpose: This is the primary visual representation of the Series and will be used in various places on the platform, including the homepage, listings, and search results.
- Details: Upload a high-quality image that captures the essence of the Series. The image should be visually appealing and meet the platform’s size and resolution requirements.
Series Player Image – Upload the Player Image
- Purpose: The player image is displayed when the Series is played or viewed on the platform. It serves as the backdrop for the video player before playback begins.
- Details: Choose an image that is relevant to the Series and enhances the viewing experience. It should be high-quality and meet the specific dimensions required for the player.
Series TV Image Cover – Upload the TV View Image
- Purpose: This image is used when the Series is displayed on television screens or large monitors. It ensures that the visual presentation is optimized for larger displays.
- Details: Upload an image specifically designed for TV viewing, ensuring it has the correct resolution and aspect ratio for large screens.
Short Description – Add a Short Description for the Series
- Purpose: The short description is a summary that appears in search results, listings, or when the Series is previewed.
- Details: Craft a concise and engaging summary that encapsulates the essence of the show in a few sentences. This description should entice viewers to click and learn more about the Series.
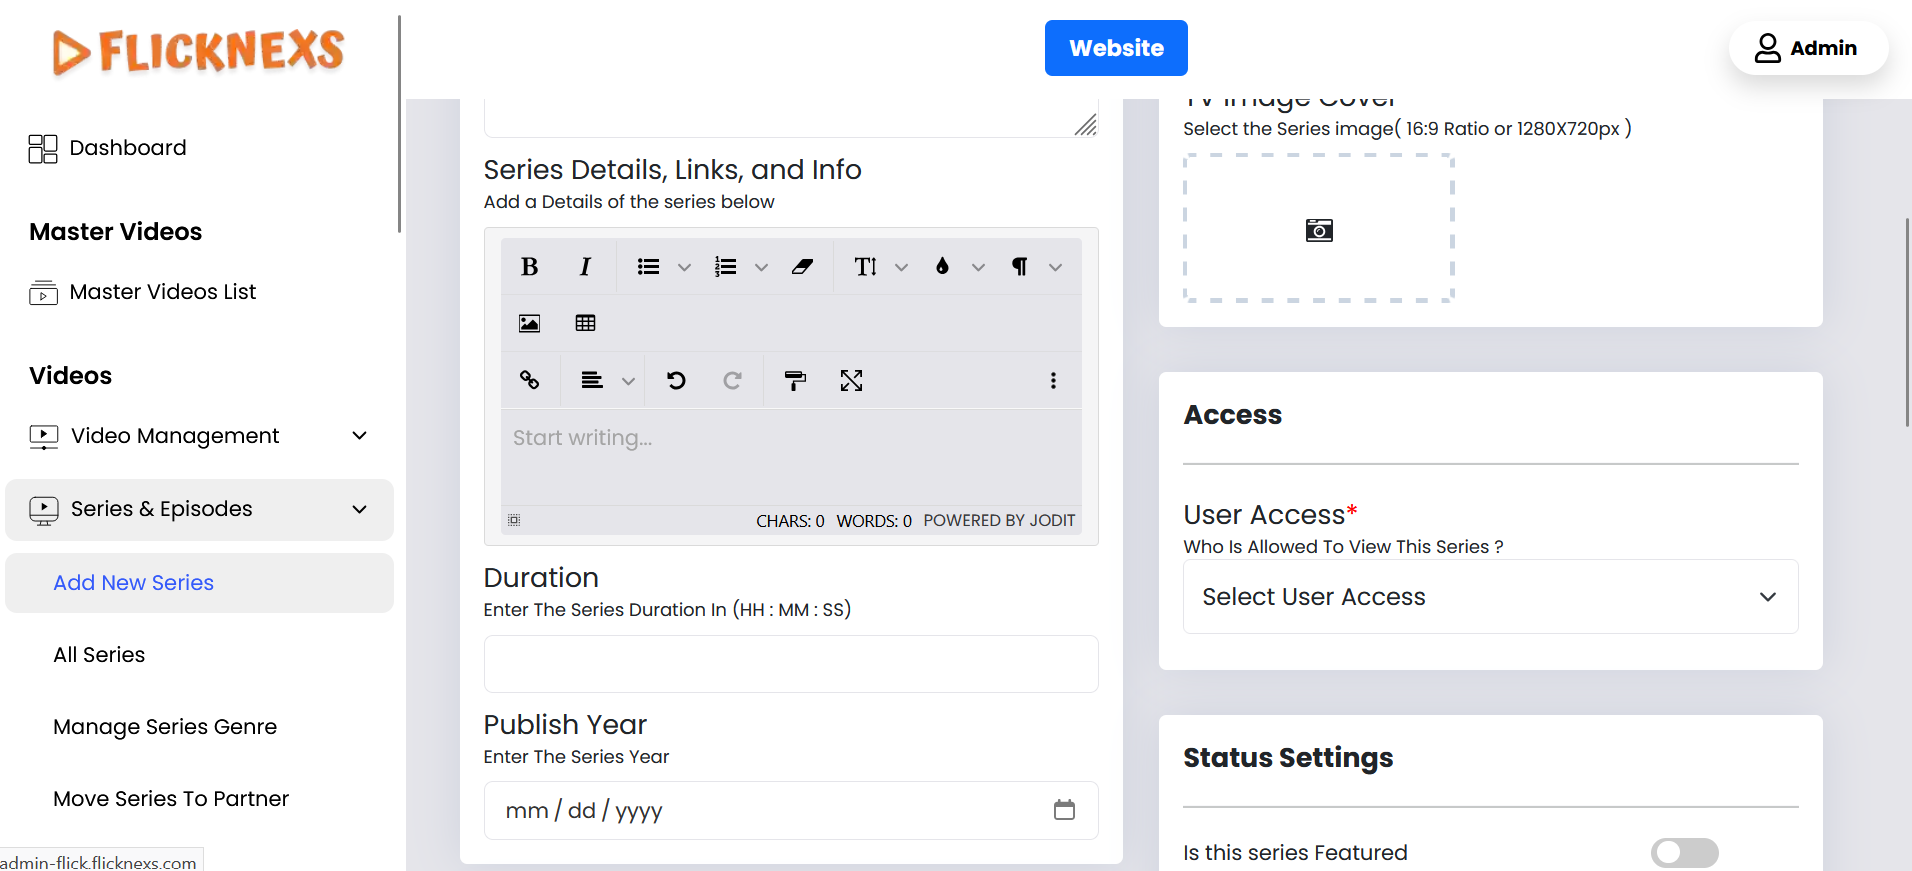
Series Details, Links, and Info – Add a Description for the Series
- Purpose: This section provides viewers with detailed information about the Series, including its plot, genre, and key highlights.
- Details: Write a comprehensive description that gives an overview of the show’s content. You can also include links to trailers, official websites, or any relevant references. This section is crucial for attracting viewers and providing them with context.
Cast & Crew – Add the Names of the Artists and Crew Members
- Purpose: This section highlights the key people involved in the creation of the Series, such as actors, directors, and writers. It provides credit to the talent behind the Series.
- Details: Enter the names of the cast and crew members. You can also link to their profiles if available on your platform. Use the “Artist Management” section under the admin settings to manage and add new artists to this list.
Category – Choose the Appropriate Category for the Uploaded Series
- Purpose: Categories help organize content on your platform, making it easier for users to find shows based on their interests.
- Details: Select the most relevant category from the available options. Ensure that the category aligns with the show’s genre, such as Drama, Comedy, or Documentary.
Language – Select the Appropriate Language for the Series
- Purpose: This field specifies the language in which the Series is available, helping users filter content based on language preferences.
- Details: Choose the correct language from the options provided. If you need to manage or add new languages, use the “Manage Languages” section under the admin settings.
Publish Year – Specify the Year the Series was Created
- Purpose: Indicating the year of creation helps viewers understand the timeline of the show, whether it’s a recent release or a classic.
- Details: Enter the year the show was produced or first released. This information is often used in search filters and can be important for viewers looking for content from specific periods.
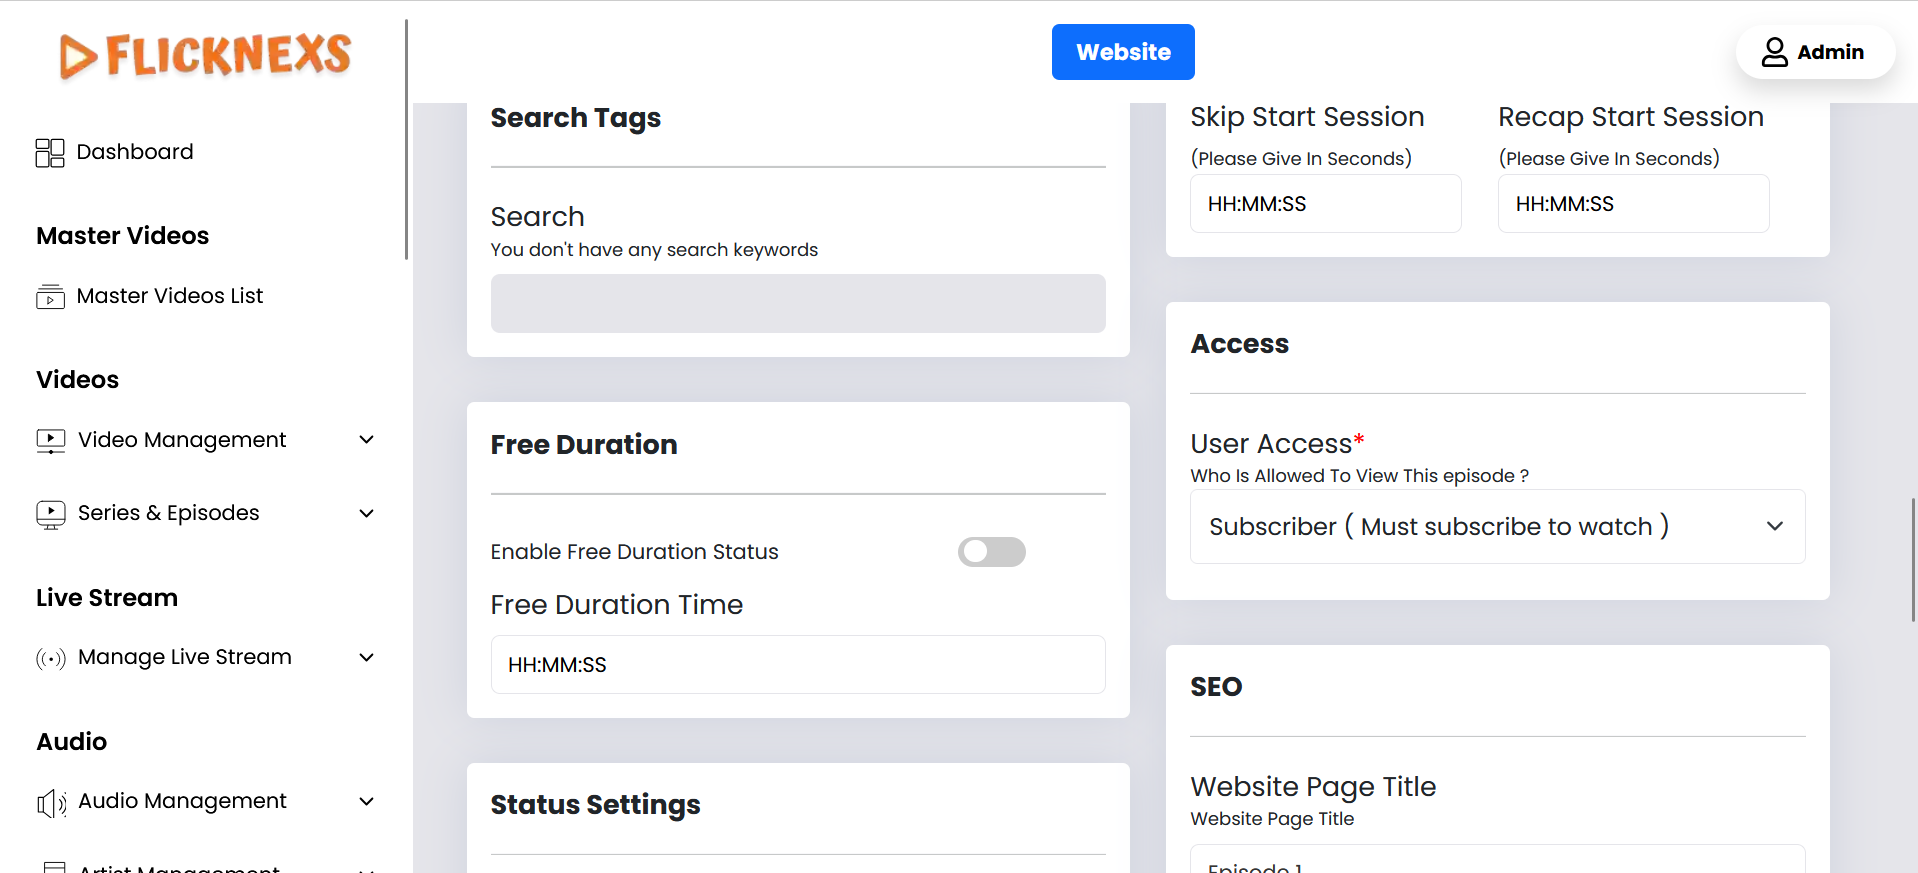
Search Tags – Create and Add Search Tags to Make the Series Easily Searchable
- Purpose: Tags are keywords associated with the that enhance its discoverability on the platform.
- Details: Add relevant tags that reflect the content, themes, or key elements of the show. For example, tags might include “mystery,” “supernatural,” or “crime drama.” These tags help users find the show when searching for specific topics.
Duration – Mention the Series’ Duration
- Purpose: Duration indicates the total length of the Series or the average length of episodes. It helps viewers decide whether they have enough time to watch.
- Details: Enter the duration in hours and minutes or indicate if it’s per episode. This information is often displayed alongside other show details.
User Access – Select the User Access Options
- Purpose: This field allows you to control who can view the Series, based on their access level.
- Details:
- Guest (Everyone): The show is available to all users, including those who are not logged in.
- Subscriber: Only users who have subscribed to your platform can watch the show. This is ideal for premium content.
- Registered User: Users must create an account and log in to watch the show. This is a way to encourage user registration.
These fields are essential for setting up a Series on your platform, ensuring that all necessary information is provided and that the show is presented professionally to your audience.
Create Season & Episode

Create Seasons by Editing the Created Series
Once you’ve created a Series on your platform, you can further enhance its structure by adding seasons. This can be done by editing the existing Series. Here’s how you can manage this:
- Access the Series:
- Navigate to the list of Series on your platform.
- Locate the specific Series you want to manage.
- Edit the Series:
- Click on the “Edit” button or option next to the Series title.
- This will open up the editing interface where you can modify the Series details and create seasons under the manage seasons and episodes section.
- Delete the Series:
- If you need to remove the Series entirely, you can use the “Delete” option.
- Be cautious with this option as deleting the Series will remove all associated seasons and episodes.
- Typically, a confirmation prompt will appear to ensure that you intend to delete the Series.
Benefits of Using These Options:
- Creating Seasons: Adding seasons allows you to organize episodes effectively and provide a structured viewing experience for your audience.
- Deleting: If a Series is no longer relevant, the delete option provides a quick way to remove it, keeping your platform organized and clutter-free.
By using these options, you can efficiently manage your Series and ensure that they are presented in the best possible way to your audience.
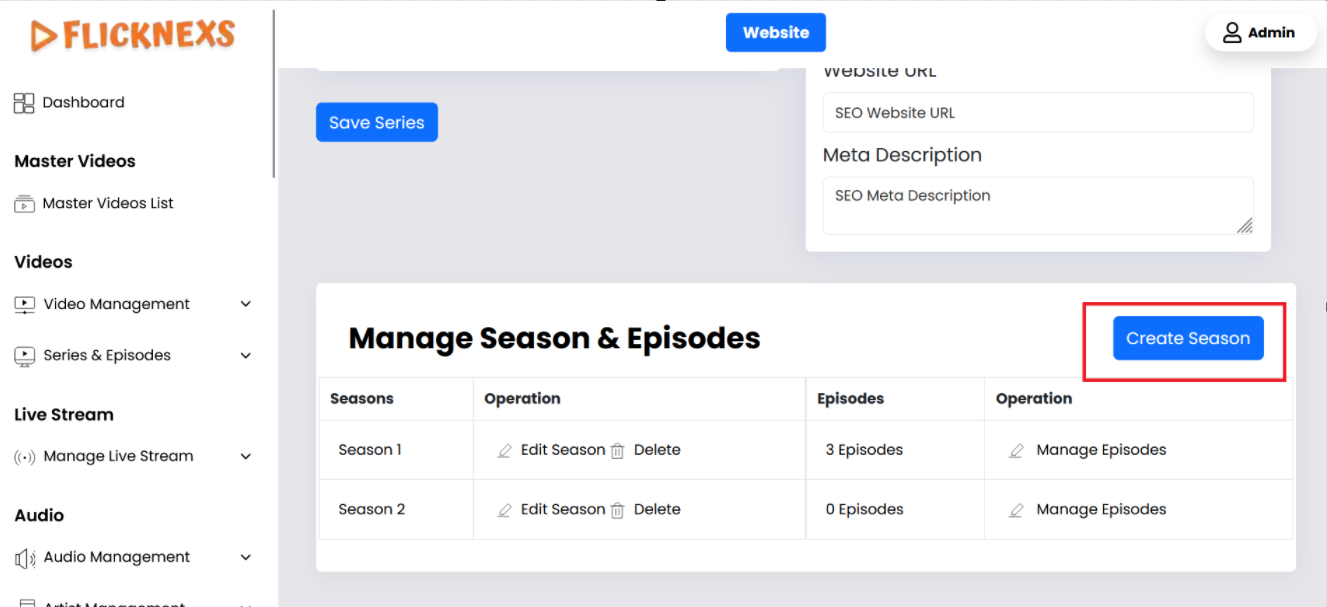
Create Season

Title – Add the Season’s Title
- Purpose: The season’s title is a key identifier for the content and is typically displayed prominently on your platform.
- Details: Enter a concise and descriptive title for the season. This title should convey the content or theme of the season, making it easy for users to identify and differentiate between multiple seasons of the same Series.
Season Thumbnail – Upload the Season Thumbnail Image
- Purpose: The season thumbnail is a visual representation of the season, used as the cover image or icon when users browse the platform.
- Details:
- Upload Process: you can select the image file manually from your files.
- Quality: The thumbnail should be high-quality, visually appealing, and relevant to the season’s content.
- Dimensions: Follow the recommended image dimensions and file size guidelines to ensure the thumbnail displays correctly on all devices.
Season Trailer – Upload a Season Trailer Video
- Purpose: The season trailer serves as a promotional video, giving viewers a sneak peek of what to expect in the upcoming episodes. It’s an essential tool to attract and engage your audience.
- Details:
- Drag and Drop: You can simply drag the trailer file from your computer and drop it into the designated area to start the upload process.
- File Selection: Alternatively, you can click on the upload area to browse your files and select the trailer video manually.
- Format: Ensure that the video file meets the platform’s format and size requirements to avoid upload issues.
Choose User Access – Select User Access Options
- Purpose: This option allows you to control who can view the season, providing flexibility in content distribution and monetization.
- Details:
- Guest: Selecting this option means the season will be accessible to all users without any payment. It’s ideal for promotional content or to attract a wider audience.
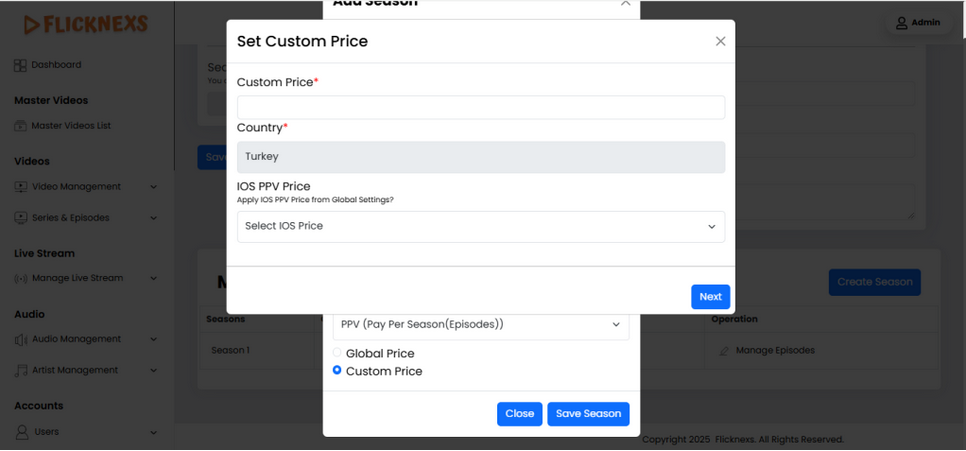
- PPV (Pay-Per-View) User: This option requires users to pay to watch the season. It’s suitable for premium content where monetization is a priority.
iOS PPV Price – Set the iOS Pay-Per-View Price
- Purpose: This field allows you to specify the price that iOS users must pay to access the season.
- Details:
- Pricing Strategy: Set a competitive and fair price based on the content’s value, market trends, and monetization goals.
- Currency: Ensure the price is in the correct currency and meets the platform’s pricing requirements for iOS users.
PPV Interval – Specify Free Episodes within the Season
- Purpose: The PPV Interval feature lets you offer a certain number of episodes for free before requiring payment, helping to attract users who might then be willing to pay to watch the rest of the season.
- Details:
- Episode Count: Enter the number of episodes you wish to make available for free. For example, if you enter “2”, the first two episodes will be free, and users will need to pay to watch subsequent episodes.
- Engagement Strategy: Use this feature to hook viewers with free content before transitioning them to a paid model, boosting both viewership and revenue.
These fields provide you with the flexibility to manage and customize the user experience for each season on your platform, ensuring that content is accessible and monetized according to your strategy.
Create Episode
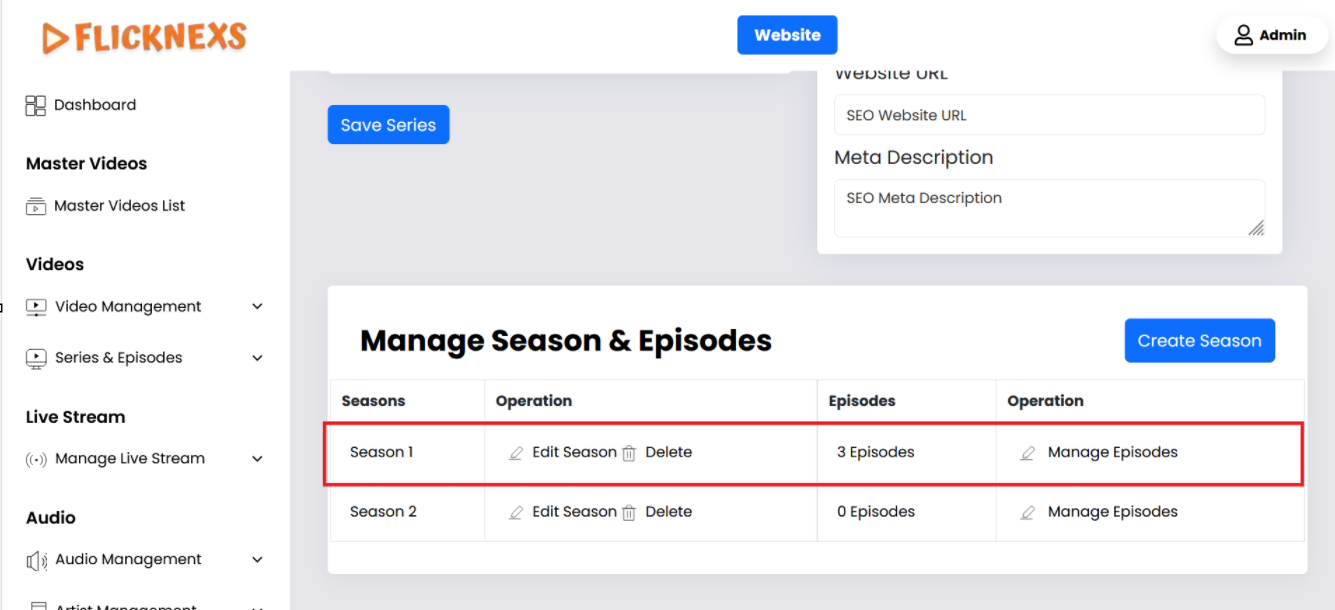
To manage episodes for a Series, you can use the “Manage Episodes” option. This allows you to create new episodes, edit existing ones, or delete entire seasons from the Series.
Steps to Upload and Manage Episodes:
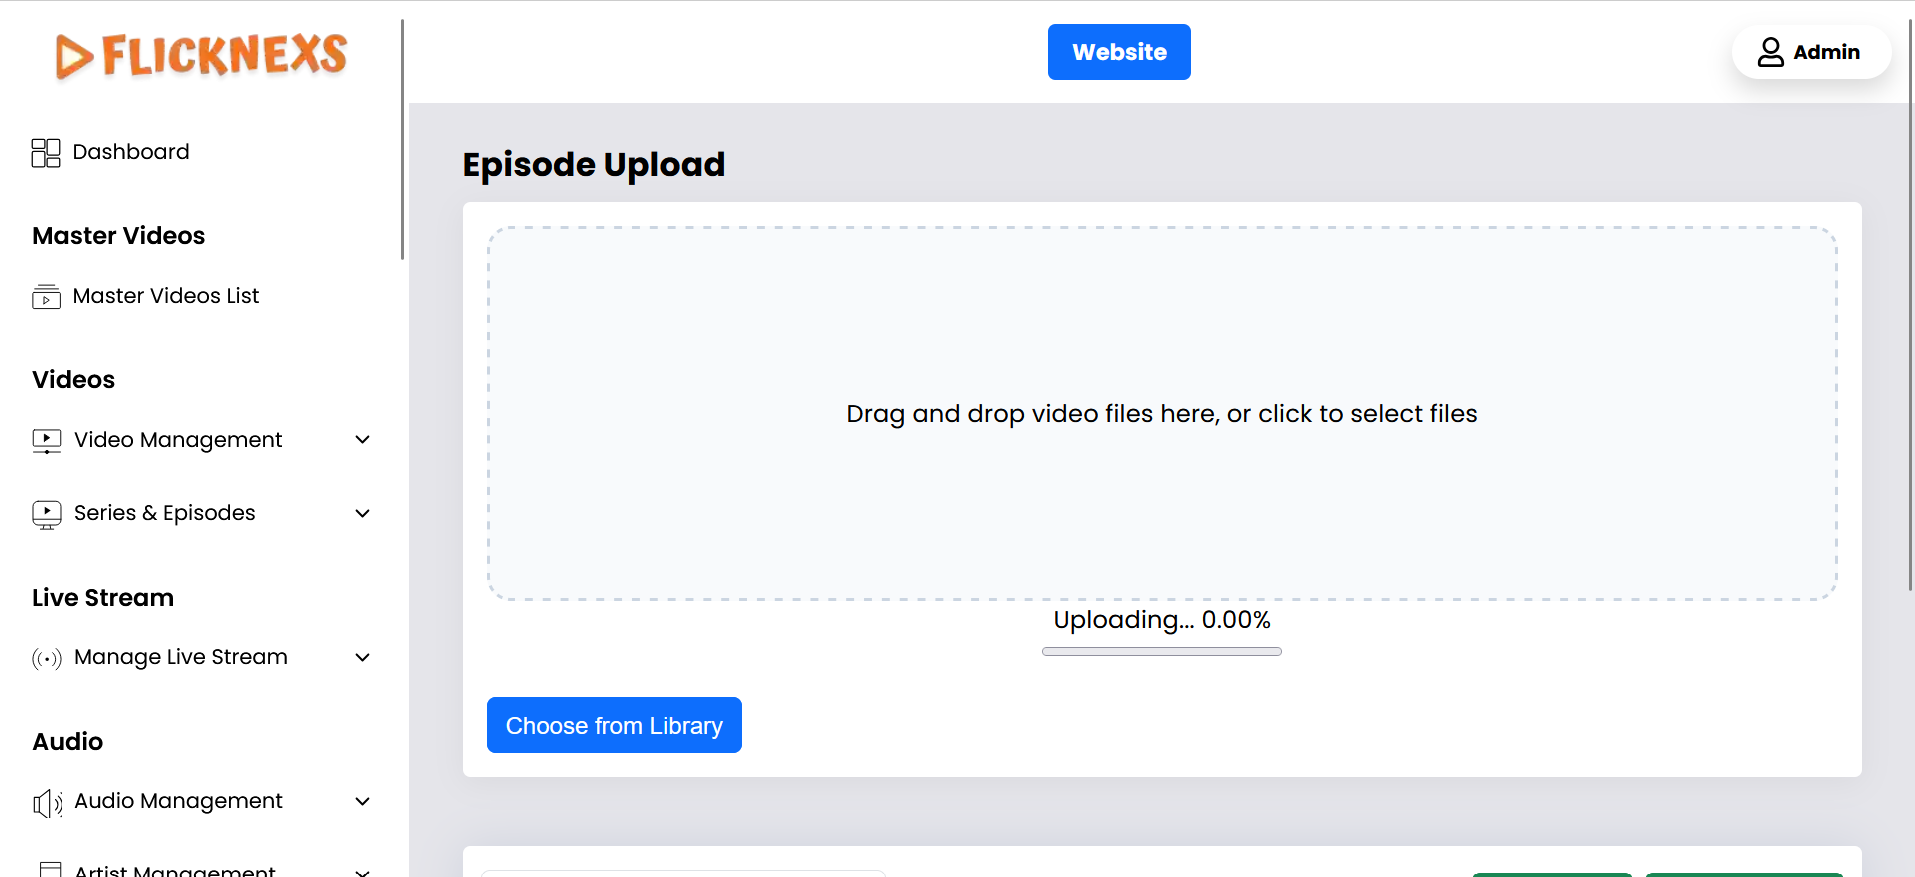
- Uploading Video:
- You can upload the episode video by either dragging and dropping the file into the upload area or selecting the file from your computer.
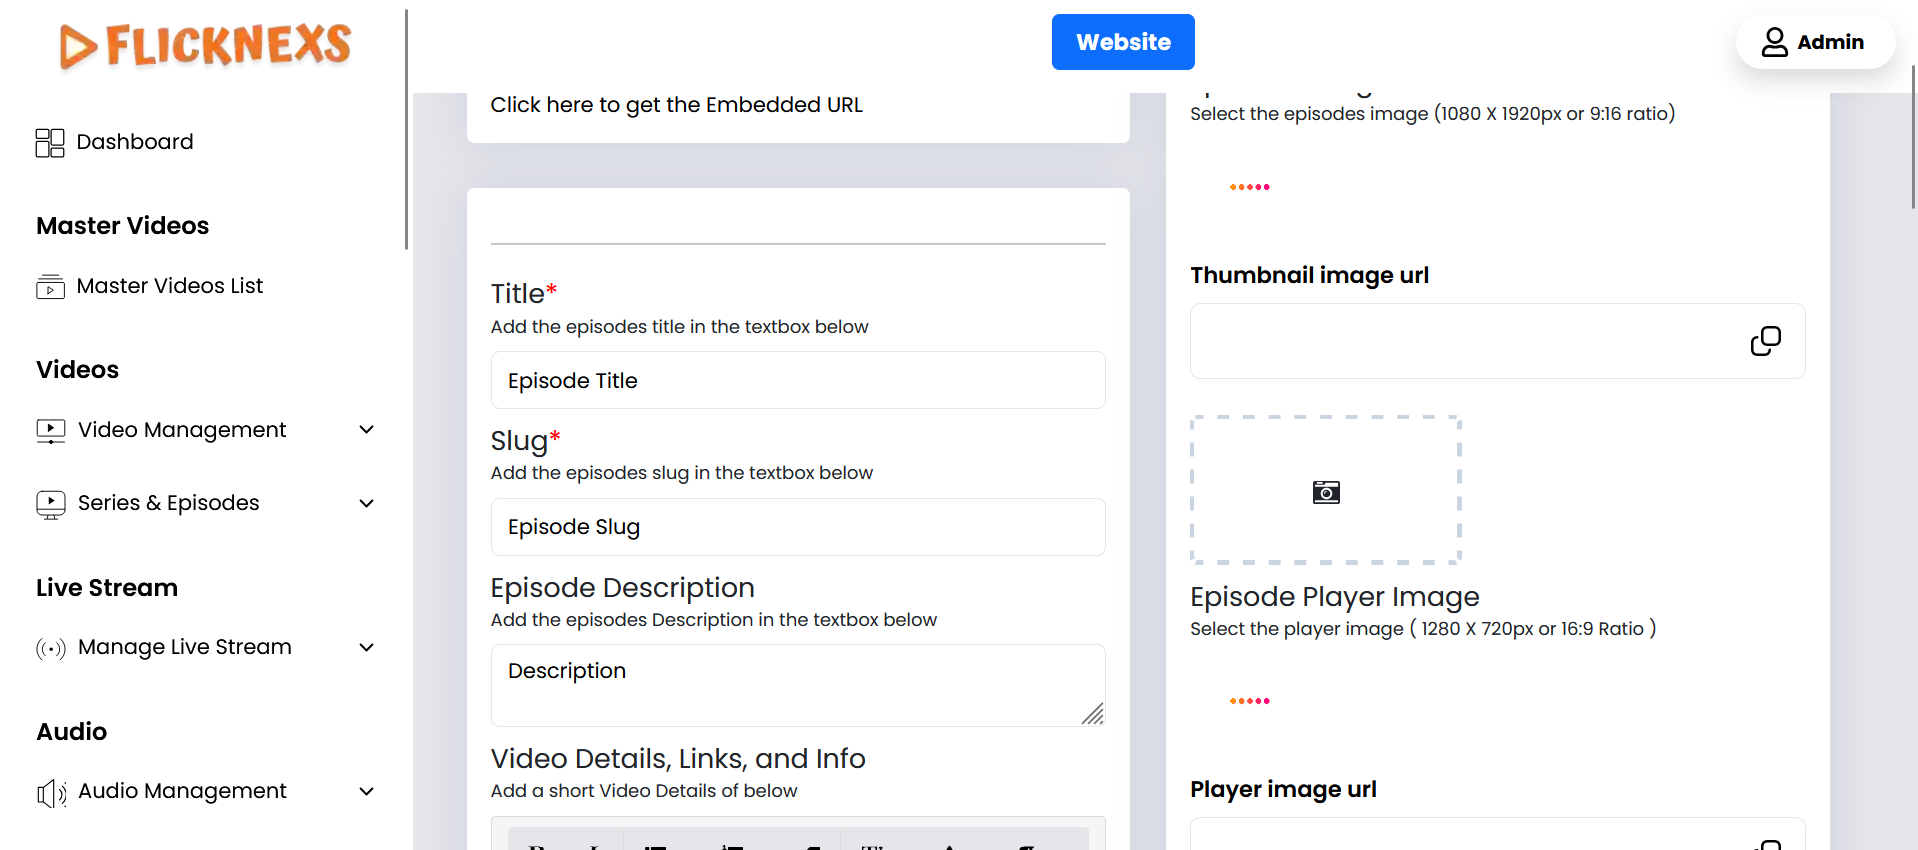
Episode Details:
- Title: Enter the episode’s title.
- Slug: Create a URL-friendly slug for the episode, which will be used in the episode’s URL.
- Episode Image Cover: Upload an image that represents the episode, typically used as a cover image.
- Episode Player Image: Upload an image that will be displayed in the episode player.
- Episode Description: Provide a detailed description of the episode, summarizing its content.
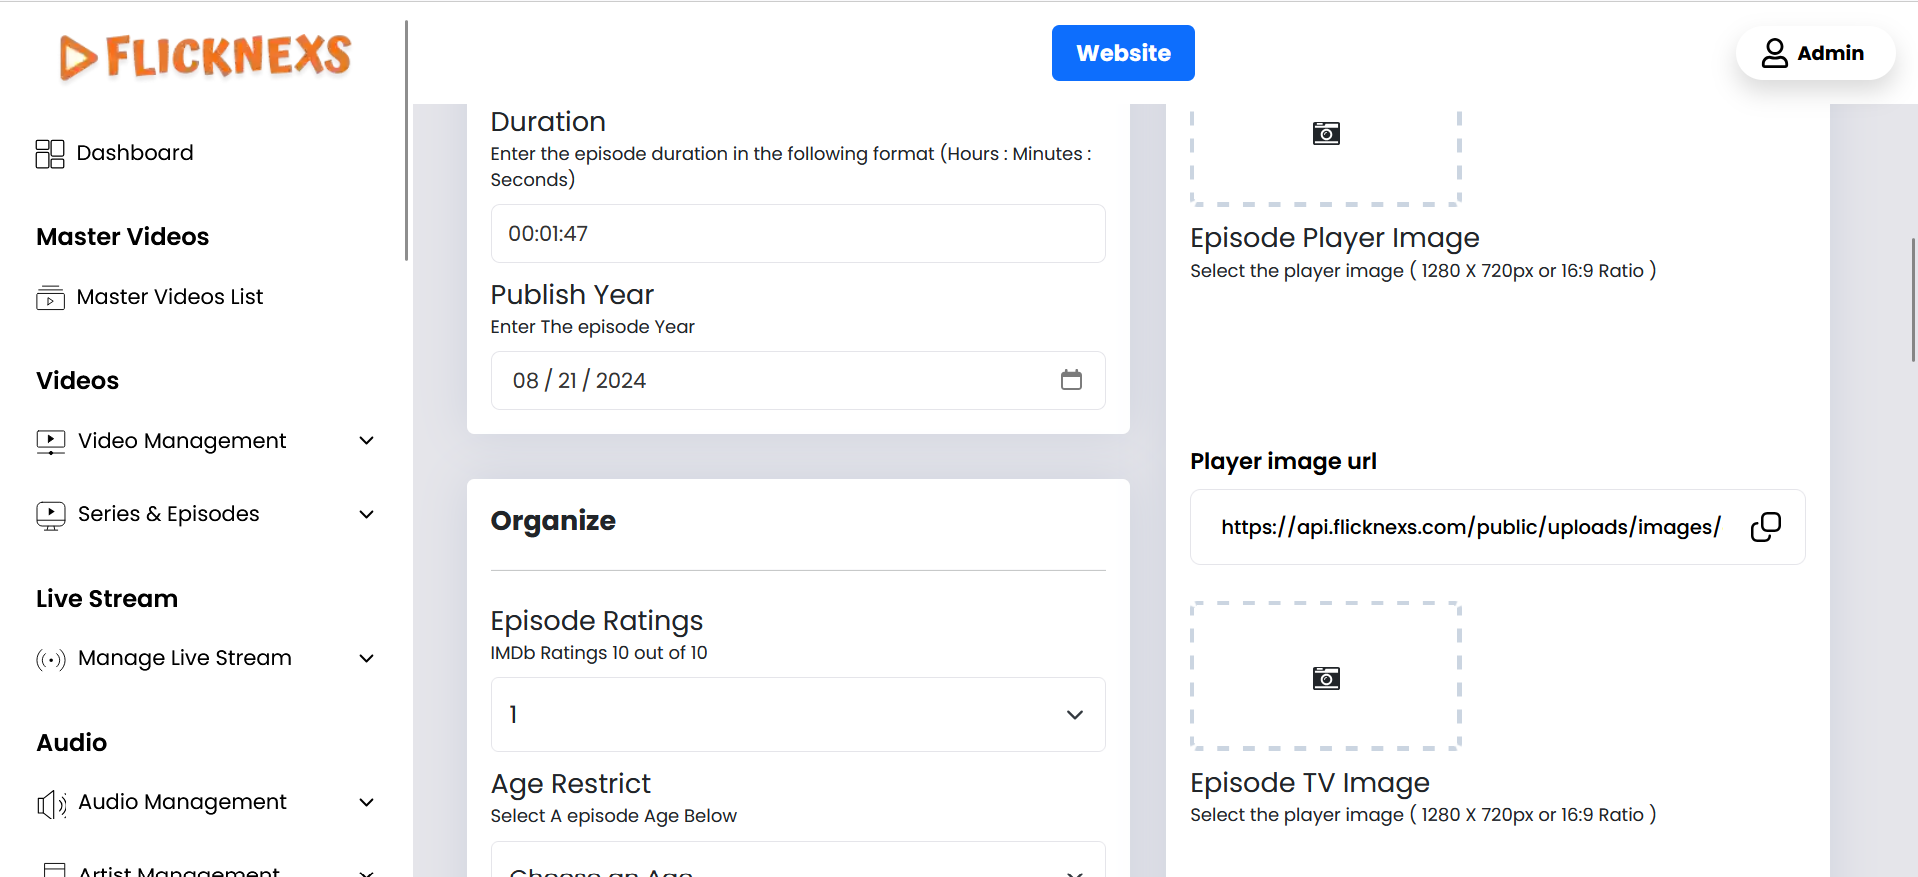
- Episode Rating: Input the IMDb rating, where applicable, out of 10.
Age Restriction:
- Specify the age group restrictions for the episode, ensuring that only viewers within the appropriate age range can access it.
Search Tags:
- Create relevant search tags to improve the discoverability of the episode.
Intro Time:
- Skip Intro Time, Intro Start Time, and Intro End Time: Specify the times (in seconds) for when the intro begins and ends, and when viewers can skip it.
- Skip Recap Time, Recap Start Time, and Recap End Time: Similarly, set the times for recap segments.
- Subtitles:
- Add subtitle files for the episode to accommodate different languages or accessibility needs.
- Advertisements:
- Choose Ads Position: Select where ads will be placed during the episode.
- Choose Advertisement: Select specific ads to be displayed.
- Duration:
- Enter the total duration of the episode.
- User Access:
- Set access restrictions for the episode:
- Guest: Available to all visitors.
- Registered Users: Available to users who have signed up for free.
- Subscriber: Available only to paying subscribers.
- PPV Users: Available to users who pay per view (Pay-Per-View).
- Set access restrictions for the episode:
These features allow you to manage and control various aspects of each episode, ensuring a tailored experience for your audience.
In the episode management section, you can view a comprehensive list of all episodes within a Series. The list provides detailed information and several management options, allowing you to efficiently oversee and modify the content. Here’s a breakdown of the features available:
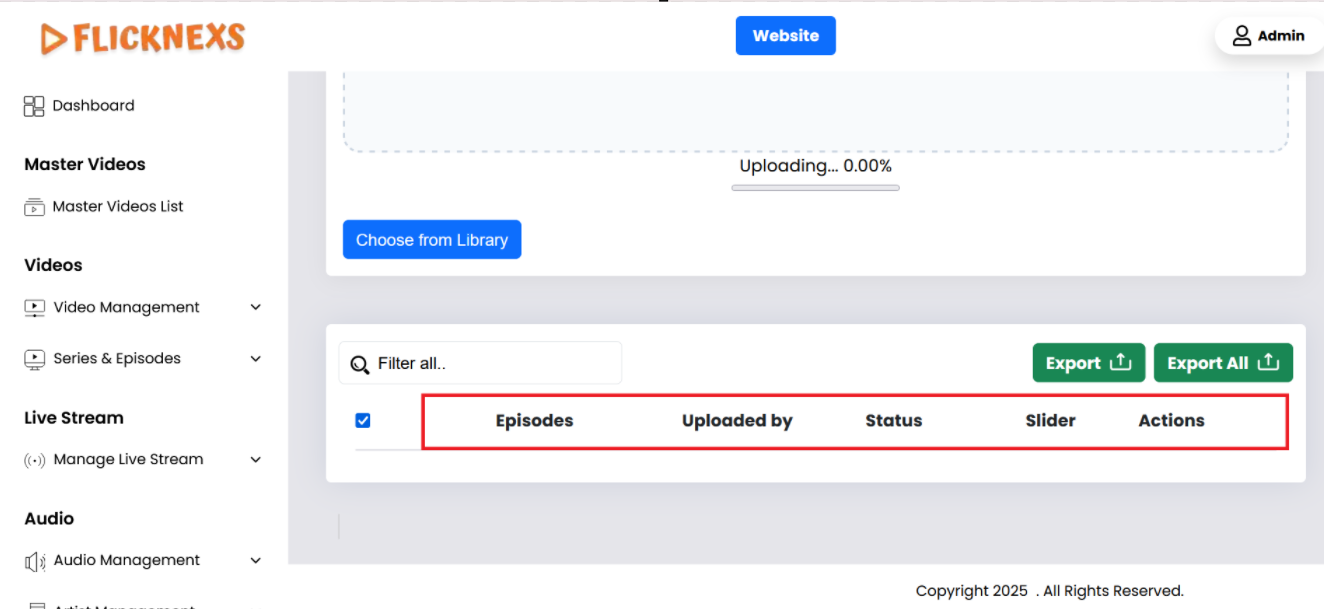
Episode List Overview:
- Episode Name:
- Shows the title of each episode, making it straightforward to find specific episodes by name.
- Uploaded by:
- This field shows the name of the person who uploaded the video.
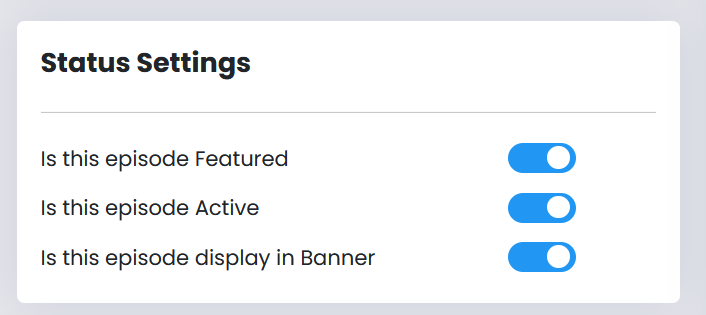
- Status of Episode:
- This field shows whether an episode is active or inactive. An active status means the episode is live and viewable by users according to their access permissions. An inactive status means the episode is hidden from viewers but not deleted.
- Slider for Episode Activity:
- Active/Inactive Toggle: This slider lets you control whether the episode is currently active and available to viewers. You can easily toggle the episode’s availability without deleting it from the system.
- Actions:
- Edit: You can click the edit button to modify any details of the episode, such as the title, description, images, or access settings.
- Delete: This option allows you to permanently remove an episode from the list.
- Bulk Delete Option:
- Search and Select: You can search for specific episodes using the search bar and then select multiple episodes at once. Once selected, you can delete them in bulk, streamlining the process of managing large volumes of content.
This interface is designed to provide a clear and efficient way to manage episodes, enabling quick access to important details and allowing for easy modifications or deletions as needed.
Manage Series Genre
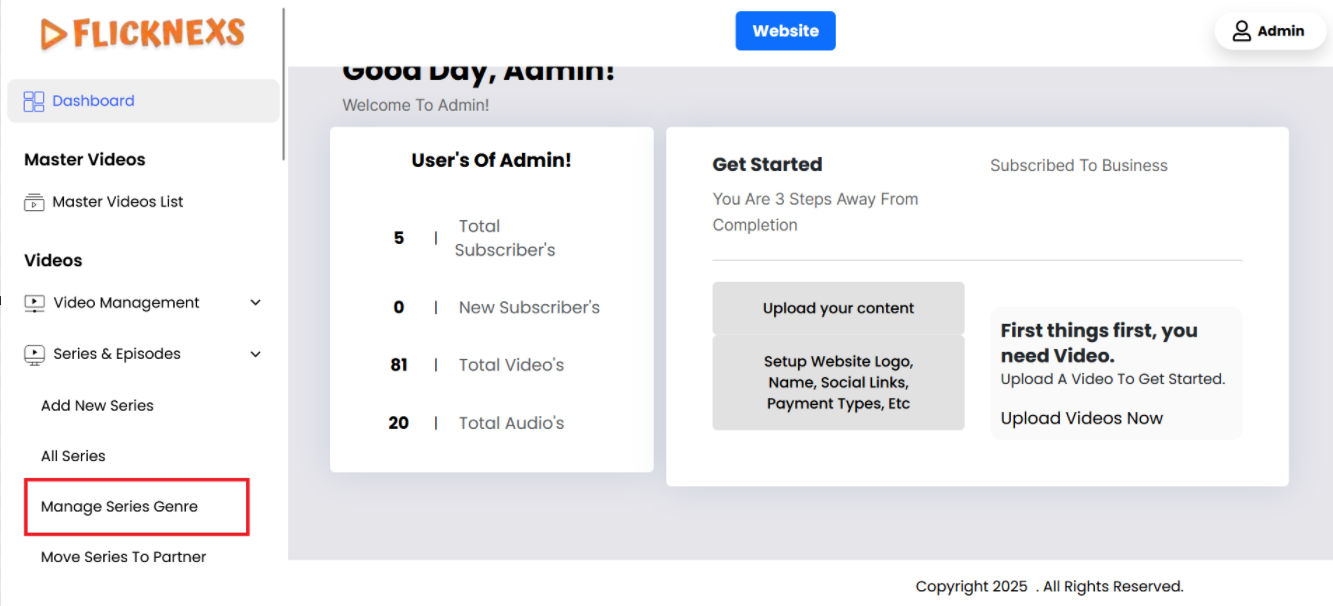
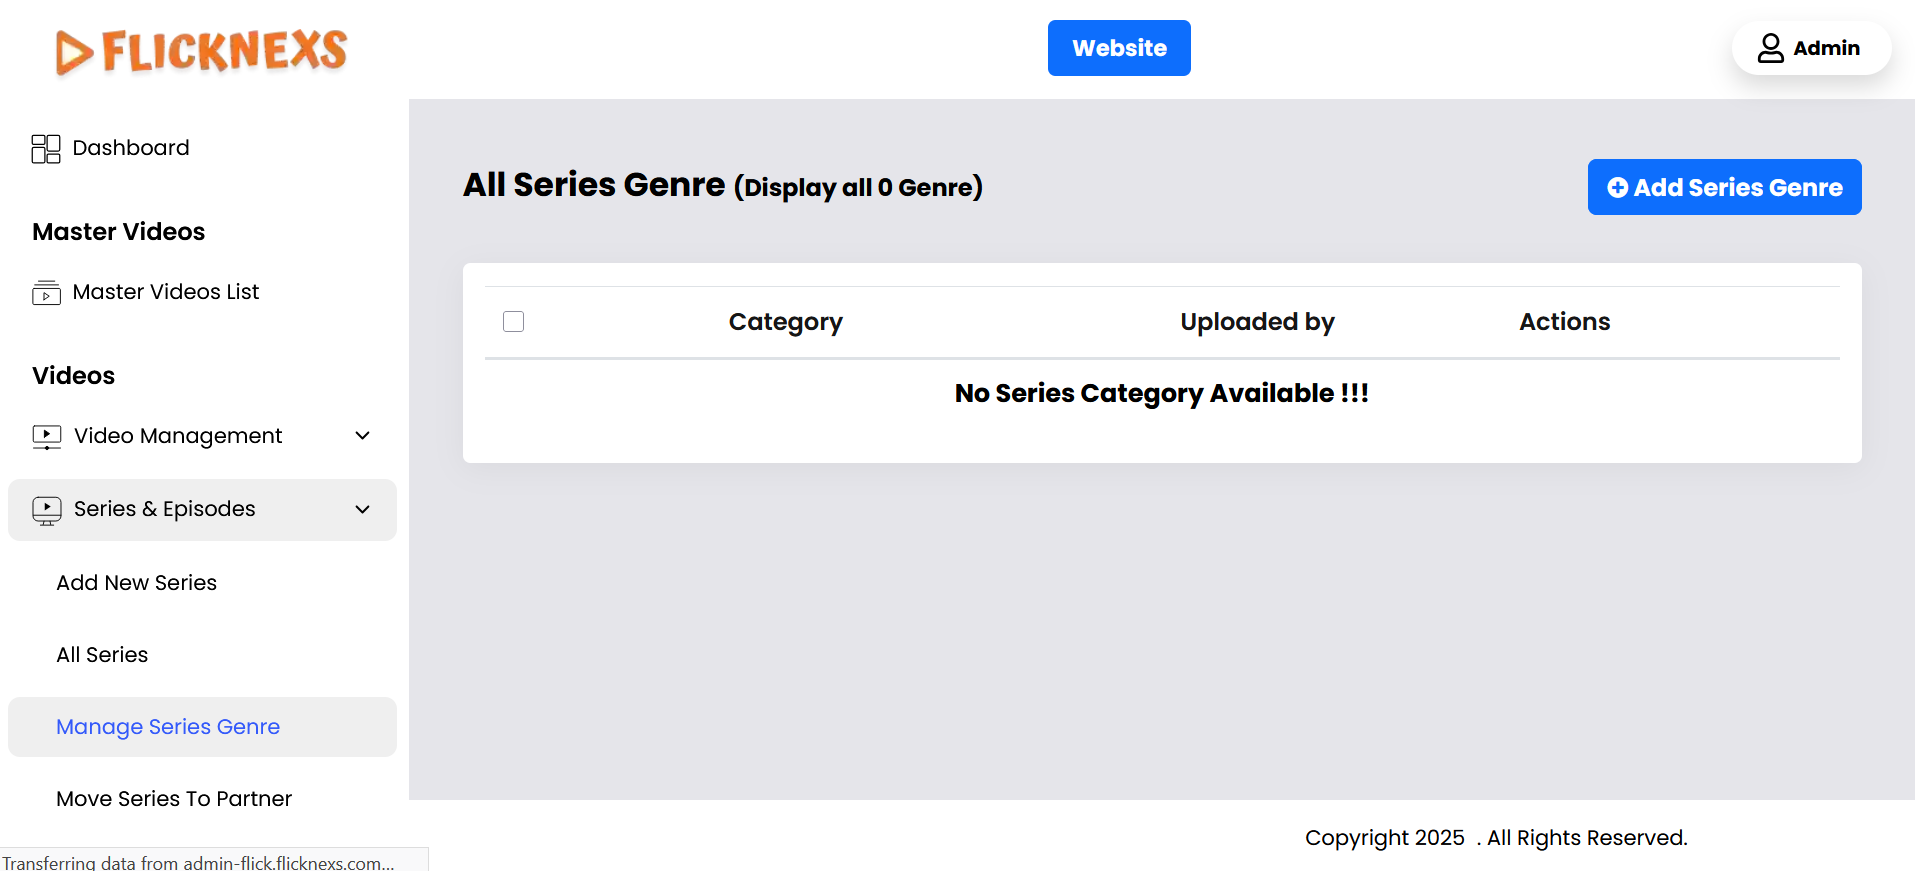
In the genre management section, you can view and manage a list of all Series genres that have been posted on your platform. This section is designed to give you a clear overview of each genre, along with the ability to perform various operations on them. Here’s a detailed explanation of what you can see and do:
Genre List Overview:
- Series Genre Image:
- Displays a representative image for each genre. This image typically reflects the theme or mood of the genre and is used across the platform to visually differentiate between genres.
- Series Genre Name:
- Shows the name of each genre, such as “Drama,” “Comedy,” “Action,” etc. The genre name helps you quickly identify and categorize the types of Series available on the platform.
- Actions:
- Edit: The edit option enables you to modify the genre details, such as changing the genre name or updating the genre image. This is useful if you need to refresh the genre’s branding or correct any errors.
- Delete: If a genre is no longer relevant or needed, you can permanently remove it from the platform using the delete option. This will eliminate the genre from the list and remove its association with any Series.
This genre management interface is designed to help you efficiently organize and update the Series genres on your platform, ensuring that the content remains relevant, visually appealing, and easy for users to navigate.
Add Series Genre
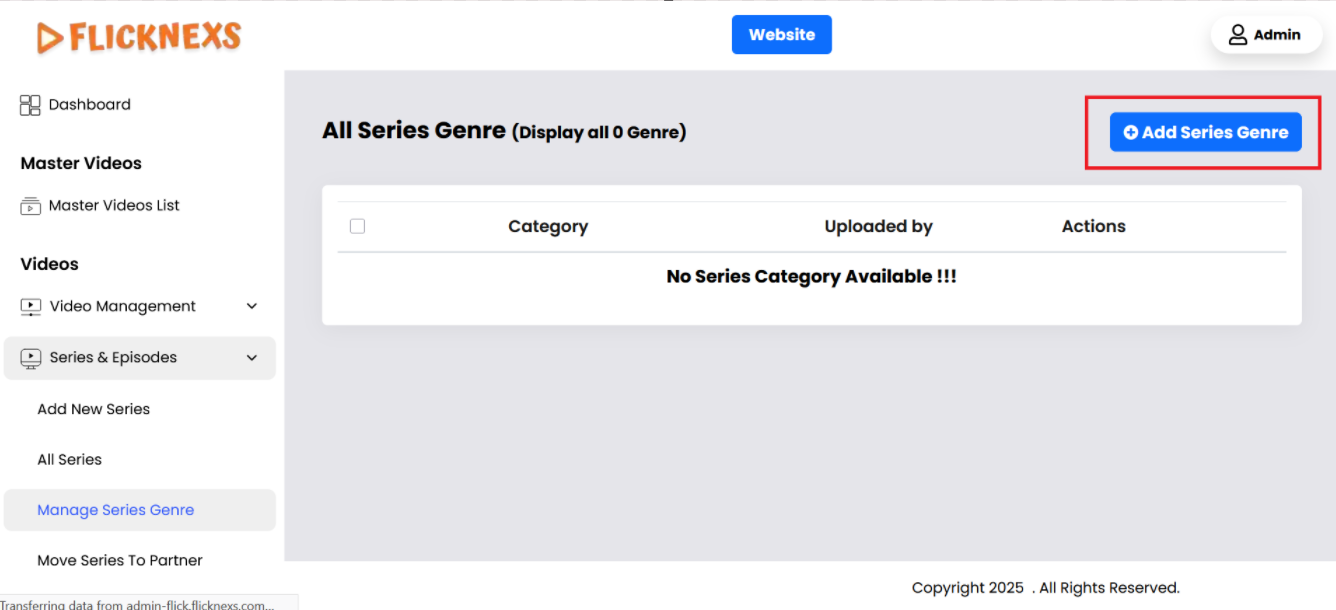
When creating or editing a genre on your platform, you have several options to configure how the genre will appear and function. Below is a detailed explanation of each field and setting available:
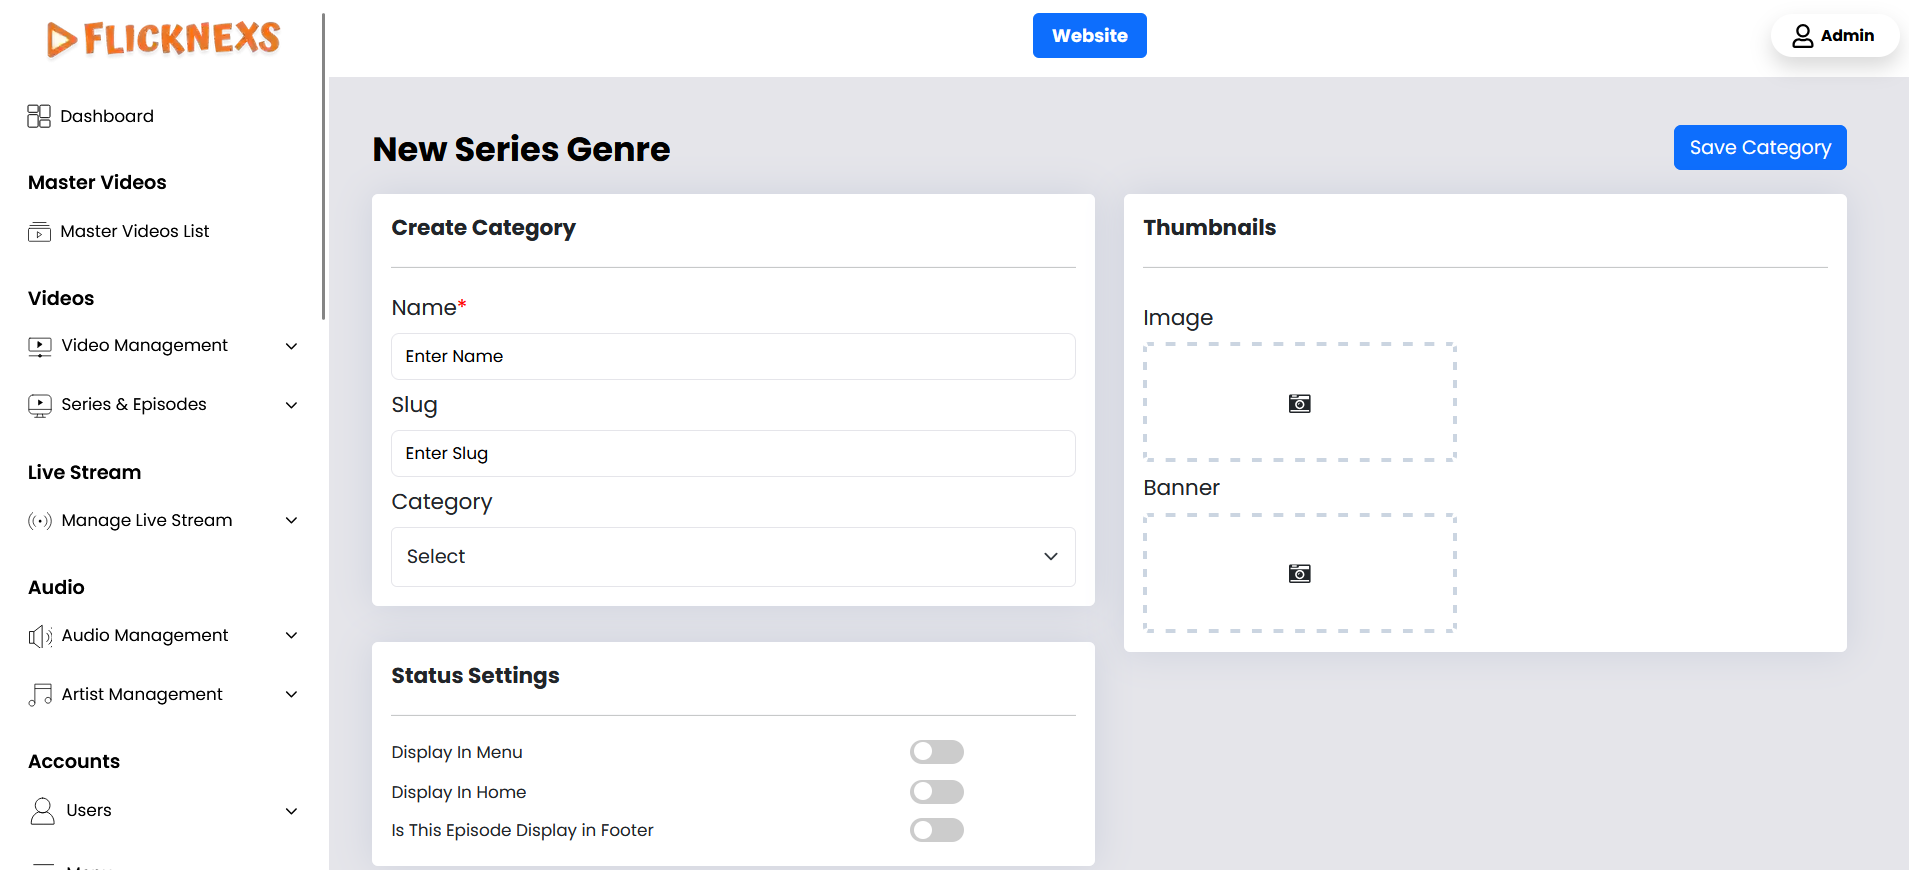
Genre Configuration Fields:
- Name:
- Purpose: Enter the name of the genre, which will be displayed across the platform. This name should clearly represent the type of content included within this genre, such as “Action,” “Romance,” or “Documentary.”
- Usage: This name will be visible to users when they browse or filter content by genre, so it should be clear and concise.
- Slug:
- Purpose: Enter a URL-friendly version of the genre name, known as a “slug.” This slug will be used in the genre’s URL, making it easier to access and share.
- Usage: The slug should be lowercase, with words separated by hyphens (e.g., “action-adventure”). It’s essential for SEO (Search Engine Optimization) and for creating clean, user-friendly URLs.
- Genre (Sub-Genre Creation):
- Purpose: If you want to create a sub-genre, you can select a main genre from the list here.
- Usage: This allows you to create hierarchical relationships between genres, organizing content into broader categories with more specific sub-genres beneath them. For example, under the main genre “Action,” you could create sub-genres like “Superhero” or “Martial Arts.”
- Save Changes: After configuring all the settings, click “Save Changes” to apply the updates or create the new genre. This will add the genre to your platform according to the configurations you’ve set.
- Display in the Menu:
- Purpose: Decide whether or not this genre should be included in the main navigation menu of your homepage.
- Options:
- Yes: Selecting this will add the genre to the homepage menu, making it easily accessible for users to find content under this genre.
- No: If selected, the genre will not appear in the main menu but will still be accessible through other means, like browsing or search functions.
- Display In Home:
- Purpose: Choose whether this genre should be featured directly on the homepage.
- Options:
- Yes: Selecting this option will display the genre prominently on the homepage, possibly as part of a featured section or carousel, making it highly visible to users.
- No: The genre will not be highlighted on the homepage but can still be accessed through other navigation methods.
- Image:
- Purpose: Upload an image that visually represents the genre. This image will be used as a thumbnail or icon on the platform, helping users quickly identify the genre.
- Usage: The image should be relevant to the genre and visually appealing, as it enhances the user experience by adding visual context.
- Banner:
- Purpose: Upload a banner image for the genre, which will be displayed in larger sections, such as the top of the genre’s landing page or in featured areas.
- Usage: The banner image should be high-quality and capture the essence of the genre, as it will serve as a key visual element when users explore content within this genre.
These settings give you comprehensive control over how genres are created, displayed, and organized on your platform, ensuring that content is easily accessible and visually appealing to users.