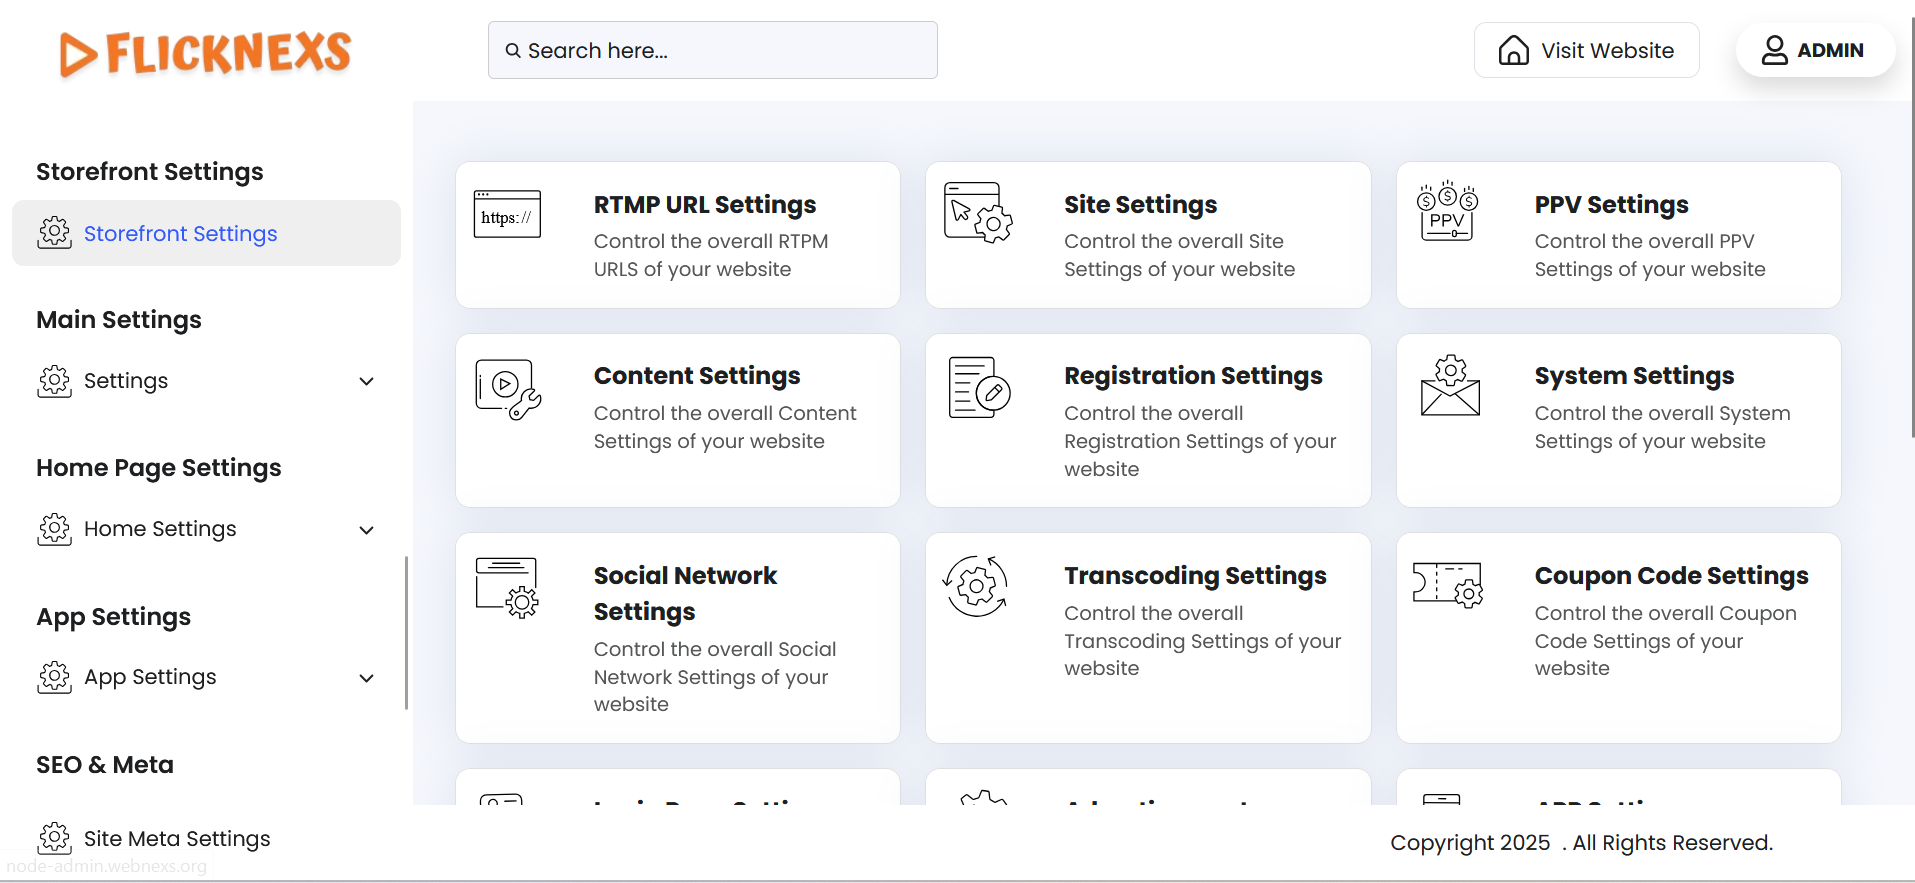
The Storefront Settings section is a central configuration area in the admin panel that allows you to manage the look, feel, and behavior of your platform’s homepage, storefront, and key user-facing components. These settings directly impact the visual presentation, promotional content, access settings, and monetization features shown to users across web and app platforms.
RTMP URL Settings

The RTMP URL Settings section allows administrators to manage all the streaming endpoint URLs used for live streaming or video broadcasting within the platform. This includes both RTMP (Real-Time Messaging Protocol) URLs and HLS (HTTP Live Streaming) URLs.
List View
The main interface displays a structured list of all existing RTMP and HLS URLs. Each entry typically includes:
- RTMP URL – The streaming ingest URL used for pushing live streams.
- HLS URL – The playback URL used for delivering the stream to viewers.
- Action – Options to manage each entry (Edit or Delete).
Actions Available
Edit
- Clicking on the Edit button allows you to:
- Update or modify the existing RTMP URL and HLS URL.
- This is useful if the stream source or CDN provider has changed or if you want to switch to a different streaming endpoint.
- After editing, the updated URLs will be used wherever this stream is assigned.
Delete
- Clicking the Delete button will:
- Permanently remove the selected RTMP and HLS URL pair from the system.
- Once deleted, the URLs can no longer be used or referenced in any live stream setup.
- This helps keep the list clean and up to date by removing outdated or unused endpoints.
Adding RTMP Streaming URL and Streaming Key for Your Platform
RTMP (Real-Time Messaging Protocol) is widely used for live streaming to deliver high-quality video and audio content. To set up RTMP streaming on your platform, you need to configure the RTMP Streaming URL and Streaming Key provided by your server.
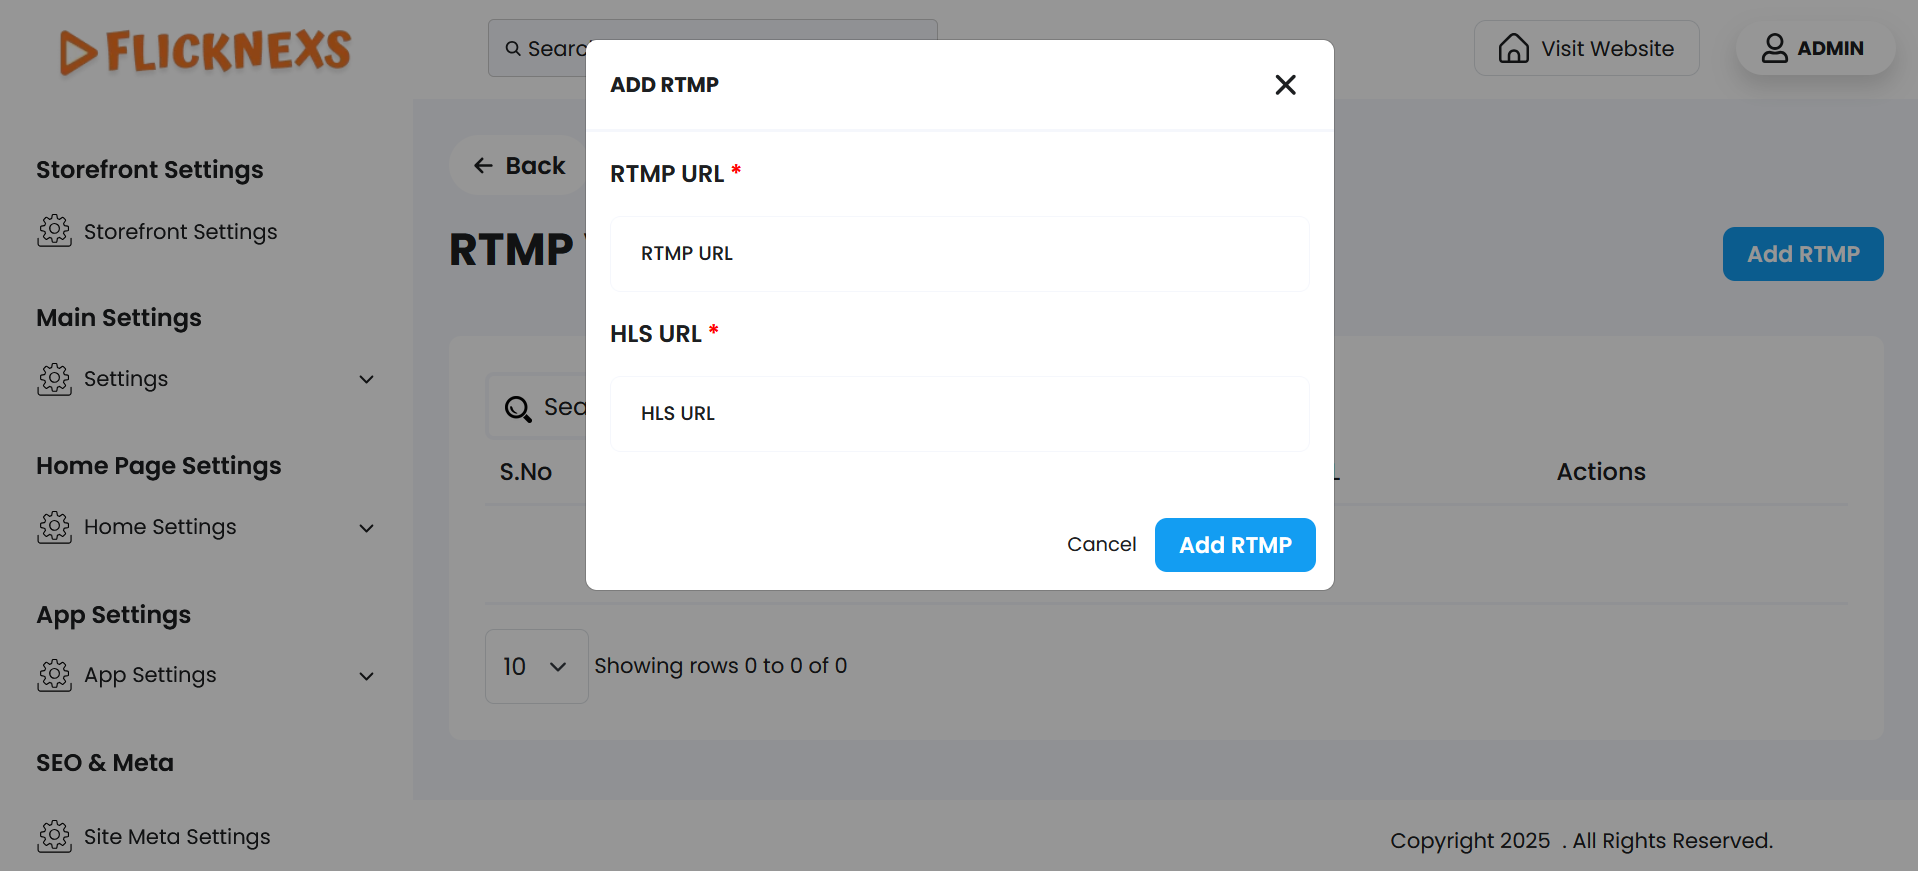
RTMP URL: This is the endpoint where your streaming content will be transmitted. It typically looks like:
rtmp://yourserver.com/live
HLS URL(Streaming Key): A unique identifier that ensures your stream is authenticated and linked to your account or session.
Purpose of RTMP URL Settings
This module ensures that you have full control over your live stream source and playback links. It allows for:
- Easy switching of streaming endpoints.
- Maintaining an organized list of active and inactive stream URLs.
- Quickly resolving streaming issues by updating endpoints.
Note: Always verify your URLs after editing to ensure the stream continues to function correctly on all platforms.
Site Settings
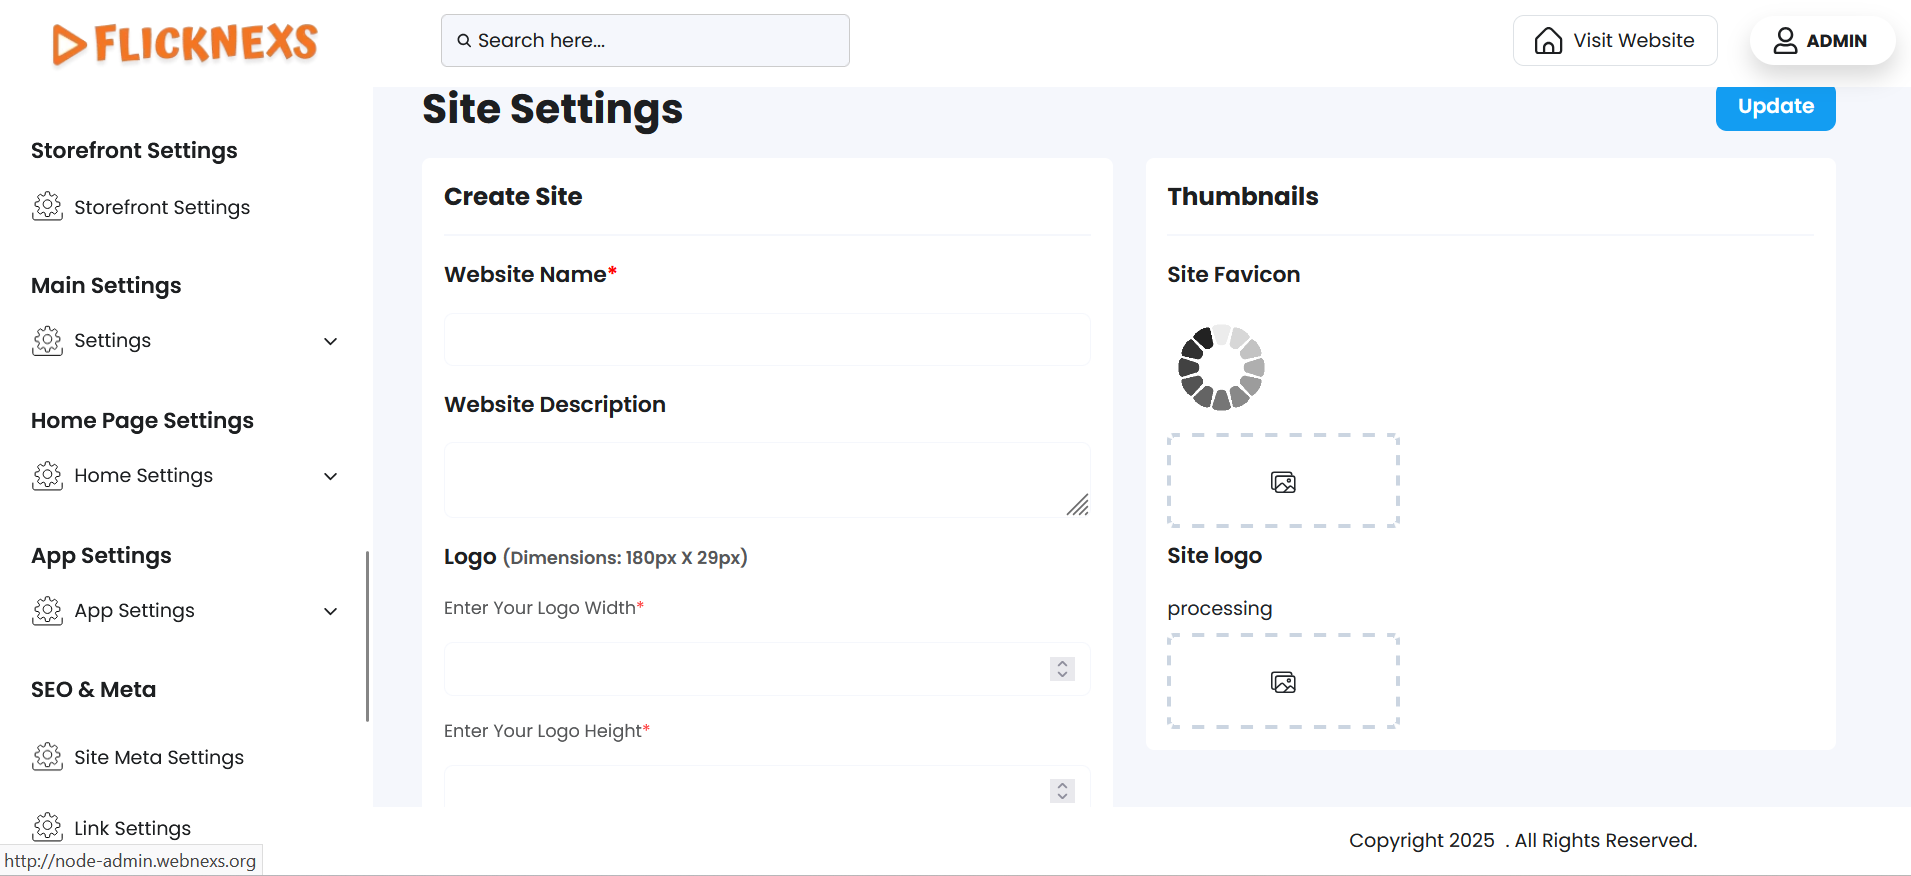
The Site Settings menu is a critical section in the Admin Panel, allowing you to customize and optimize the foundational aspects of your website. This section includes tools to enhance branding, improve search engine optimization (SEO), and personalize the user experience. Here’s a detailed explanation of its features:
Adding the Site Name
- Purpose: The site name represents your platform’s identity and is often displayed in the browser title, headers, and across the platform.
- SEO Impact: A well-chosen site name can improve your site’s visibility on search engines.
- How to Add:
- Locate the Site Name field in the Site Settings menu.
- Enter your platform’s name (e.g., “My Streaming Platform”).
- Click Save to apply the changes.
Adding the Site Description
- Purpose: The site description provides a brief overview of your platform’s purpose or offerings. It is often used in meta tags for search engines.
- SEO Impact: A concise and keyword-rich description can help your website rank higher in search results.
- How to Add:
- Locate the Site Description field.
- Add a short, engaging description (e.g., “Your ultimate destination for live streaming, entertainment, and exclusive shows.”).
- Ensure it aligns with your platform’s objectives and contains relevant keywords.
- Save the changes to reflect them in your site’s metadata.
Adding the Logo
- Purpose: The logo is the visual representation of your brand, displayed prominently on your platform, including the header, footer, and other key areas.
- Customization: You can upload your logo and adjust its size for optimal display.
- How to Add:
- Locate the Logo upload section.
- Click Upload, and select your logo file (recommended formats: PNG, SVG).
- Adjust the width and height settings to ensure the logo fits seamlessly into the platform’s design.
- Example: Width = 200px, Height = 50px (adjust based on your platform’s layout).
- Save the settings to apply the changes.
Adding the Favicon
- Purpose: The favicon is a small icon displayed in the browser tab and bookmarks, enhancing your site’s branding.
- How to Add:
- Locate the Favicon upload section.
- Upload a small image file (e.g., 16x16px or 32x32px, PNG or ICO format).
- Save the changes to display the favicon across browsers.
By leveraging the Site Settings menu, you can establish a strong brand presence, improve search engine visibility, and create a cohesive visual identity for your platform. These settings are essential for both functionality and user experience.
PPV Settings
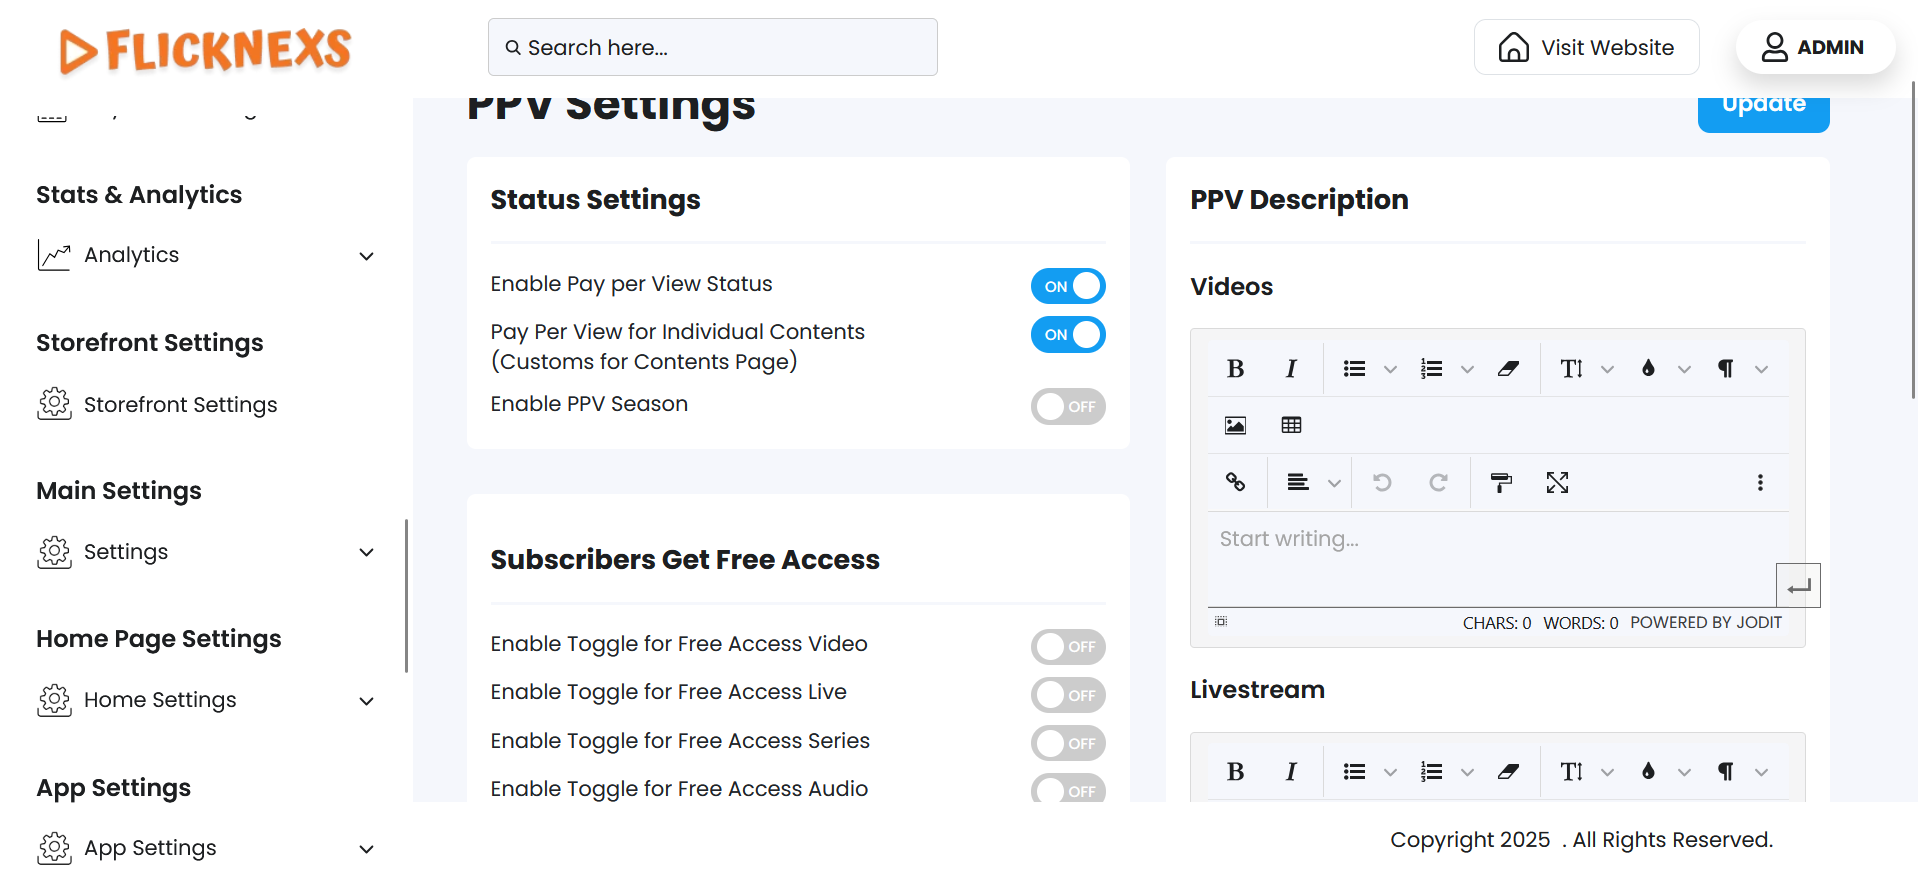
PPV Status Settings Overview
This section allows you to configure and manage how Pay-Per-View (PPV) functionality is applied across your platform, giving you control over monetization options for different types of content.
Enable Pay-Per-View Status
This is the master toggle for enabling or disabling PPV functionality across the entire platform.
- ON: Activates PPV features.
- OFF: Disables all PPV-related settings and options.
Pay-Per-View for Individual Contents (Custom for Contents Page)
Enables you to apply PPV pricing individually to specific content like videos, live streams, audios, or series from their respective content pages.
- This provides flexibility if only selected content needs to be monetized.
Enable PPV Season
Allows PPV pricing to be applied at the season level for series or TV shows.
- Useful for charging users per season rather than per episode.
Subscribers Get Free Access
Enable toggles here if subscribers should be allowed to watch PPV content for free, depending on the content type.
Enable Toggle for Free Access Video
- ON: Subscribers can watch paid videos without extra charge.
- OFF: Subscribers must pay for each video individually.
Enable Toggle for Free Access Live
- ON: Subscribers can access live PPV streams for free.
- OFF: They need to pay as per the PPV settings.
Enable Toggle for Free Access Series
- ON: The Entire PPV-enabled series is available free to subscribers.
- OFF: Subscribers must purchase each series or season.
Enable Toggle for Free Access Audio
- ON: Subscribers can access paid audio tracks freely.
- OFF: PPV rules apply even for subscribers.
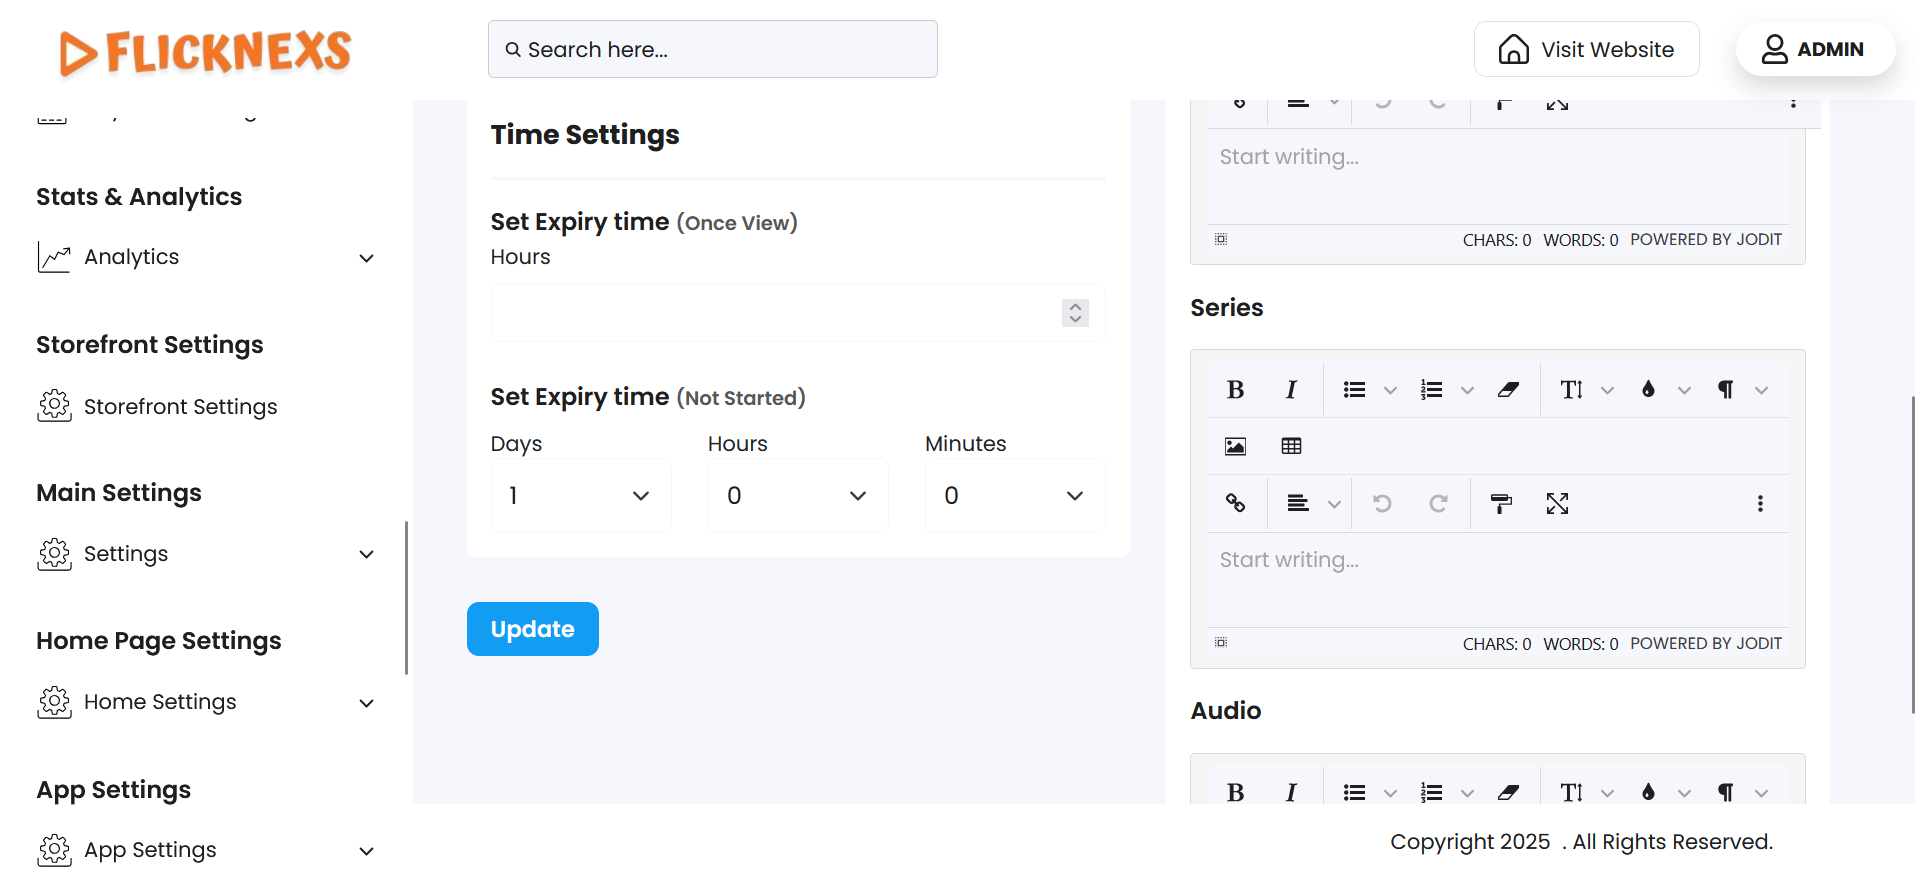
Time Settings
These settings allow you to define expiration periods for PPV content access after purchase.
Set Expiry Time (Once View)
- Defines how long a video is accessible after it has been played once.
- Input value in Hours.
Set Expiry Time (Not Started)
- Controls the window in which the user can begin viewing the content after purchase.
- Input values:
- Days
- Hours
- Minutes
PPV Description (Labeling the PPV type)
Customize how PPV content is labeled or described for users. This helps communicate what type of content they are purchasing access to.
- Videos – Label used for standalone video PPV.
- Series – Label used for PPV series or TV shows.
- Live Stream – Label for paid live event streams.
- Audio – Label used for PPV music/audio content.
These settings give you full flexibility to monetize content across different formats while also offering conditional free access for subscribers.
Content Settings
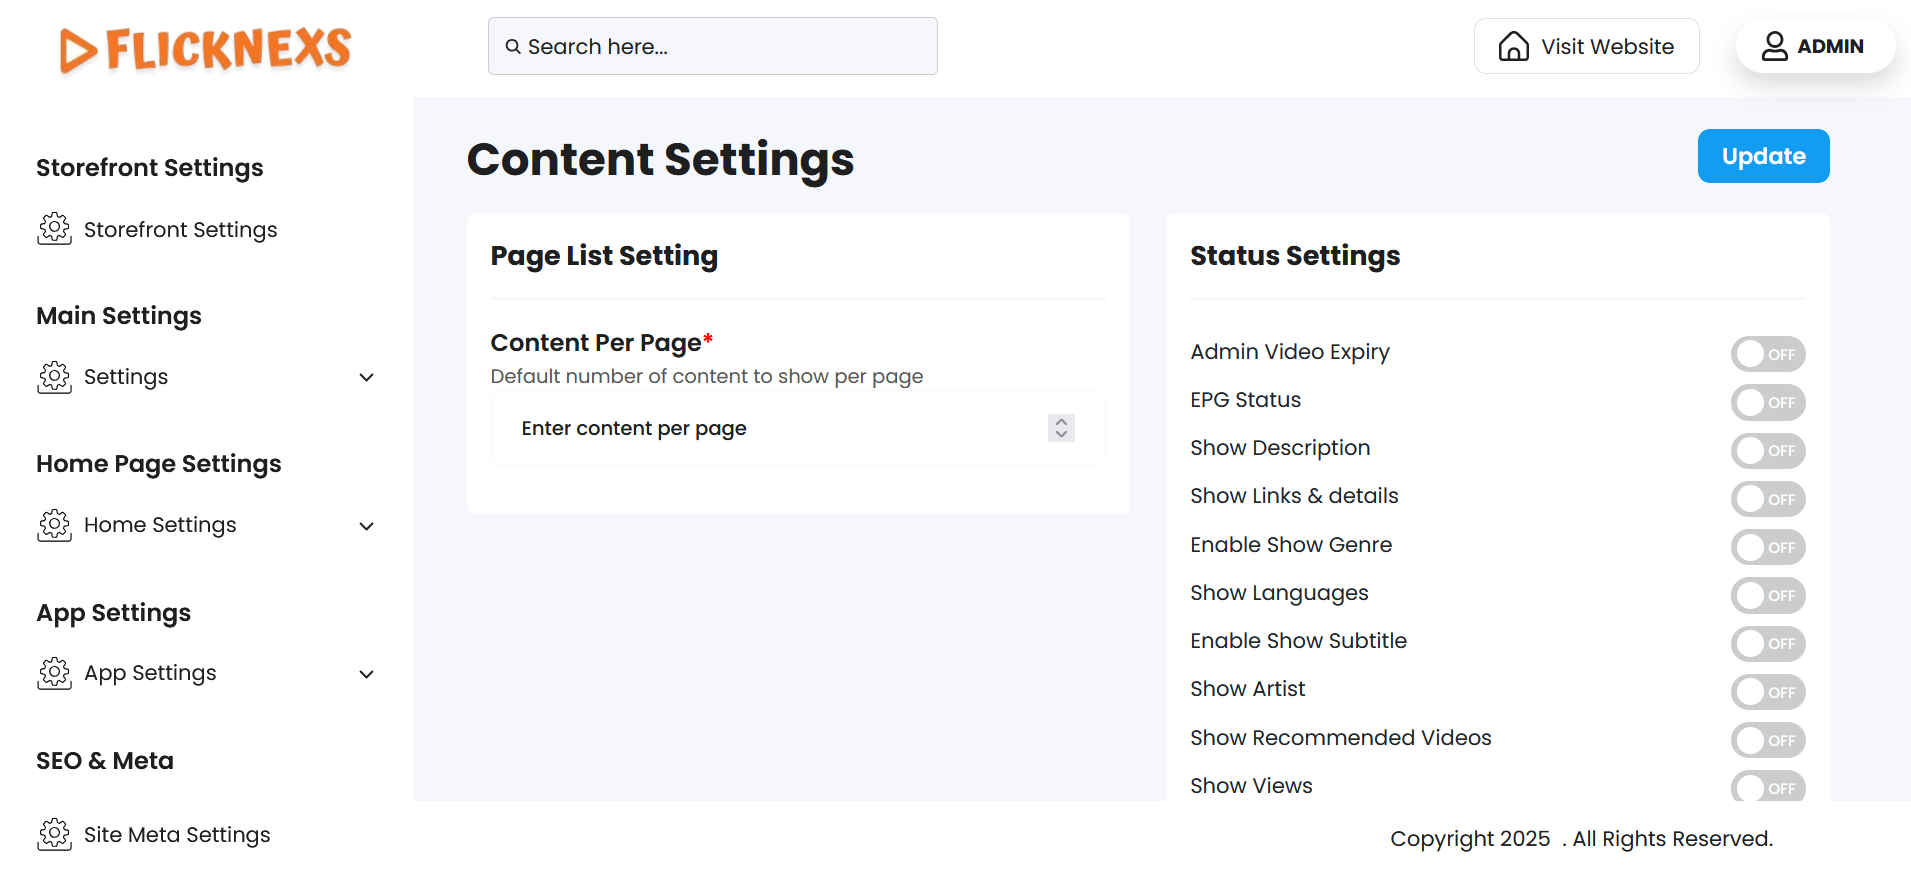
- You have the option to specify the default number of videos displayed per page on the platform. This setting determines how many videos users can view at once before navigating to the next page.
- Additionally, you can enable or disable specific features to customize what is shown on the video page. For example, you can choose to display a show description, enable show subtitles, or additional details about the videos to enhance the user experience.
- These configurations allow you to tailor the video page to meet your platform’s needs and improve usability for your audience.
Purpose & Benefits
These settings provide powerful customization tools that allow you to:
- Tailor the video browsing and viewing experience based on your content strategy.
- Enhance user satisfaction by showing only the most relevant information.
- Improve platform performance by controlling content load per page.
By fine-tuning these options, you ensure your video platform remains responsive, user-friendly, and aligned with your brand and audience needs.
Registration Settings
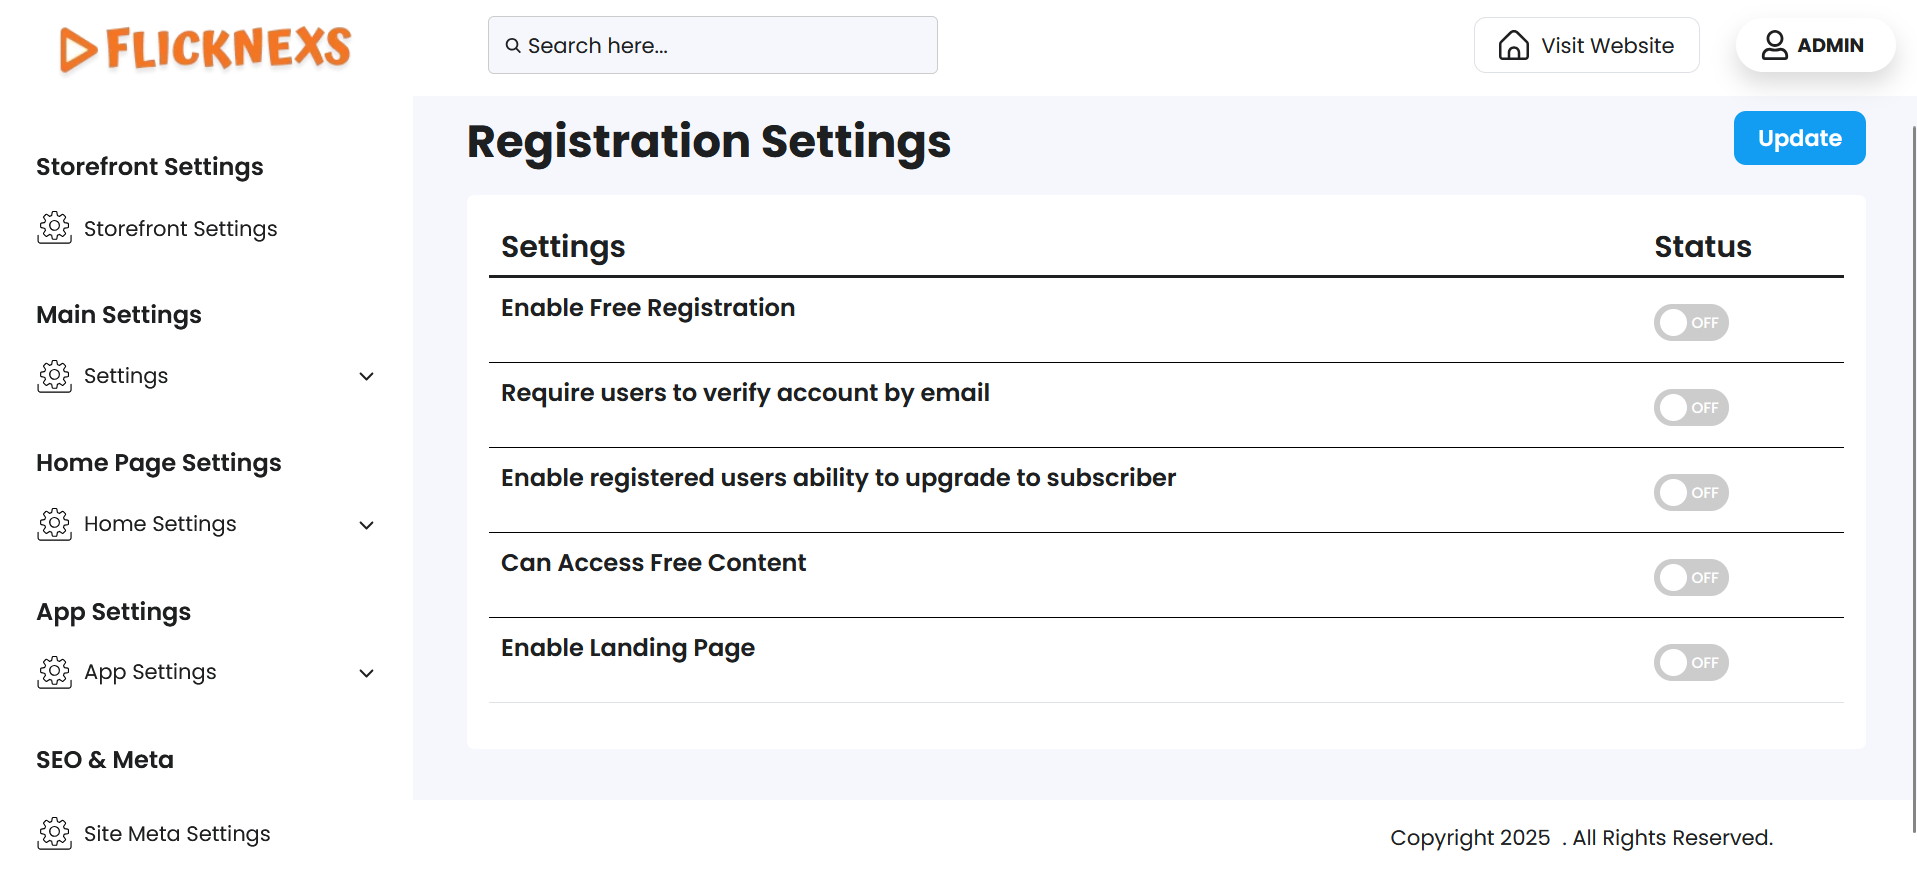
The Registration Settings section allows you to control and customize how users sign up on your platform. It provides options to configure the registration process, helping you streamline user onboarding and ensure compliance with your platform’s policies.
Enable Free Registration
- Activating this option allows anyone to access the platform without needing to sign up. Users can log in directly and browse the homepage content without restrictions. This is ideal if you want to offer immediate access without requiring account creation.
Require Users to Verify Accounts by Email
- Enabling this option ensures that all registered users verify their accounts via email. This step helps maintain security and confirms the authenticity of user accounts, preventing spam or unauthorized access.
Enable Registered Users’ Ability to Upgrade to Subscriber
- With this option, you can allow registered users to upgrade their account to a subscriber level. This is particularly useful if your platform offers premium or paid content, as it provides a seamless path for users to access enhanced features or content.
Can Access Free Content
- When this option is enabled, anyone can access free content on the platform without being redirected to the login page as the first screen. This ensures a smoother user experience for those who want to explore free offerings before deciding to register or subscribe.
Enable Landing Page
- If your platform has a landing page (e.g., for promotional content, announcements, or a welcome screen), enabling this option will make it the first page users see when they visit. This feature is useful for showcasing specific campaigns or directing user attention to particular content or actions.
These options provide flexibility in how users interact with your platform, balancing accessibility and security while enhancing the user journey. Let me know if you need further clarification or assistance with implementation!
System Settings

System Email
- This is the email address designated for system-generated emails. All notifications, alerts, and system messages will be sent from this address.
- Additionally, any contact-related emails from users or inquiries will be received at this email address. It is essential to use a valid and actively monitored email here to ensure seamless communication.
Google Analytics Integration
To integrate Google Analytics with your dashboard for enhanced analytics and tracking, you need to provide the following details:
- Google Analytics Tracking ID:
- This unique ID allows the system to connect with your Google Analytics account and track the performance metrics of your platform.
- Google Analytics API Integration:
- The API integration enables the dashboard to fetch real-time data and insights directly from Google Analytics, ensuring you have up-to-date metrics at your fingertips.
- Google OAuth Client ID Key:
- This is required for secure authentication and access to your Google account data. It ensures the platform can interact with Google Analytics securely without exposing sensitive credentials.
System Address
- This is the email address displayed on the Contact Us page. It acts as a point of contact for users or visitors who wish to reach out directly to your support or administrative team.
System Phone Number
- This is the phone number displayed on the Contact Us page. Providing a valid phone number ensures users have an alternative way to contact your team for support or inquiries.
Email Coupon
- The Email Coupon Option allows you to control whether promotional or discount coupons are sent to users via email. This feature is particularly useful for marketing campaigns, user retention, seasonal offers, and subscription incentives.
- Enable Option: When enabled, the platform will automatically send coupon codes to users through email.
- Disable Option: When disabled, no coupon-related emails will be sent to users, even if coupons are created or active.
These configurations are critical for maintaining clear communication channels with your users and leveraging analytics to optimize platform performance. Let us know if you need assistance with setting up these fields!
Social Networks Settings
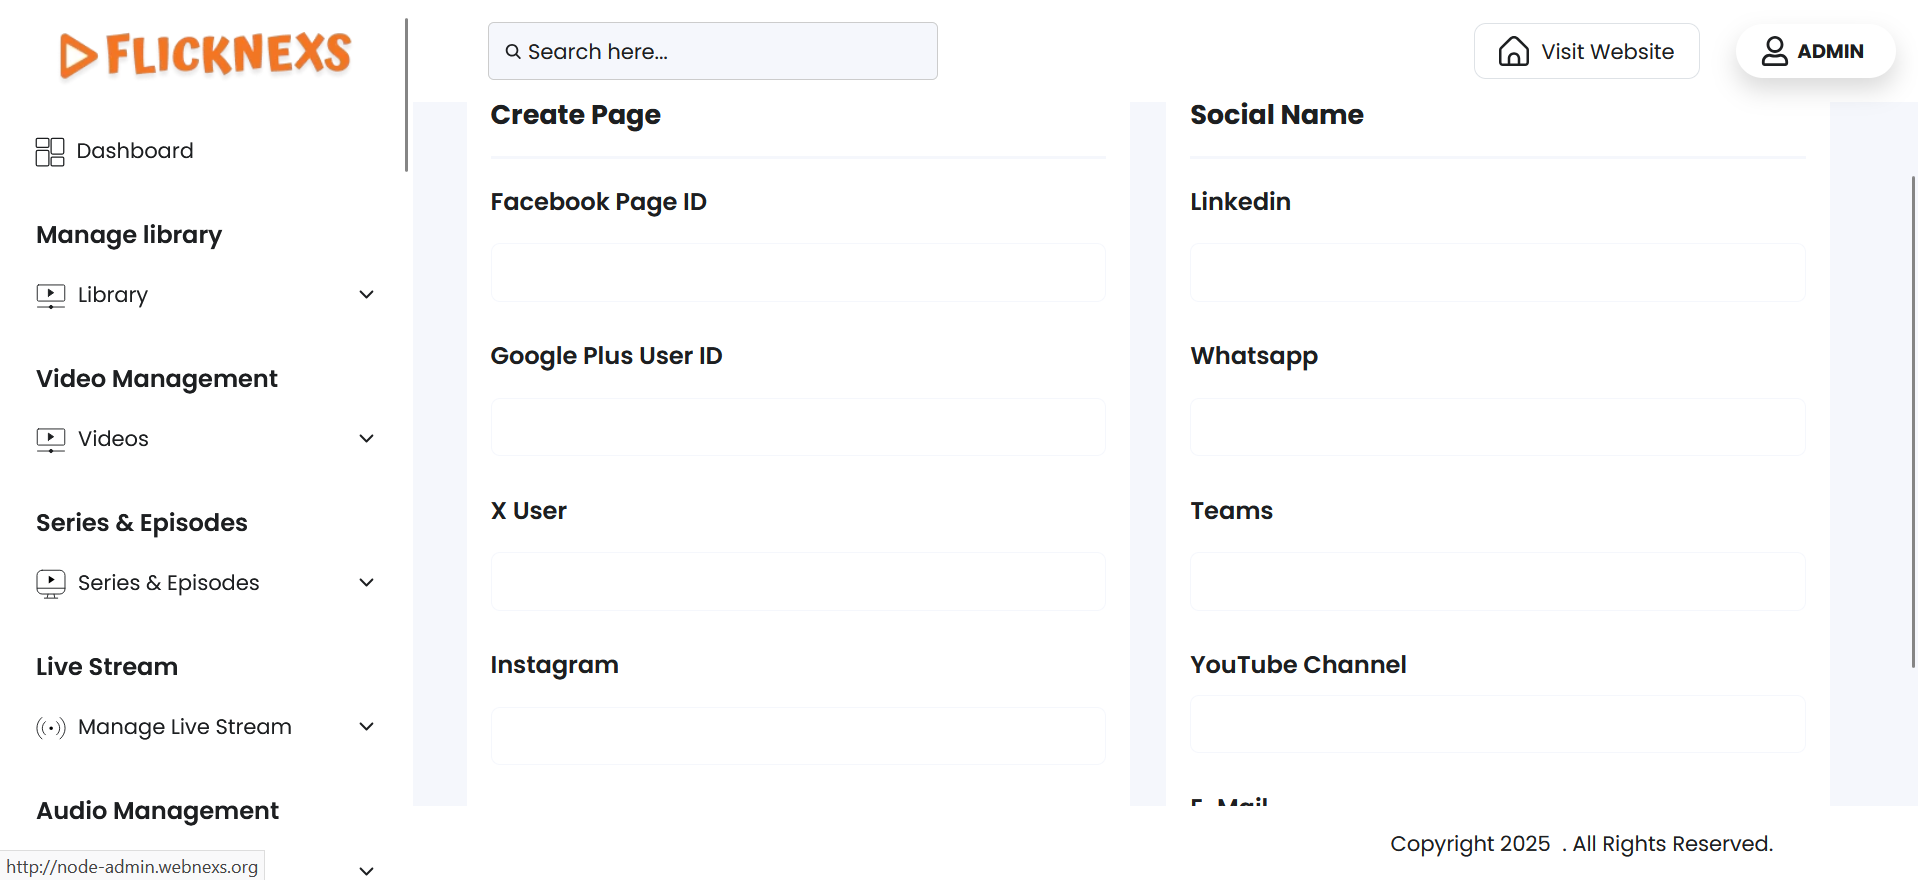
You can configure and add the social network details associated with your platform to enhance connectivity and engagement across various social media channels. Each social network requires specific identifiers or usernames, as outlined below:
Social Network Details You Can Add
Facebook Page ID:
- Enter the unique ID associated with your Facebook page. This will allow users to connect directly to your page for updates, content, and interactions.
LinkedIn:
- Specify the username for your LinkedIn profile or company page. This helps users access professional updates or corporate information easily.
Google Plus User ID(if applicable):
- Although Google Plus is discontinued, if your platform still integrates legacy IDs, you can specify the user ID here.
WhatsApp:
- Include your WhatsApp username or business account details to facilitate direct communication through WhatsApp.
Twitter:
- Add your Twitter handle (e.g., @YourUsername). This will direct users to your Twitter account for quick updates and interactions.
Teams:
- Provide your Teams username to enable users to reach out through Teams for queries, support, or collaborations.
Instagram:
- Enter your Instagram handle (e.g., @YourInstagramName) to connect users to your visual content and updates on Instagram.
YouTube Channel Name:
- Specify the name or URL of your YouTube channel. This integration will allow users to view video content directly from your platform.
TikTok:
- For platforms targeting a younger, video-focused audience, include your TikTok user ID. This ensures users can engage with your short-form video content.
Email:
- Provide a contact email address where users can send inquiries or feedback directly.
Transcoding Settings
You will find three options to configure video processing and optimize playback across different platforms.
Create Resolution:
- Select Transcoding Resolution: From the dropdown menu — 240p, 360p, 480p, 720p, 1080p, select the required one. Since this is a mandatory field, an error message ‘Transcoding resolution cannot be empty’ will appear if you omit it.
Status Settings:
- Enable Transcoding Setting: Turn the transcoding feature on or off by toggling the ‘On’ and ‘Off’ buttons. To enable this toggle switch, you must set the server configuration.
- Add Video Clip on Transcoding: Automatically append a video clip during the transcoding process by toggling the ‘On’ and ‘Off’ buttons.
URL
Test URL
- Enter the video file’s source URL for transcoding. An error message, ‘URL cannot be empty’, will appear if you omit it. If you enter an invalid URL, an error message ‘Invalid URL format. Use http://, https://, or rtmp://’ will appear.
- Once you have set the configuration, click on ‘Save Transcoding’ to apply your changes. A toast notification ‘Settings Updated Successfully’ will appear to confirm the update.
NOTE: Only if you enter a valid URL, the ‘Enable Transcoding Setting’ option will enable you to toggle between ‘On’ and ‘Off’.
- In case the server is not configured, these alert messages will appear:
- ‘Server Error: Redis is not connected’
Redis handles real-time processing. This error means it’s not connected. Check your server setup and ensure Redis is running.
- ‘FFmpeg is not ready’
FFmpeg is used for video processing. This alert shows it’s not installed, running, or detected. Make sure FFmpeg is set up correctly.
- ‘FFmpeg path is invalid or missing’
The system can’t find FFmpeg. Check and set the correct path in your server configuration.
- ‘FFprobe path is invalid or missing’
FFprobe analyzes video files. This error means its path is wrong or missing. Update the path in your system settings.
NOTE: Only if all the dependencies are properly installed and configured can interruptions be avoided in video processing and system performance.
- To go back to the table, you can click on the ‘Back’ button at the top of the ‘Transcoding Settings’ section.
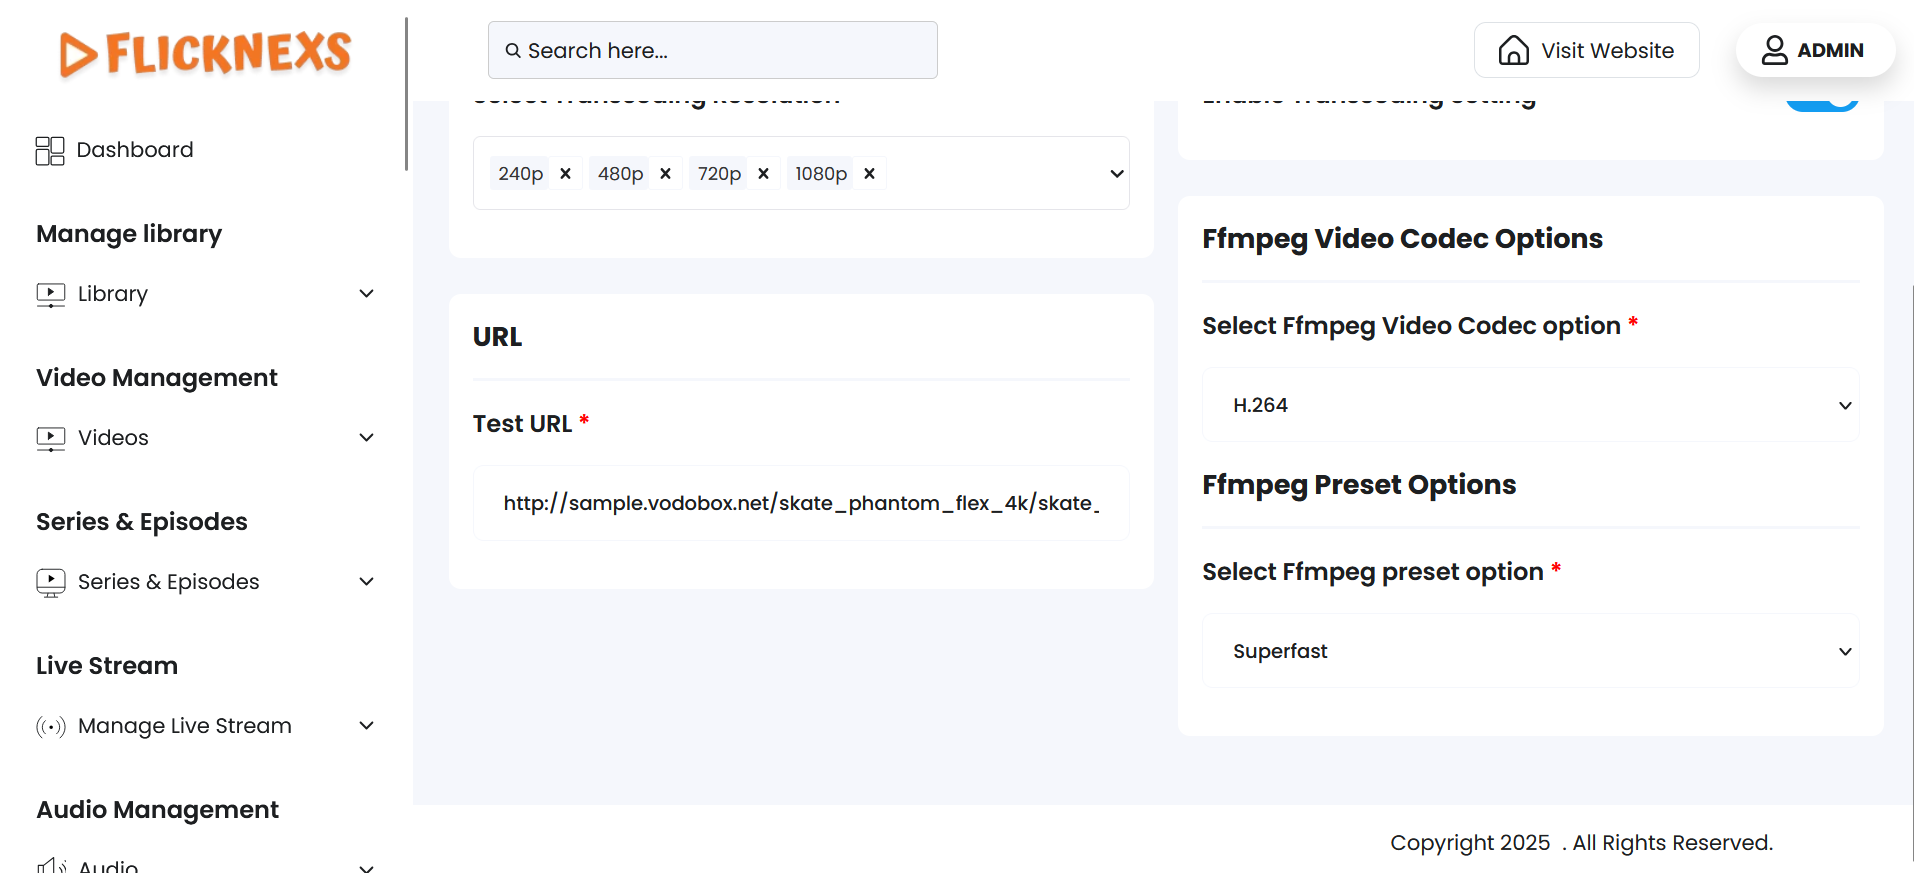
To optimize video quality, compression, and performance for your playout streams, you can configure FFmpeg Video Codec and FFmpeg Preset Options.
FFmpeg Video Codec Options
Field: Select FFmpeg Video Codec Option
This setting allows you to select the video codec FFmpeg will use to encode the video stream. The codec determines the compression method and video compatibility across devices.
Common Codec Options You May See:
- libx264 –
- H.264 encoding (most widely supported codec).
- Best balance between quality and file size.
- Recommended for most platforms and browsers.
- libx265 –
- H.265 / HEVC encoding.
- Higher compression and better quality at lower bitrates.
- Less compatible with older devices.
- mpeg2video –
- MPEG-2 encoding (used in traditional broadcast systems).
- Useful if the content is intended for legacy TV infrastructure.
- vp9 –
- Open-source alternative to H.265.
- Supported in modern browsers like Chrome.
- Slower to encode but efficient.
Tip: Choose the codec based on your audience’s device compatibility and the balance you want between quality and bandwidth.
FFmpeg Preset Options
Field: Select FFmpeg Preset Option
The preset controls the speed vs. compression efficiency of the encoding process. It does not affect output quality directly, but it affects how long encoding takes and how much compression is achieved.
Typical Preset Values (from fastest to slowest):
- ultrafast –
- Minimal compression, very large files.
- Very fast encoding.
- Good for real-time scenarios.
- superfast
- veryfast –
- Often used for live streaming.
- Good speed with reasonable file size.
- faster
- fast
- medium –
- Default preset.
- Balanced speed and file size.
- slow
- slower
- veryslow –
- Maximum compression, small file size.
- Takes the most time to encode.
Tip: If you prioritize faster encoding for live or near-live streaming, use veryfast or superfast. If you want a smaller file size and don’t mind slower encoding, choose slow or veryslow.
Coupon Code Settings
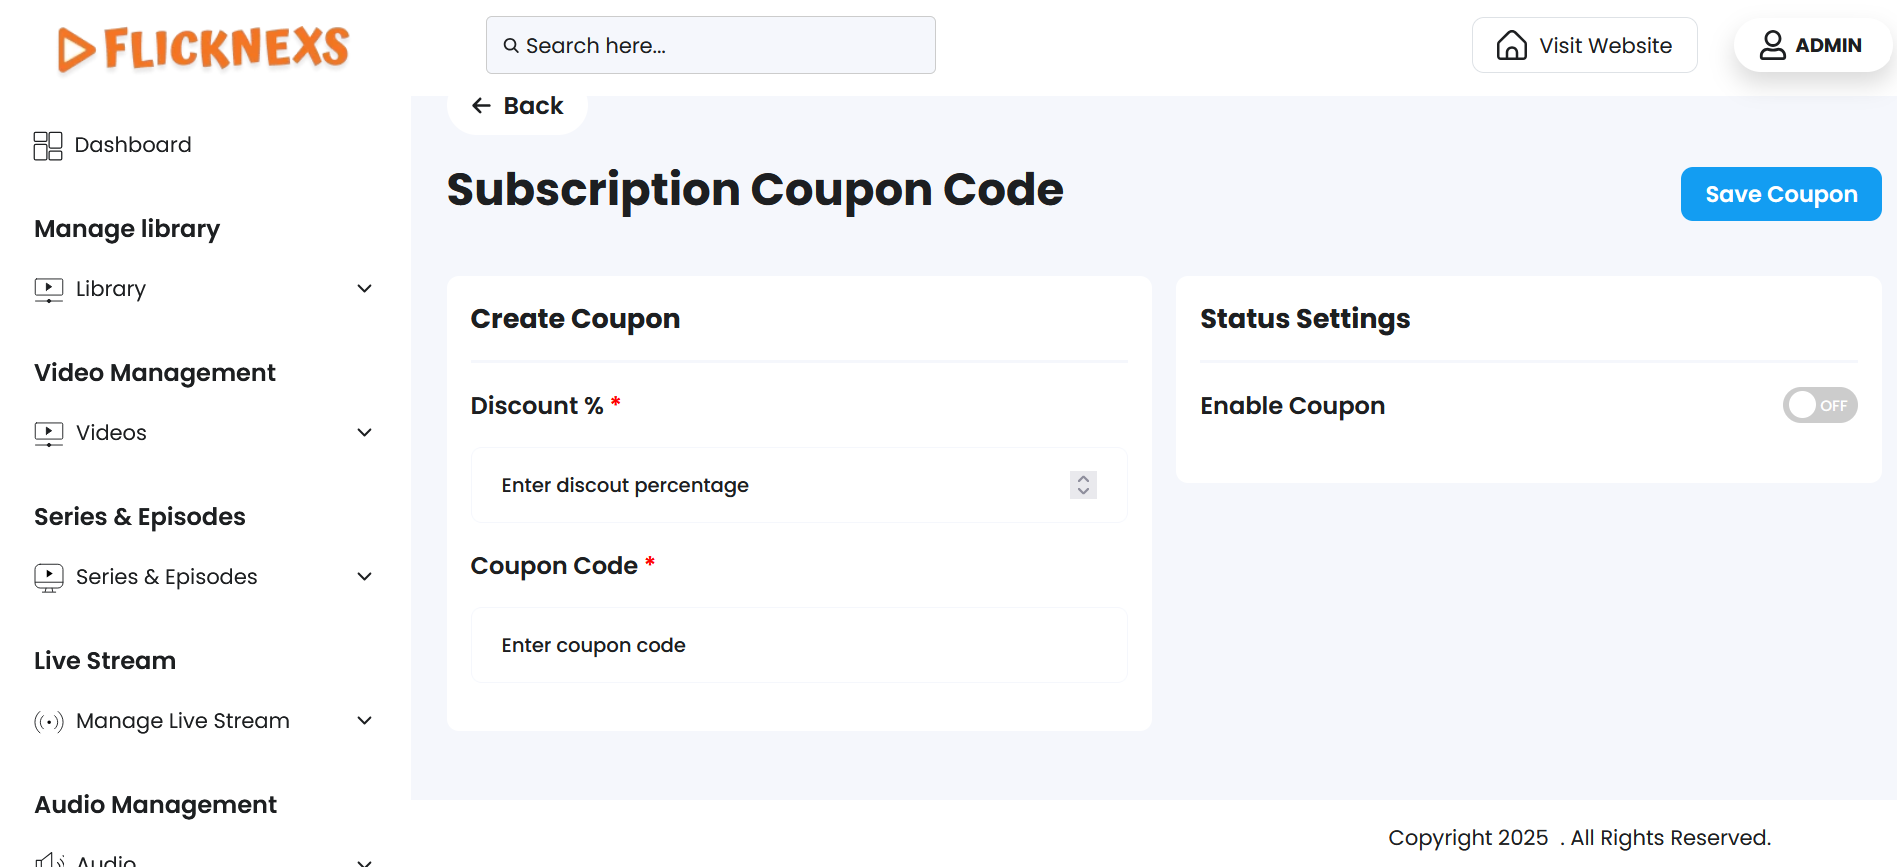
Adding Coupon Codes for New Subscriptions
If you want to offer discounts to users subscribing to your platform, you can use this feature to add coupon codes. These codes, created on Stripe, can be integrated with your platform to allow users to apply discounts during the subscription purchase process. Here’s how it works:
Steps to Add a Coupon Code
Create Coupon Code on Stripe:
- Log in to your Stripe account.
- Navigate to the “Coupons” section and create a new coupon code.
- Define the discount type (percentage or fixed amount) and any validity constraints (e.g., expiry date or usage limits).
Integrate Coupon Code on the Platform:
- Add the coupon code generated on Stripe to your platform.
- Enter the following details:
- Coupon Code: The actual code users will enter.
- Discount Percentage: The percentage discount the coupon provides (as defined on Stripe).
- Coupon Display Name: The label or description that will be shown to users on the platform.
Display on the Website:
- The coupon code will appear on the subscription checkout page, making it visible and accessible to users when they are purchasing a subscription.
- Users can enter the code at checkout to receive the associated discount.
Login page settings
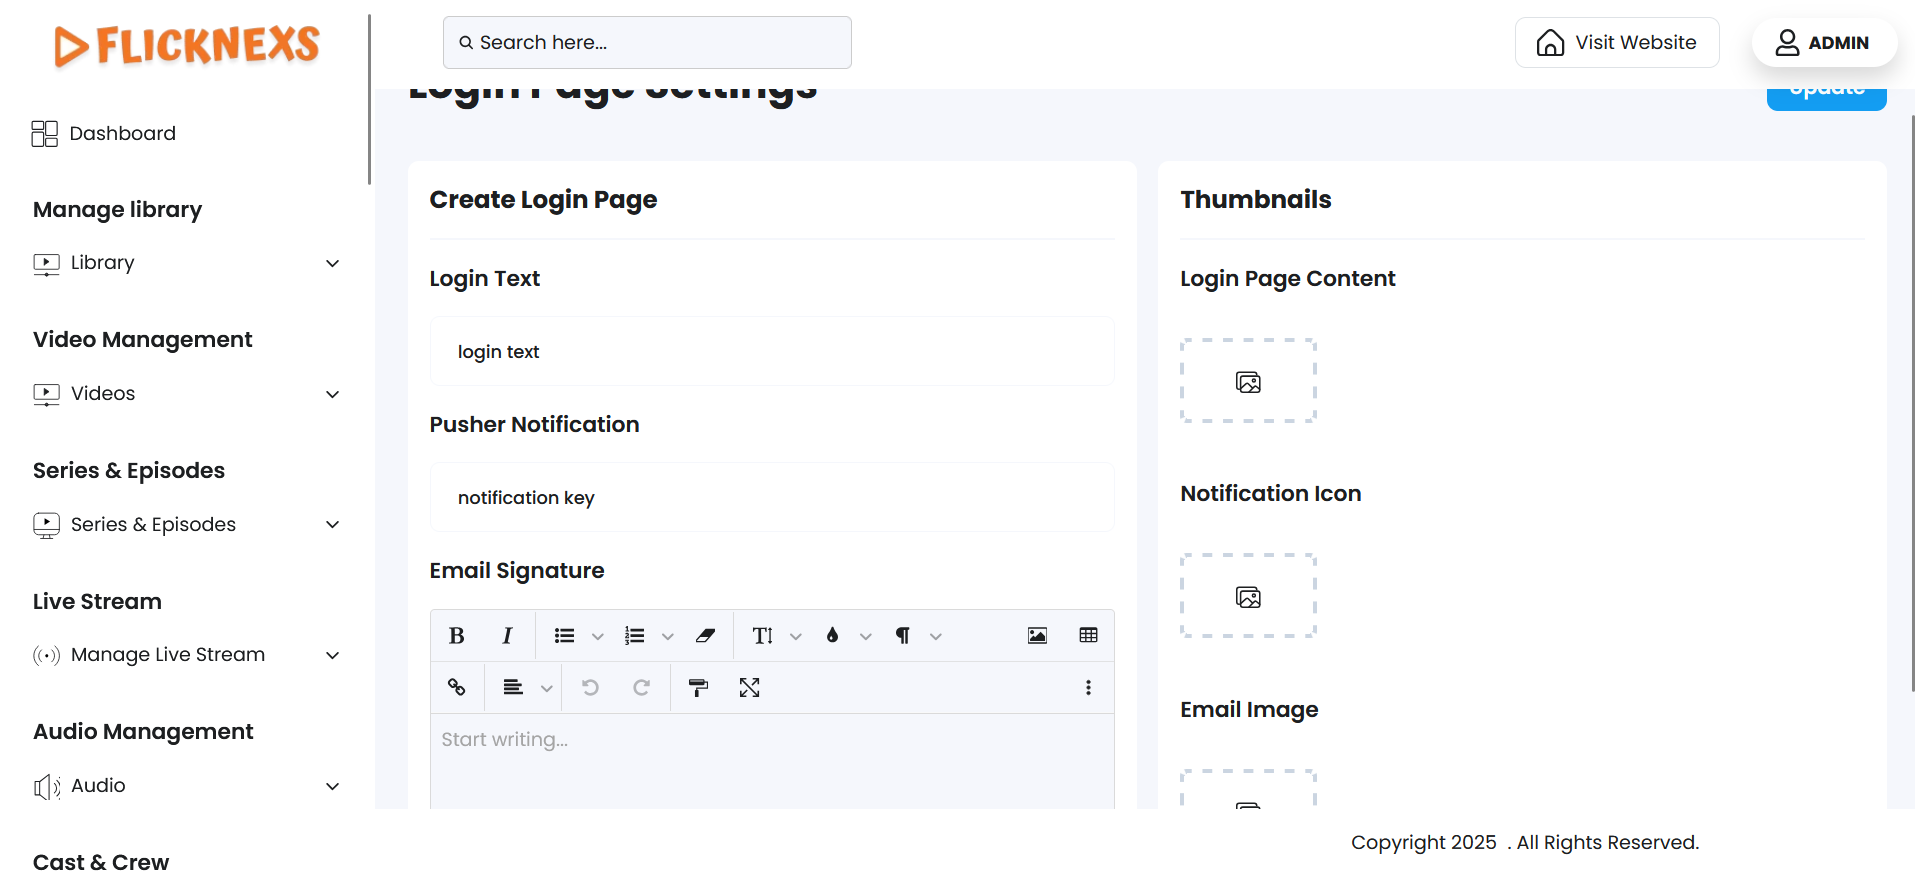
You can customize various elements of your platform’s login page, email communications, and notification system to enhance the user experience. Here’s a detailed explanation of the features you can configure:
Login Page Configuration
Login Page Content:
- You can define the content displayed on the login page, including images and text.
Login Page Content Image:
- Upload an image to appear on the login page.
- Supported formats: JPEG, PNG, or GIF.
- Maximum file size: 10 MB.
Login Text:
- Add text to display on the login page, such as a welcome message, instructions, or branding content.
- Ensure the text aligns with your platform’s theme and user onboarding goals.
Email Customization
Email Image:
- Add a custom image to be included in the emails sent from your platform to users.
- This could be a logo, banner, or any graphic that aligns with your platform’s branding.
Email Signature:
- Include a professional email signature in your platform-generated emails.
- This could contain the platform’s name, contact information, and a tagline or message.
- Adding a signature helps improve the credibility and personalization of your emails.
Notification Settings
Pusher Notification Server Key:
- Add the server key required for enabling push notifications through Pusher.
- Pusher is used to deliver real-time notifications to users on your platform.
Notification Icon:
- Upload an icon to be displayed with notifications.
- This icon will appear in notification pop-ups, ensuring consistency with your platform’s branding.
Advertisement Settings
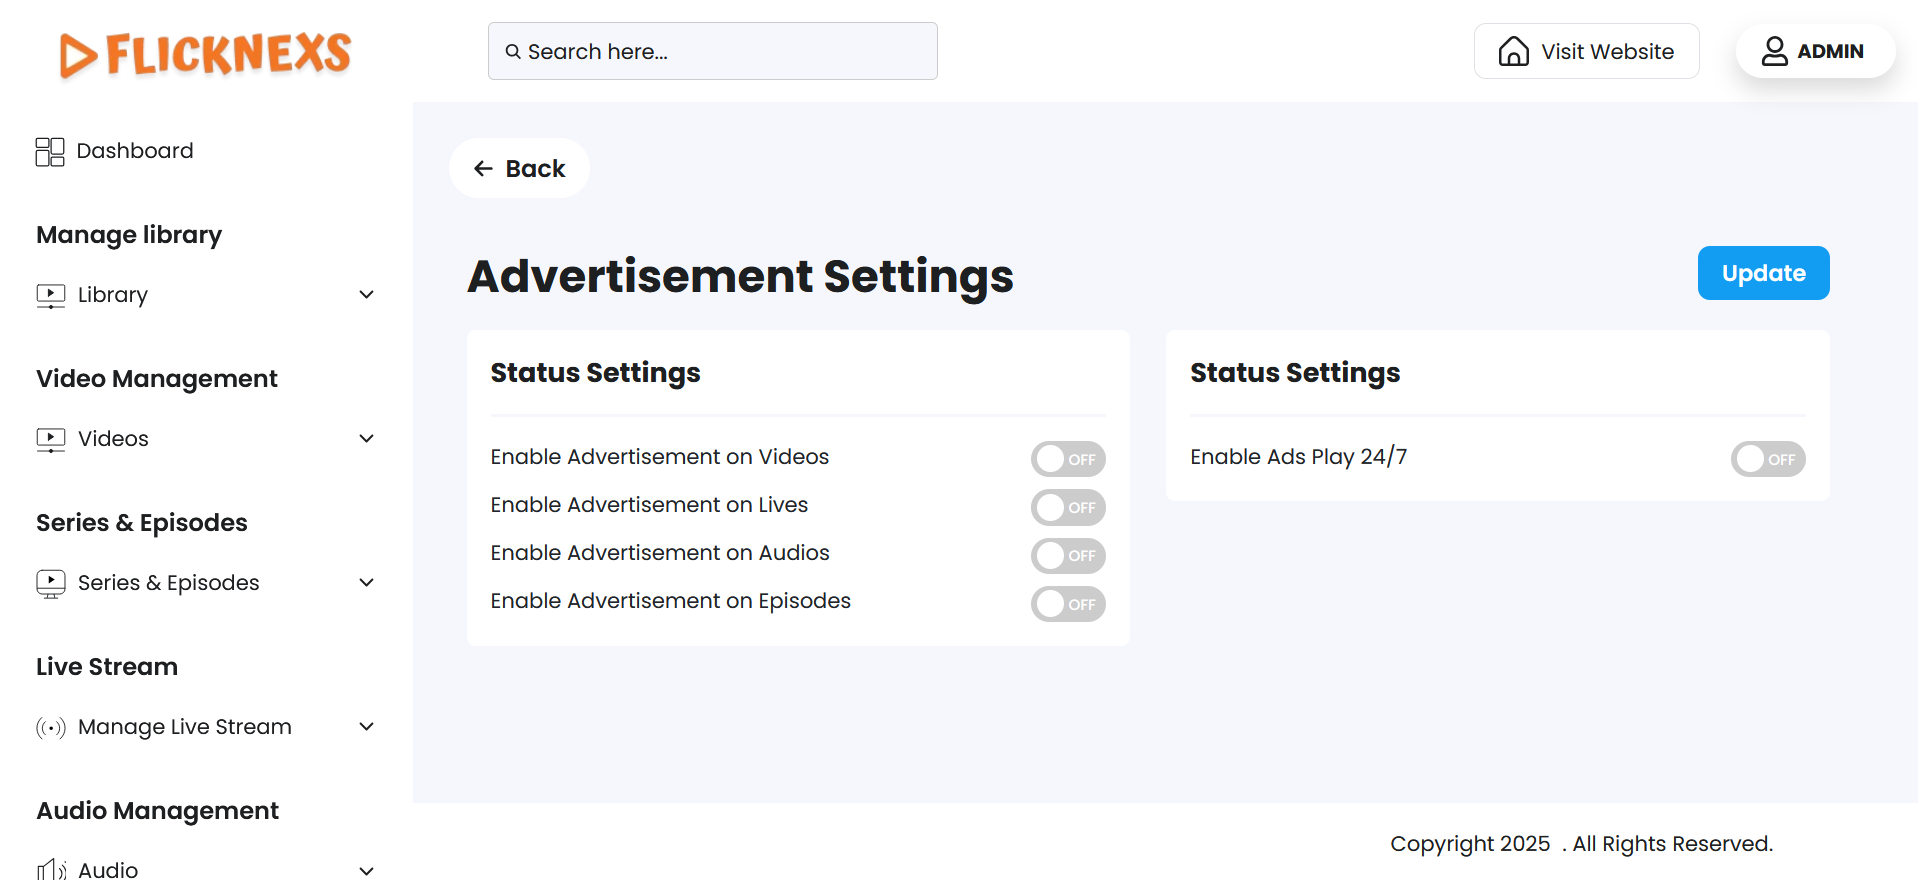
These settings allow you to control where advertisements appear across various types of content on your platform. By enabling or disabling advertisements for specific content types, you can strategically monetize different areas of your platform or provide an ad-free experience where required.
Each option is presented as a simple ON/OFF toggle in the admin panel.
Ads Play 24/7
If you want advertisements to run continuously 24/7, you can enable this feature. Disable it if you prefer to control when ads are shown.
Enable Advertisement on Videos
- ON:
- Ads (pre-roll, mid-roll, post-roll, or banners) will be displayed on standard video content such as movies, trailers, or short clips.
- Ideal for monetizing free-to-watch video content or offering ad-supported plans.
- OFF:
- No advertisements will be shown during or around video content.
Enable Advertisement on Lives
- ON:
- Advertisements will be shown on live stream content, including live events, sports, webinars, or broadcasts.
- You can insert ads before the stream begins (pre-roll), at custom intervals (mid-roll), or after the stream ends (post-roll).
- OFF:
- Live streams will play uninterrupted with no ads.
Enable Advertisement on Audios
- ON:
- Ads will be inserted into audio content such as music, podcasts, or radio streams.
- This can include audio ads, banner ads on the audio player, or intermissions.
- OFF:
- Audio content will play without any advertisement interruptions.
Enable Advertisement on Episodes
- ON:
- Ads will be shown during episodic content like TV shows, web series, or mini-series.
- Can include dynamic ad insertion at intro, mid-point, or end of the episode.
- OFF:
- Episodes will be served ad-free to viewers.
Purpose & Benefits
- Flexible monetization: Control how and where you generate revenue across your content library.
- Better user segmentation: Offer ad-supported content to free users while keeping premium content ad-free.
- Improved experience: Adjust ad placement based on content type and viewer expectations.
These toggles give you full control over the advertising strategy of your platform, allowing you to customize the user experience per content category.
App Settings
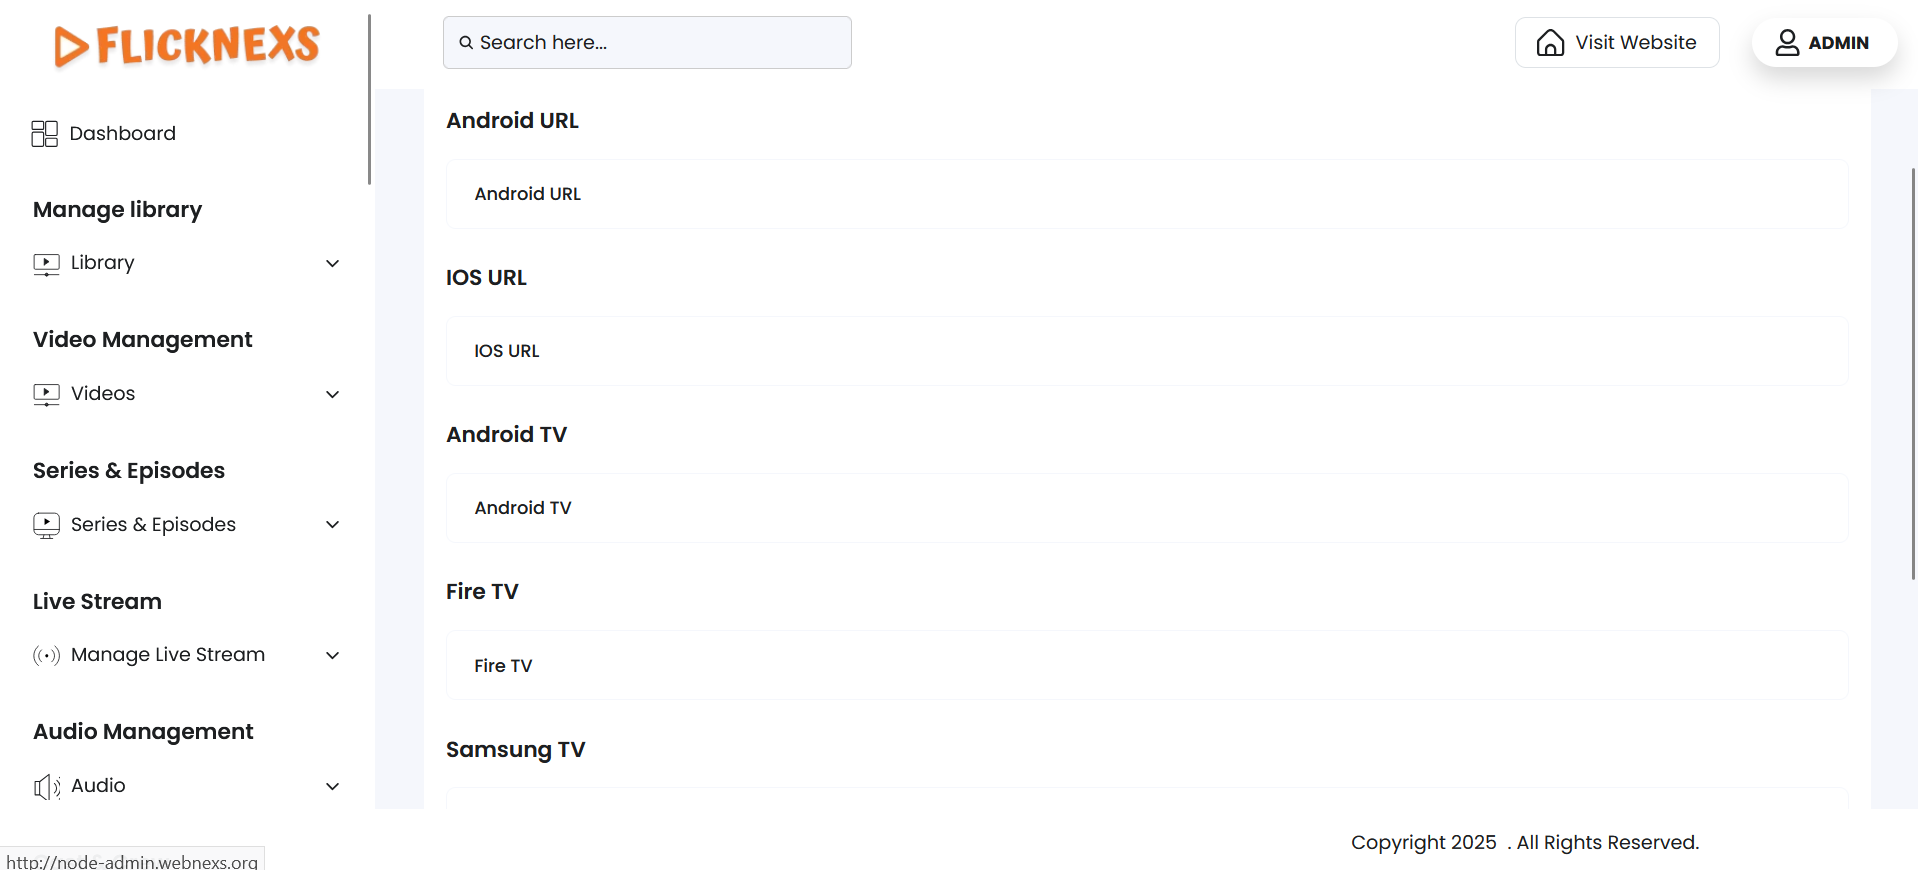
You can configure and display links to your platform’s applications across various devices directly in the footer of your platform. Here’s how these URLs are managed and their significance:
Android App URL
- Add the URL of your Android app from the Google Play Store.
- This link will allow users to directly download or update the app on their Android devices.
iOS App URL
- Add the URL of your iOS app from the Apple App Store.
- This provides a direct link for iPhone and iPad users to access your app.
Android TV App URL
- Include the link to your Android TV app available on the Google Play Store.
- This ensures users with Android TV devices can easily locate and install your app.
Fire TV App URL
- Add the Amazon App Store link for your Fire TV app.
- This makes your app readily accessible to users of Amazon Fire TV.
Samsung TV App URL
- Provide the URL for your app from the Samsung App Store (Tizen Store).
- Users of Samsung Smart TVs can use this link to find and install your app effortlessly.
LG TV App URL
- Enter the link to your app on the LG Content Store.
- This facilitates easy access for LG Smart TV users.
Roku App URL
- Add the URL for your Roku app from the Roku Channel Store.
- This link helps users find and install your app on their Roku devices.
By adding these URLs, your users can conveniently locate and download your platform’s app for their preferred device directly from trusted app stores. This is particularly useful for multi-device platforms where accessibility and user experience are a priority.
Script Settings
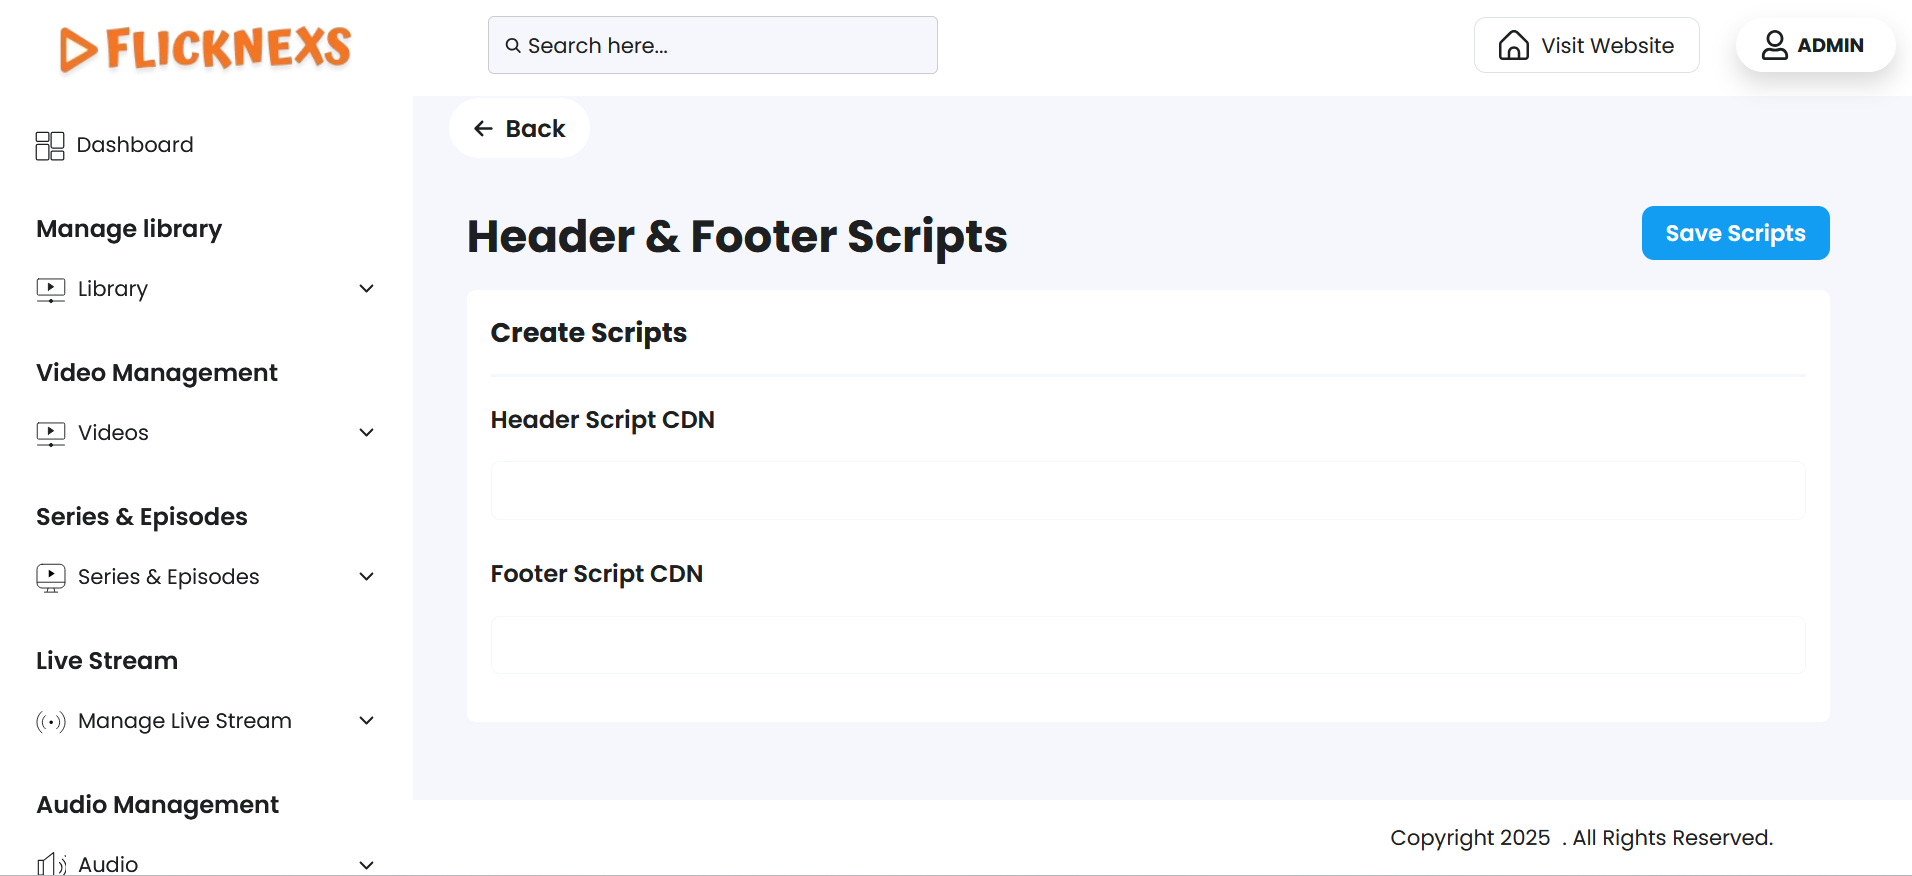
You can add custom scripts to the header or footer sections of your platform’s pages to integrate various external tools and features. This allows you to track, engage, and customize user interactions effectively. Here’s a breakdown of how you can use these scripts and their purposes:
Header Script
- Purpose: Scripts placed in the header load first when the page is accessed. These are typically used for tools that need to run before the content of the page is displayed.
- Examples:
- Google Analytics Tracking Code: Allows you to track visitor behavior, monitor traffic, and gain insights on user engagement.
- Meta Tags for SEO: These tags help search engines index the page better and enhance social media sharing (e.g., Open Graph tags for Facebook, Twitter Cards).
- Fonts or CSS Libraries: Include external libraries like Google Fonts or custom CSS files for design elements.
Footer Script
- Purpose: Footer scripts are executed after the main content is loaded, making them less intrusive and less likely to affect page load times. These are often used for non-essential but important functions.
- Examples:
- Chatbot Codes: Integrate live chat or chatbot services to enhance customer support and user engagement.
- Scripts for Third-Party Advertising: Integrate ad networks like Google AdSense, affiliate programs, or other monetization strategies.
Adding these scripts enhances the overall functionality of your platform, improving user experience, tracking capabilities, and engagement.
Default Image Settings
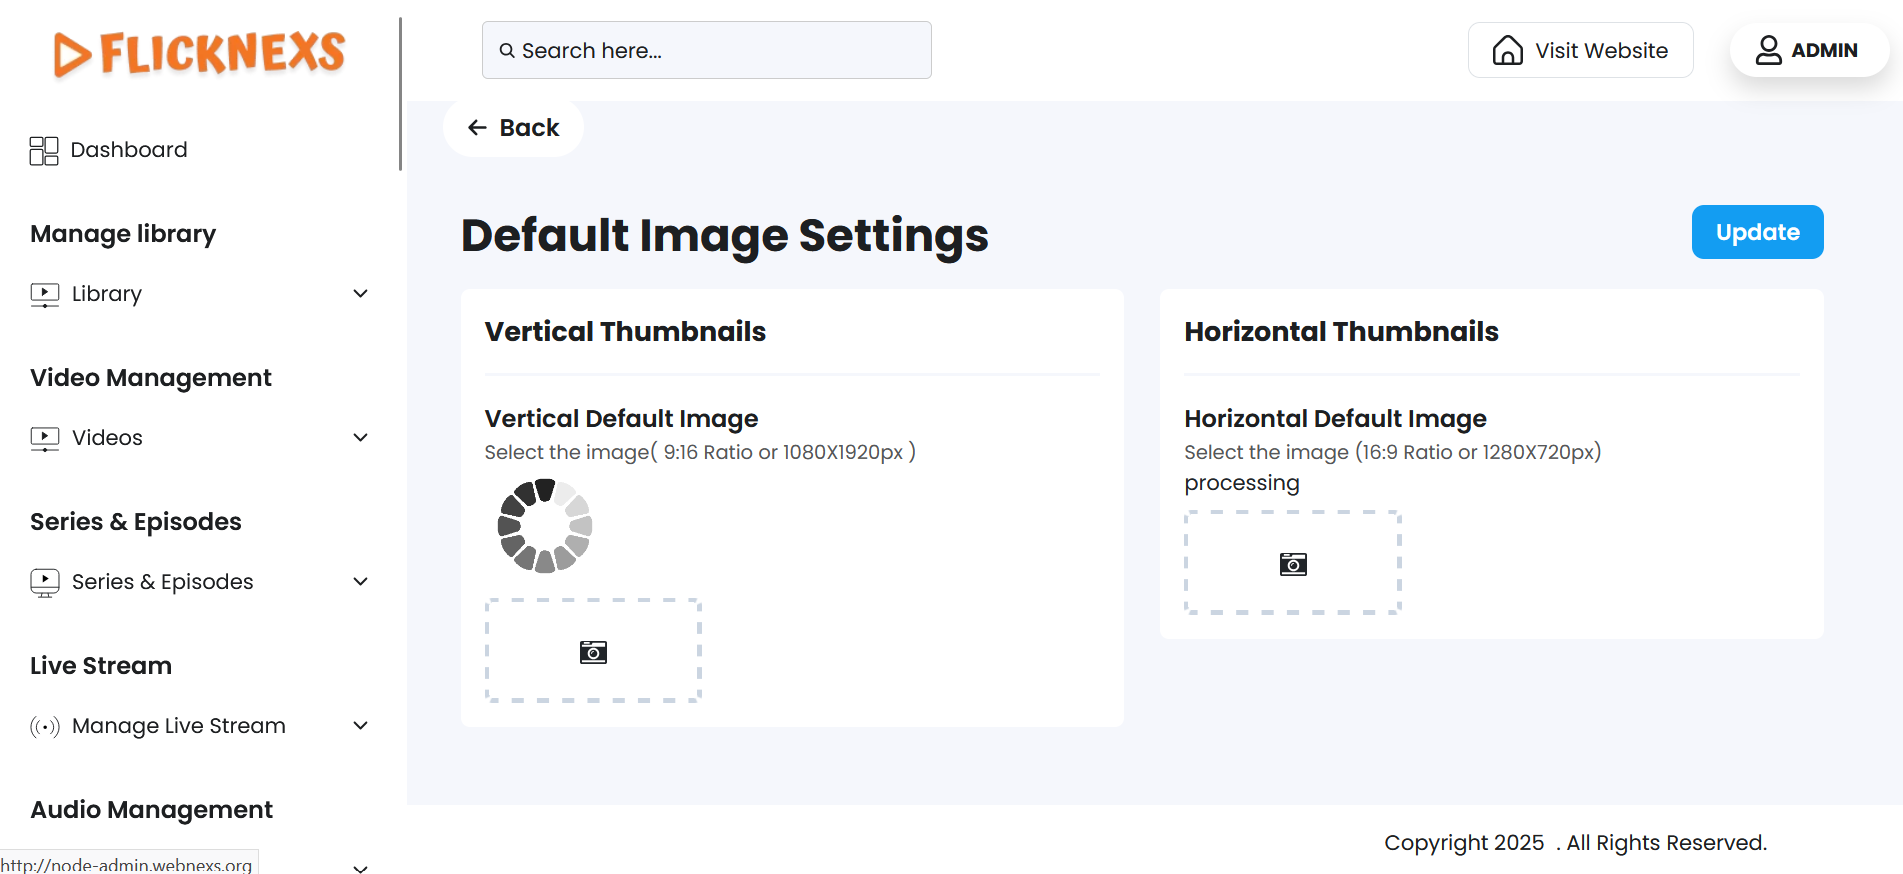
You can configure default images for various types of content on your platform to ensure that every piece of content (like videos, audio, or TV shows) always has a visual representation, even if the content creator or uploader hasn’t added an image.
How Default Images Work:
Default images are used automatically when a piece of content is uploaded but lacks a specific image file (like a thumbnail or player image). These images act as placeholders, ensuring that the user interface remains consistent and visually appealing even when no custom image is provided.
Steps to Add Default Images:
- Access Settings: Navigate to the platform’s settings, where default images are managed.
- Upload Default Images: Upload images for various content types, such as:
- Default Video Thumbnail: An image used when a video doesn’t have a thumbnail uploaded.
- Default Player Image: A placeholder used for content playback if no specific player image is available.
- Assign Default Images to Content: Once the images are uploaded, configure them in the settings so they are automatically applied when new content is added without an image. The platform will automatically display the default image for each content type as needed.
In conclusion, by utilizing default images, you ensure a seamless experience for both users and content creators, making sure that your platform maintains a visually appealing and professional look at all times.
Payout Settings
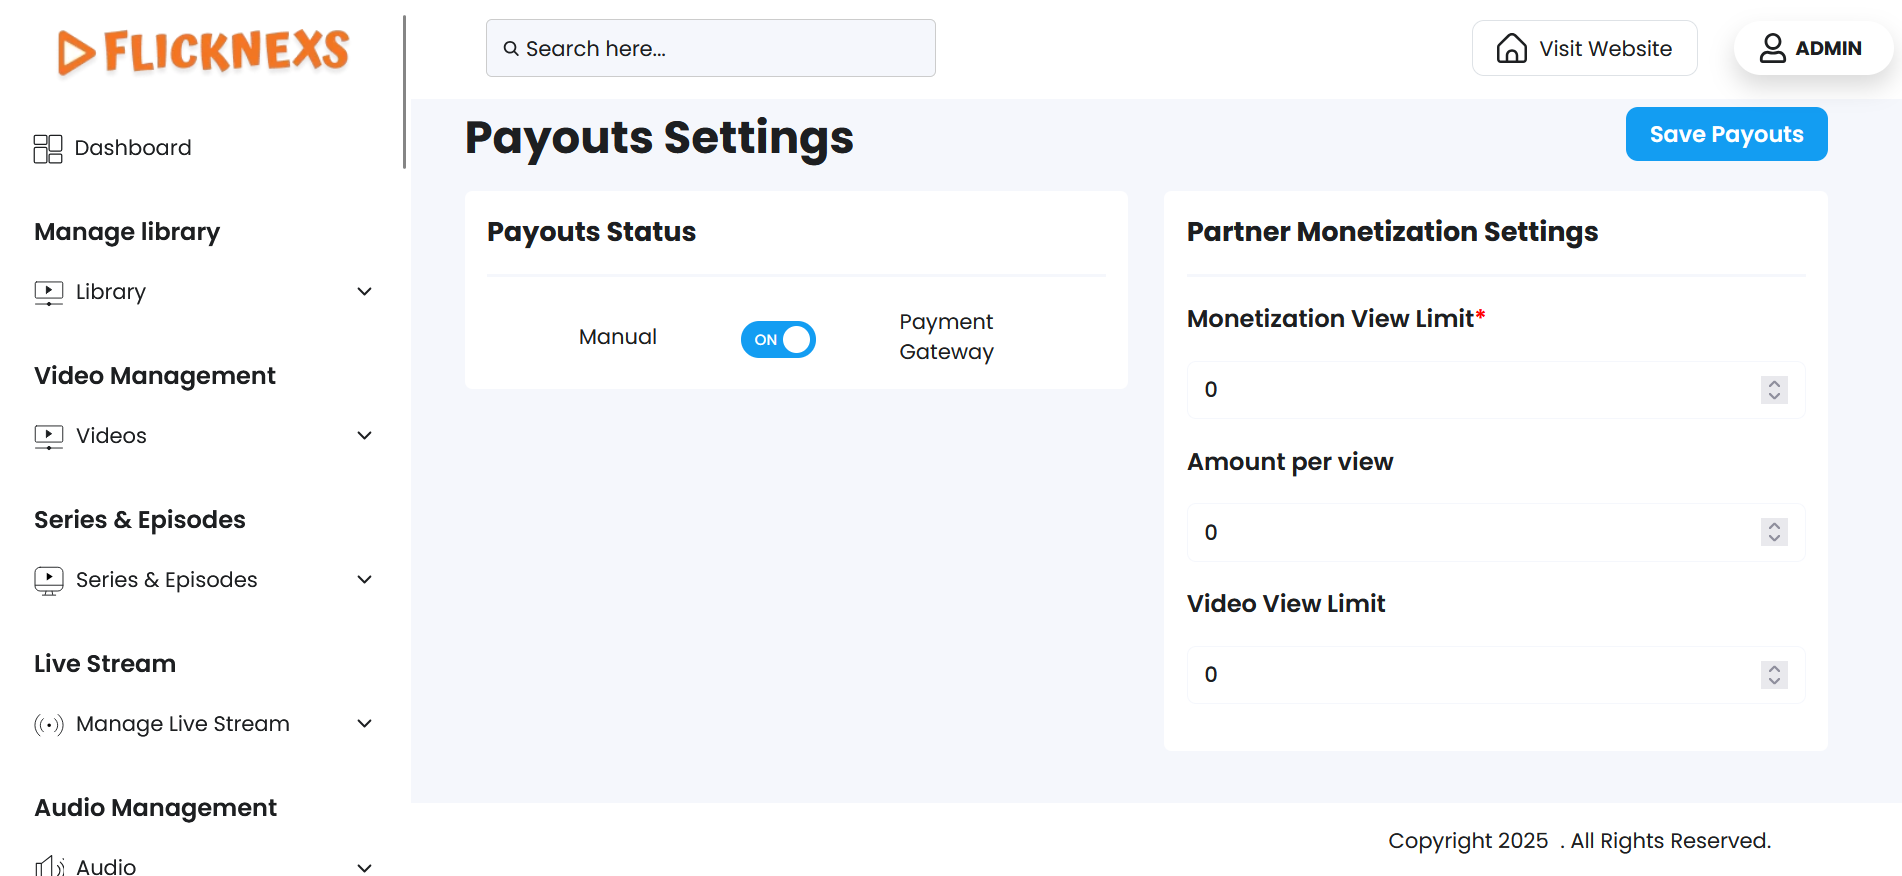
You have the option to enable or disable the payout feature for content and channel partners on your platform. This setting gives you control over how and when partners receive their earnings from content contributions or channel performances. You can choose between two primary methods of payout: manual payouts (admin-controlled) or automated payouts via a payment gateway integrated into the platform.
Options for Payouts:
Enable/Disable Payout Feature:
- Enabling this option allows content and channel partners to receive payouts either through manual or automatic methods.
Manual Payouts by Admin:
- When this option is selected, the admin of the platform will handle payouts manually. The process involves the admin reviewing earnings and making payments directly to the partners.
- This could be done through methods like bank transfers, PayPal, or other traditional payment systems.
- Advantages: This method gives the admin full control over the payouts, ensuring that payments are only made after review. It can be beneficial for smaller platforms or when payouts require oversight.
- How it Works:
- Admin can access partner payment details in the dashboard, verify their earnings, and then approve the payout request.
- Admin can initiate payments manually using the desired method.
Payment Gateway Payouts:
- This option allows the platform to automatically process payouts to content and channel partners through an integrated payment gateway (such as Stripe, PayPal, etc.).
- Advantages: This automated method streamlines the payout process, ensuring partners receive their payments without delay. It’s a more efficient solution for larger platforms with many partners.
- How it Works:
- The platform calculates each partner’s earnings based on pre-set criteria (e.g., views, engagements, or subscription revenue).
- Once the payout is due, the payment gateway processes the transfer automatically, deducting any relevant fees (if applicable).
- Partners receive their payments directly to their bank accounts, PayPal accounts, or other linked payment methods.
You have the flexibility to control the way payouts are handled for content and channel partners, either through manual payouts managed by the admin or automated payouts using an integrated payment gateway. Enabling the appropriate payout method and customizing it to meet the needs of your platform and partners will enhance your content ecosystem’s effectiveness and satisfaction.
Recaptcha Settings
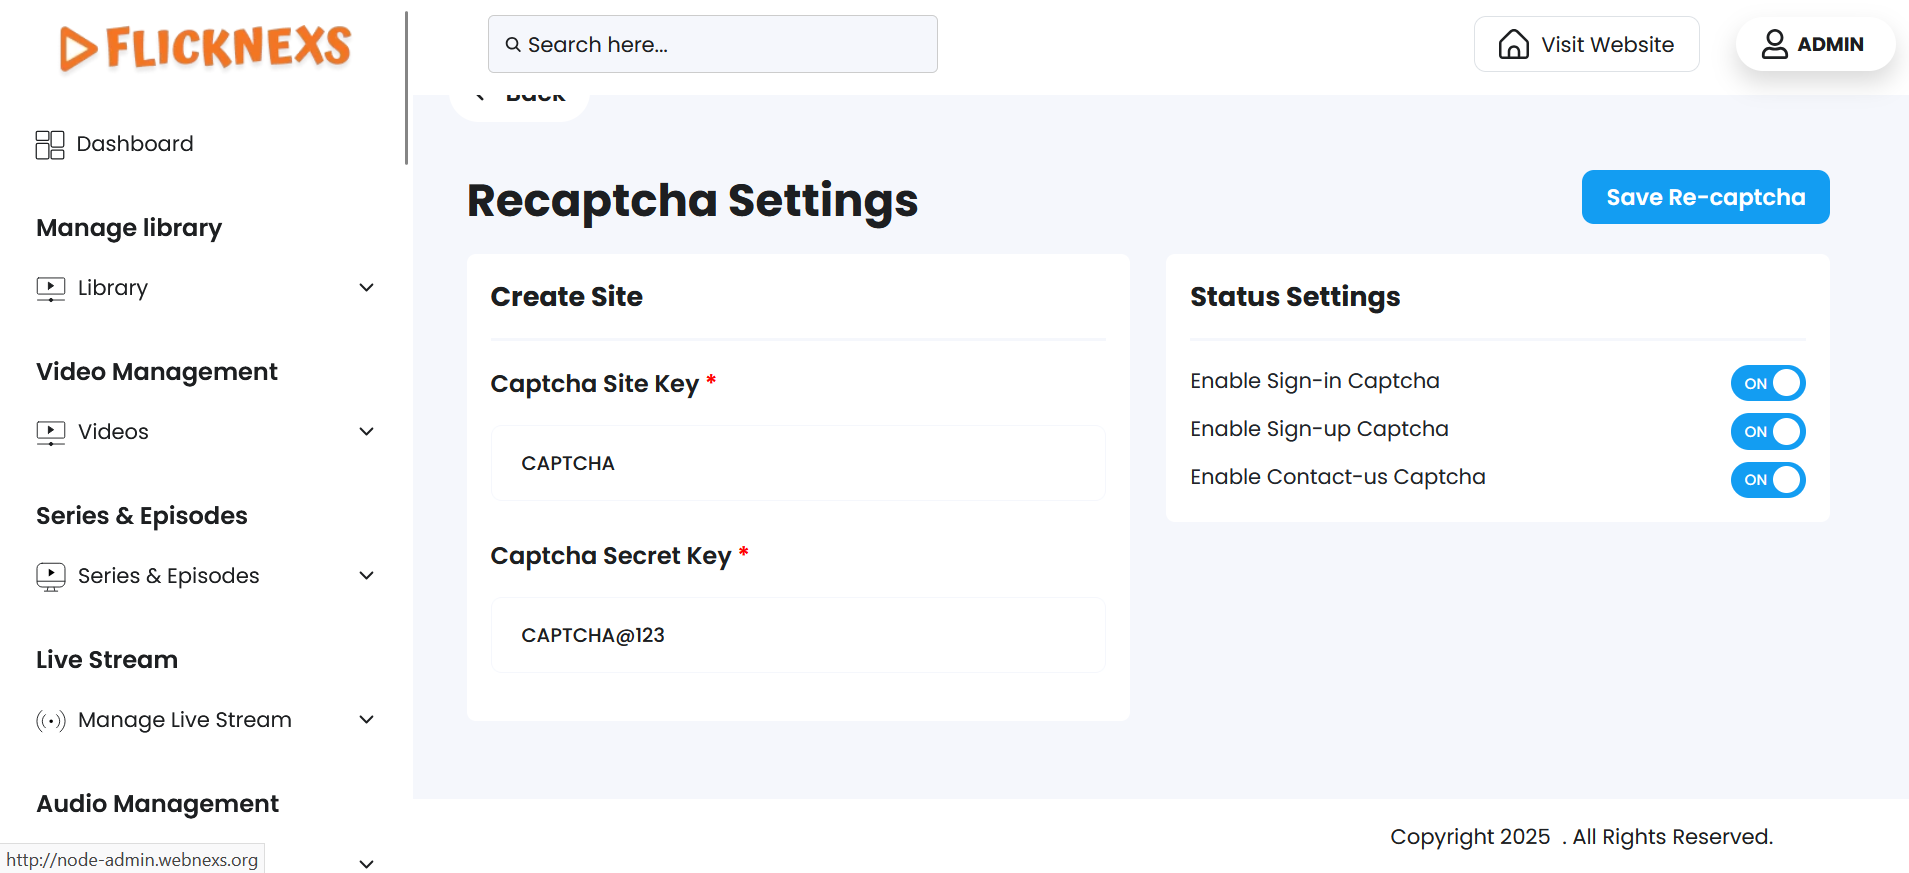
Captcha settings help you protect your platform from spam, bots, and automated abuse by verifying that interactions are being made by real users. You can selectively enable CAPTCHA verification on key user-facing forms, ensuring enhanced security and system integrity without compromising user experience.
Each option is managed through a simple ON/OFF toggle in the admin panel.
Enable Sign-in Captcha
- ON:
- Activates captcha verification on the sign-in/login form.
- Prevents bots or brute-force attacks from repeatedly trying to guess user credentials.
- Especially useful if you have high login volumes or notice suspicious login activity.
- OFF:
- Users can log in without solving a captcha.
- Provides a faster login experience but with less protection from automated threats.
Enable Sign-up Captcha
- ON:
- Adds a captcha to the user registration form.
- Prevents automated systems from creating fake or bulk user accounts.
- Essential for platforms with open registration to maintain a clean and authentic user base.
- OFF:
- Registration becomes quicker but may open up vulnerabilities to bot-driven fake signups.
Enable Contact-us Captcha
- ON:
- Enables CAPTCHA on the Contact Us form, which helps prevent spam messages or bot-generated inquiries.
- Reduces unwanted clutter in your support inbox or CRM.
- OFF:
- Users can submit the contact form without verification.
- Useful if you’re targeting high-conversion contact forms, but may increase the risk of spam.
Captcha Site Key:
- The site key is a public key provided by the CAPTCHA service (such as Google reCAPTCHA) that you need to add here.
- The site key is used to display the Captcha challenge on the signup page.
- You can typically obtain the site key by signing up for the CAPTCHA service and registering your domain on their platform.
- How it Works: This key is embedded in the frontend of your signup page, where users will interact with the captcha challenge.
Captcha Secret Key:
- The secret key is a private key that is used to validate the user’s response to the CAPTCHA challenge.
- It should be kept secure and never exposed on the frontend of your website.
- When a user completes the captcha on the signup page, the secret key is used in the backend to verify if the response is valid.
- How it Works: After the user interacts with the captcha, the server sends the response along with the secret key to the captcha service for verification. If the captcha is validated successfully, the user can proceed with the signup process.
By enabling the captcha feature on the signup page and providing the site key and secret key, you enhance the security of your platform by preventing automated bots from registering fake accounts. This ensures that only human users can successfully sign up, improving your platform’s user quality and security.
Timezone Settings
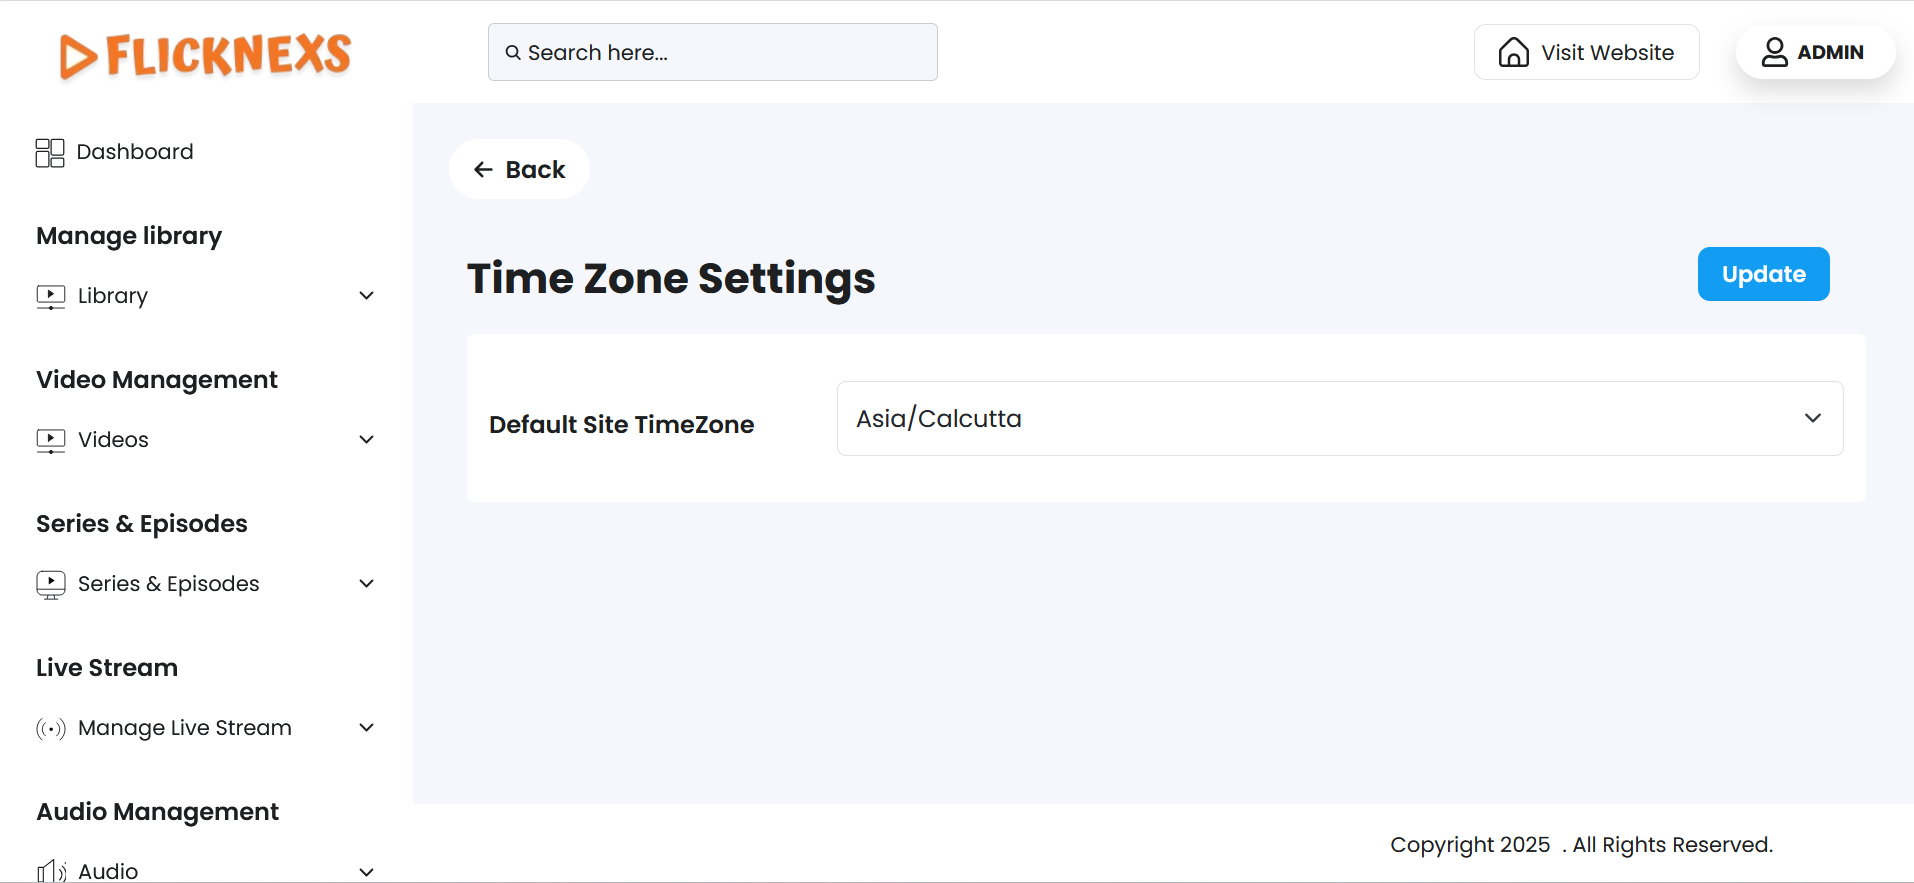
The Time Zone Settings section allows you to select your preferred time zone for the entire platform. This setting plays a crucial role in maintaining consistency and accuracy for all time-related operations, especially content scheduling.
How It Works
- You can choose from a list of global time zones (e.g., GMT, IST, PST, EST).
- Once selected, the chosen time zone will be:
- Applied across the admin panel
- Reflected in user-facing displays where applicable
- Used for automated scheduling and publishing of content
Primary Use: Content Scheduling
The selected time zone is particularly important for:
- Scheduling Video Releases: Ensures that videos go live exactly at the intended time for your region or audience.
- Premiere Events: Controls when premiere countdowns and access begin.
- Live Events & Broadcasts: Aligns stream start times with the correct local or global audience expectations.
- Ad Insertion Timings: Ensures that timed ads play correctly in sync with platform events.
Benefits
- Consistency: All platform components, including content management, scheduling, reporting, and analytics, will follow the same time zone reference.
- Clarity for Users: Viewers see accurate release times based on the defined time zone, avoiding confusion across different regions.
- Ease of Management: Administrators and content managers can plan and schedule events without worrying about time conversions.
Search Settings
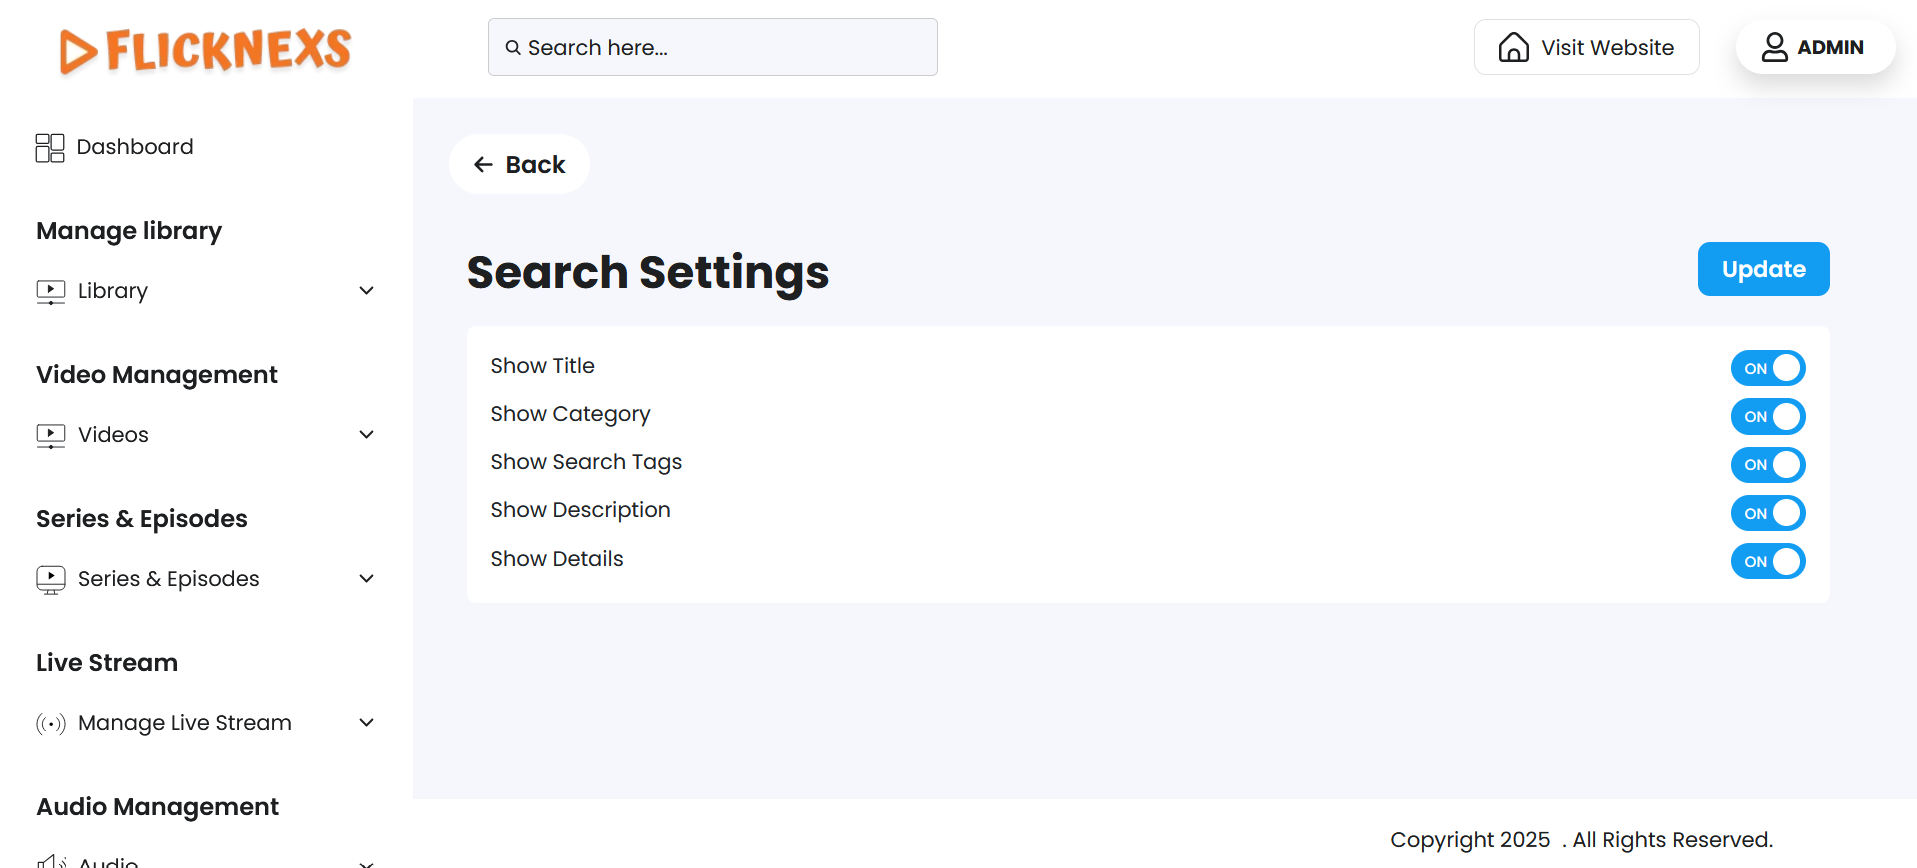
The Advanced Search setting gives you control over the depth and flexibility of the search experience on your platform. It allows you to enable or disable advanced search capabilities for your users, depending on your content strategy and user engagement goals.
Enable/Disable Advanced Search
When Enabled:
- Users gain access to a powerful, multi-parameter search tool that improves content discoverability.
- They can search using various attributes such as:
- Title – Find content by exact or partial match of titles.
- Category – Filter by genres or specific content categories.
- Search Tags – Use keywords and tags assigned to the content for quicker results.
- Description – Match terms from the content’s short or long description.
- Details – Search within additional metadata like cast, crew, language, year, or duration.
- This feature is ideal for platforms with large libraries of movies, shows, audio, or live content, where users may want to drill down to specific results quickly.
When Disabled:
- The platform limits the search to basic functionality, typically by:
- Searching only by content title or slug.
- Ignoring metadata, tags, and deeper descriptions.
- This may help reduce system load or simplify the user interface for platforms with a smaller content base or highly curated catalogs.
Benefits of Enabling Advanced Search
- Enhanced User Experience: Makes it easier for users to discover relevant content based on their preferences.
- Higher Engagement: Helps retain users by quickly connecting them with what they’re looking for.
- Improved Content Visibility: Ensures that even niche or older content can be found if users search using tags or metadata.
Use Cases
- OTT platforms with hundreds or thousands of titles
- Music or audio platforms with genre and artist filtering
- Live streaming apps where users search by language or event type
This setting can typically be found under General Settings or Search Configuration in the admin panel.
Geo Fencing Settings

Geo Details
This section shows the geolocation data associated with an IP address that accessed the platform or content.
| Field | Description |
|---|---|
| IP Address | 2a01:4f8:252:2bc3::2 – The visitor’s IP address (IPv6 format in this case). |
| Country Name | Germany – The country associated with the IP address. |
| Region Name | Saxony – The specific region/state within the country. |
| City Name | Falkenstein – The city where the IP is located. |
| Current TimeZone | Europe/Berlin – The local time zone of the visitor’s region. |
| Country ID | 80 – A unique internal identifier for the country, used in your system. |
Geo Fencing Settings
Geo-fencing allows you to control access to your content based on a user’s geographical location (IP-based filtering).
Settings & Options:
| Setting | Description |
|---|---|
| Block Country Status | OFF – When turned ON, you can block selected countries from access. |
| Available Country Status | OFF – When turned ON, you allow access only to selected countries. |
| Geo Fencing Token | This is the API token used to fetch location data from external services like IPinfo. It enables real-time geolocation for visitors. |
How It Works:
Generate a Geo Fencing API Token from IPinfo.
- Sign up at IPinfo.
- Get your API key/token.
- Paste it into the Geo Fencing Token field.
Enable Geo Restrictions:
- Toggle Block Country Status ON to block specific countries.
- Toggle Available Country Status ON to allow access only from specific countries.
Based on IP detection, the system will:
- Allow or deny access to users.
- Apply different content or restrictions accordingly.
Geo-fencing enhances content control and compliance by ensuring only users from specific regions can view certain content. It uses IP data to determine location and enforce restrictions or availability through toggles and tokens.
Redis Settings
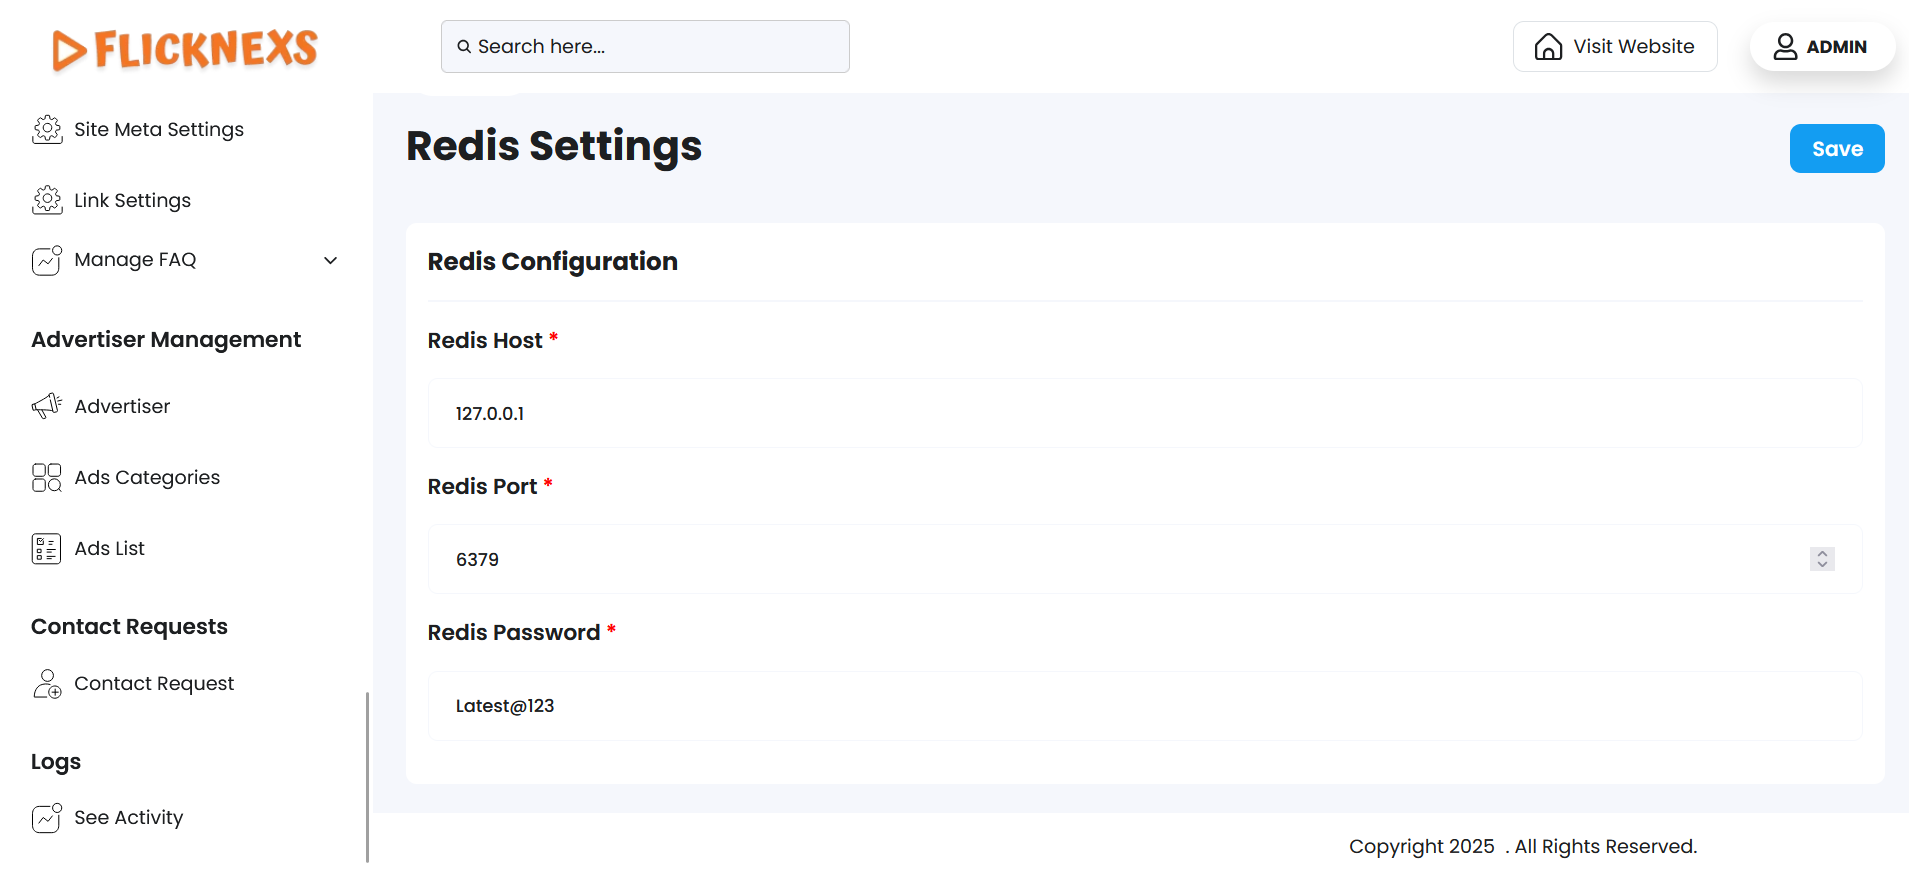
Redis Settings Overview
Redis is an in-memory key-value data store commonly used for caching, session management, queue systems, and real-time data operations in web platforms. Setting up Redis properly can significantly improve the performance and scalability of your application.
This section allows you to configure Redis to connect your OTT platform or admin panel with a Redis server.
Redis Configuration Fields
| Field | Description |
|---|---|
| Redis Host | The hostname or IP address of the Redis server. For example: 127.0.0.1 (local) or a remote server IP like 192.168.1.100. |
| Redis Port | The port number Redis is listening on. Default Redis port is usually 6379. |
| Redis Password | The authentication password required to connect to Redis (if your Redis server is password-protected). Leave blank if no password is set. |
Common uses
- Page Caching: Redis is used to store frequently accessed data like homepage content, banners, or featured videos in memory, so the platform can load faster for users without querying the database every time.
- Session Management: User login sessions and authentication tokens can be stored in Redis. This ensures quick access and helps maintain session consistency across multiple servers or services.
- Queue Management: Redis supports data structures like lists and streams, making it ideal for managing background jobs. It can be used for tasks like encoding videos, sending notifications, or handling uploads in a queue.
- Rate Limiting: Redis is effective for controlling how often a user can make requests. For example, it can prevent users from making too many login attempts in a short time.
- Real-Time View Counters: Redis can store real-time metrics like the number of viewers watching a live stream or the number of views on a specific video without putting pressure on the database.
- Leaderboard and Ranking Systems: For gamified content or popular video lists, Redis can keep track of rankings and user interactions using sorted sets.
- Temporary Data Storage: Redis is often used for storing temporary data, like OTP codes or email verification tokens, because of its support for expiration times (TTL).