The Subscription Plans & Lifetime Subscription section allows you to configure and manage the various monetization options available to users on your platform. These plans help you offer flexible access models based on pricing, duration, and user needs.
Log in to your admin panel by following these steps:
- Enter your credentials.
- You will be directed to the Dashboard page.
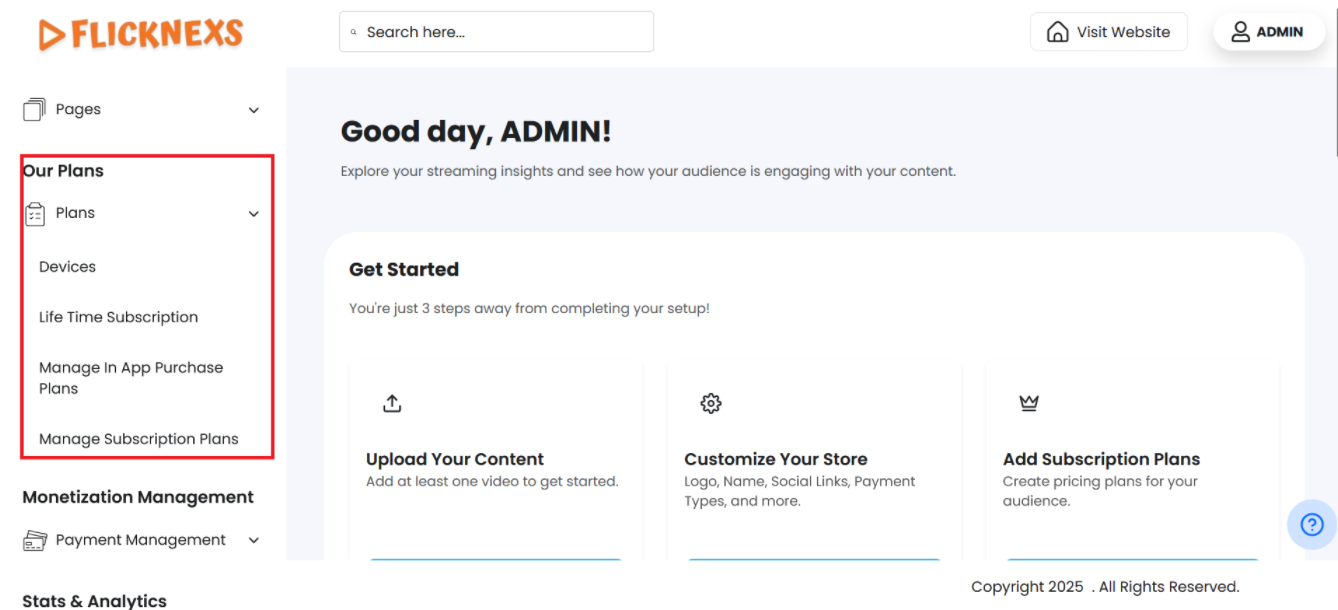
- Navigate to the left side of the page and locate ‘Our Plans’ from the side menu bar.
- Click on ‘Our Plans’ to open this section with all four submenus, namely Devices, Lifetime Subscription, In-App Purchase Plans and Manage Subscription Plans.
- Based on your requirements you can open any of the sections to configure your plans.
Note that before configuring ‘our plans’, the payment gateway must be set up. Follow the steps mentioned below to configure:

- Navigate to the ‘Monetization Management’ section in the side menu bar just below ‘Our Plans’ , click on ‘Payment Management’ and then select ‘Payment Settings’.
- A Payment Gateway Integration Card will be present, click on ‘Configure’ on the card.
- You will find three configuration panels named ‘Stripe configuration’, ‘Stripe Key Details (LIVE)’ and ‘Stripe Key Details’ (TEST)’. If you want to learn more about Stripe payment gateway, you will find the link to their website just above the ‘Stripe configuration’ settings panel.
Under ‘Stripe configuration’ you will find these four options mentioned below:
- Enable Stripe Mode: Toggle to turn the Stripe Payment Gateway ON or OFF for your platform. You must toggle to ‘On’ to be able to feed the system with the details of your subscription plan.
- Enable Coupon Status: Toggle to enable or disable the ability for customers to use discount coupons during checkout. You must toggle to ‘On’ to be able to feed the system with the details of your subscription plan.
- Enable Payment Mode: Dropdown to select ‘Live’ mode for real transactions or ‘Test’ mode for developers to simulate transactions in a sandbox environment. Set it to ‘Live’ for processing actual customer payments.
- Stripe Label: Custom name shown for this payment option, visible to admins or customers based on platform settings. You can choose to omit this field as this is not mandatory.
Under ‘Stripe Key Details (LIVE)’ you will find these two options mentioned below:
- Live Publishable Key: Public key for securely collecting payment details on your website or app. If you omit entering this field, an error message ‘Live Publish cannot be empty’ will appear.
- Live Secret Key: Private key for processing and managing payments on your server. If you omit entering this field, an error message ‘Live Secret cannot be empty’ will appear.
NOTE:
- Navigate to your Stripe dashboard to find both the keys.
- Both the keys are needed to connect your site to your Stripe account and process payments securely.
Click on ‘Update Stripe’ to save your changes. A toast notification ‘Stripe Payment Setting Updated Successfully’ will appear to confirm the configuration.
Now, navigate back to ‘Our Plans’ to add your subscription plans to make it visible for your users. The plans that you offer require the utmost consideration to be flexible enough to cater to a wider audience. So, we included the four main submenus. They are listed in detail below:
Devices
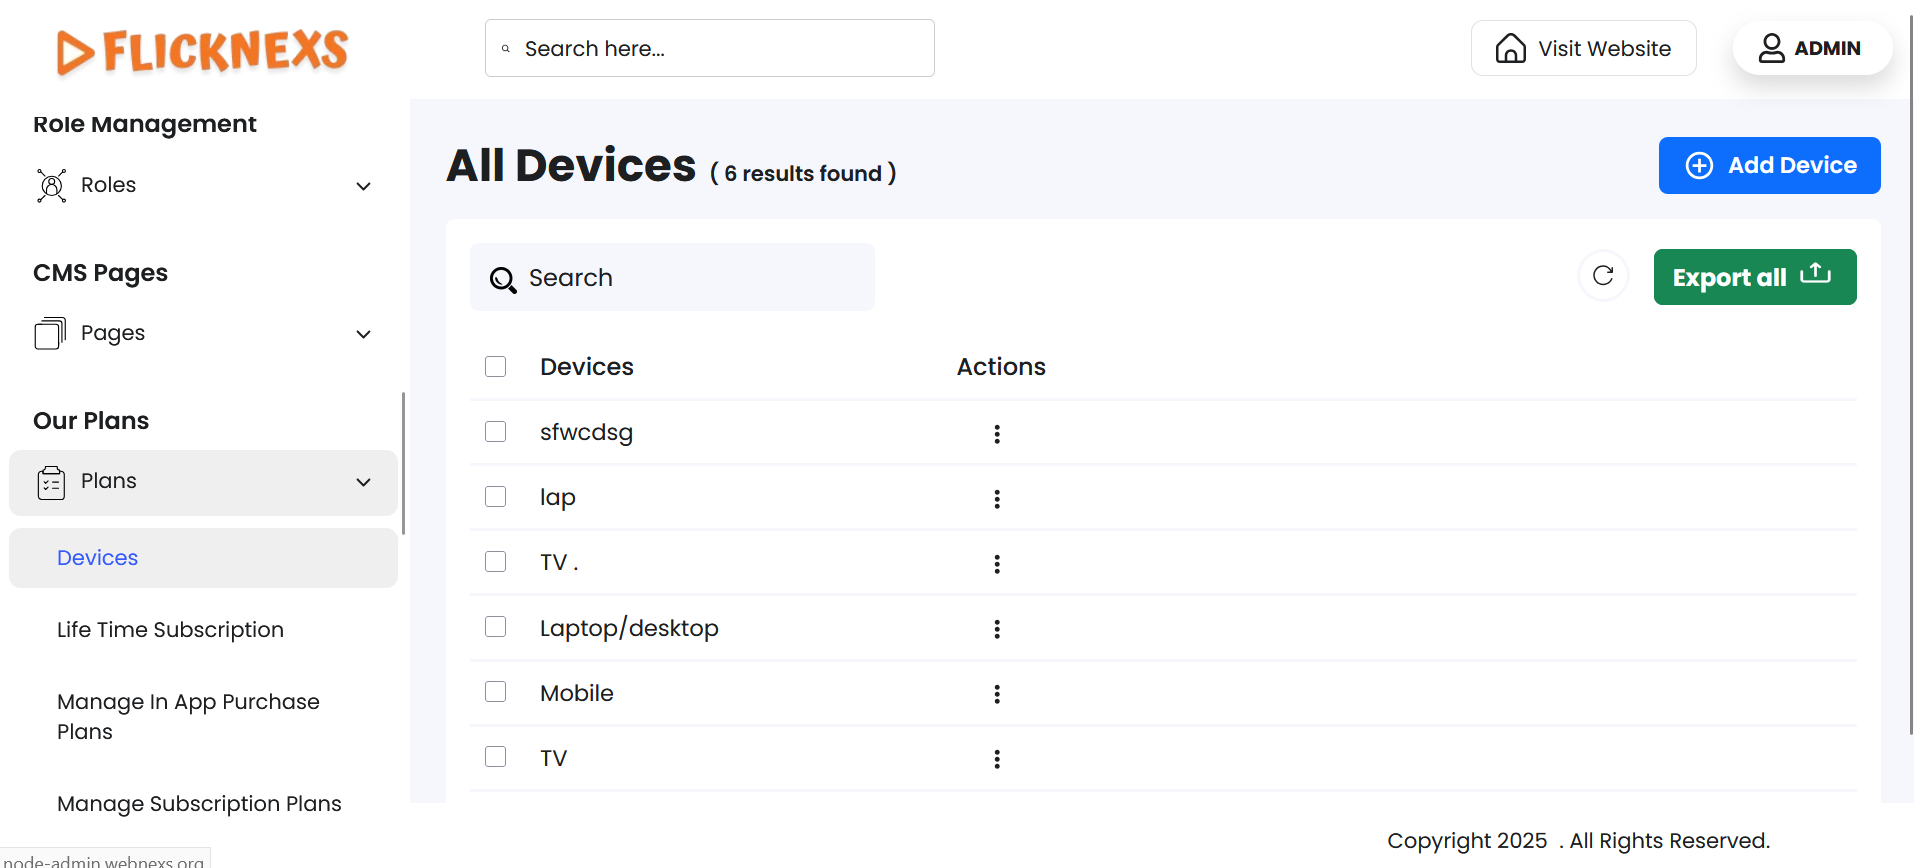
Under the title ‘All Devices’ you can add an unlimited number of devices, and this table will display all your existing devices.
- To add a new device, click on the ‘Add Device’ button at the top right corner. A dialog box called ‘Add New Device’ will open with a text box to name the new device.
- Click on the ‘Add Device’ button to add this field to the table. A toast notification ‘Device Added Successfully’ will appear to confirm the addition.
- It is a mandatory field and if you click on the ‘Add Device’ button without entering the name of the device, an error message ‘Device Name cannot be empty’ will appear in the dialog box.
There is a table just below the ‘Add Device’ option with two columns, namely ‘Devices’ and ‘Actions’. The number of devices you add will display here, you can choose to control each device using the two options – ‘Edit’ and ‘Delete’.
Edit
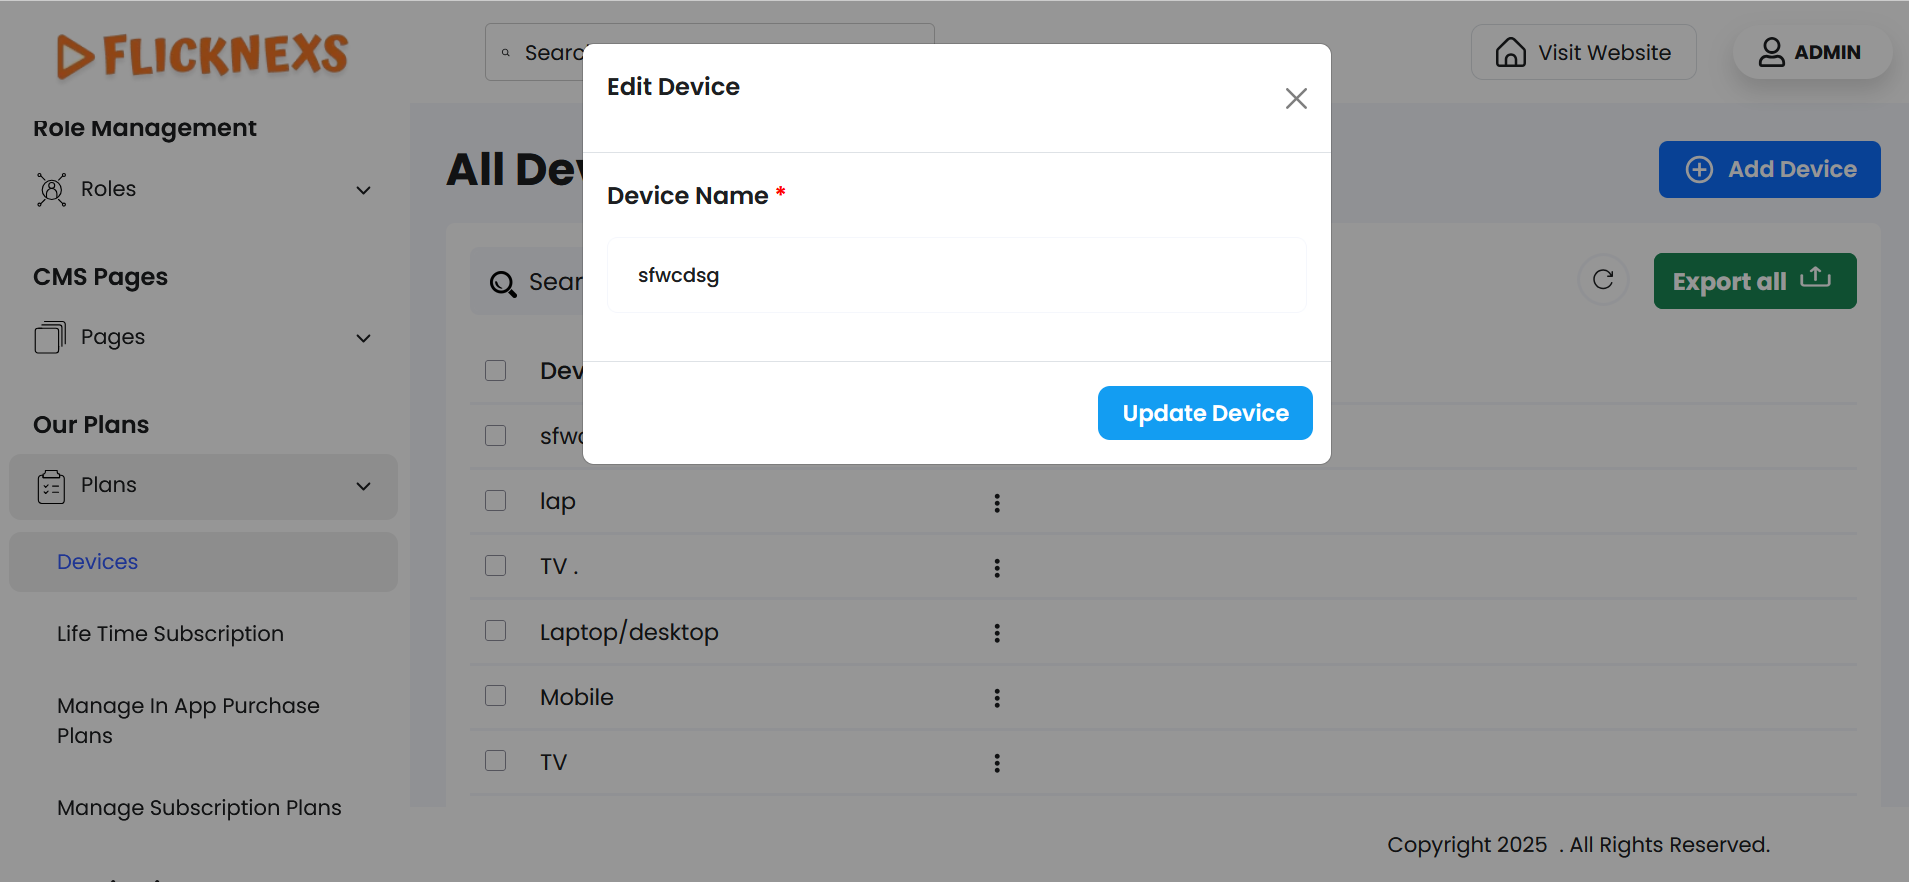
- Clicking on this will open an Edit dialog box called ‘Edit Device’ with the option to change the name of the device. You can save your changes by clicking on ‘Update Device’. A toast notification ‘Device Updated Successfully’ will appear to confirm the addition.
Delete
You can either confirm deletion or choose to retain the field.
- A pop-up named ‘Confirm Deletion’ will appear.
- It will ask, “Are you sure you want to delete this item?”
- You can choose to click ‘Cancel’ or ‘Delete’ based on your preference.
- A toast notification ‘Device Deleted Successfully’ will appear to confirm the deletion.
You can also delete a row or multiple rows by clicking on the checkboxes in each row individually or collectively.
- To simplify your workflow, there is a ‘Search’ button at the top left corner of the table. You can enter specific variables to filter the entire data.
- In case the page is not reflecting the updated data, you can use the ‘Reload’ button to refresh and display the information. You can find it by navigating to the top-right corner.
- For the purpose of record-keeping, reporting, backups, or sharing data outside the system, you can export all fields directly by clicking on ‘Export All’ by navigating to the top right corner of the table. You will find the following format options:
- CSV
- XLSX
Download in your preferred format.
Lifetime Subscription

You will find three options under the title ‘Subscription Plan Update’ to update your subscription settings by configuring the subscription details, controlling plan availability, and managing device access for users. These are explained below:
Lifetime Subscription Name
- Update the name of the Lifetime Subscription in the text box. If you omit it, the field will display this error message ‘Name cannot be empty’.
Lifetime Subscription Price
- Update the price of the Lifetime Subscription in the text box. If you omit it, the field will display this error message ‘Price cannot be empty’.
Status settings
- You can choose to offer or hide this plan by toggling between the ‘On’ and ‘Off’ button next to ‘Enable this Plan Status’.
- You can also choose to offer or hide this plan on specific devices or all devices by toggling the ‘On’ or ‘Off’ button next to each device name. This is again a mandatory field. If you choose to omit it without selecting any device, an error message ‘Enable any one of the devices’ will appear.
After filling all required fields, clicking on the ‘Update Plan’ button will save your changes, and a toast notification ‘Admin Lifetime Subscription Data Updated Successfully’ will be displayed to confirm the update.
IN-APP Purchase Plans
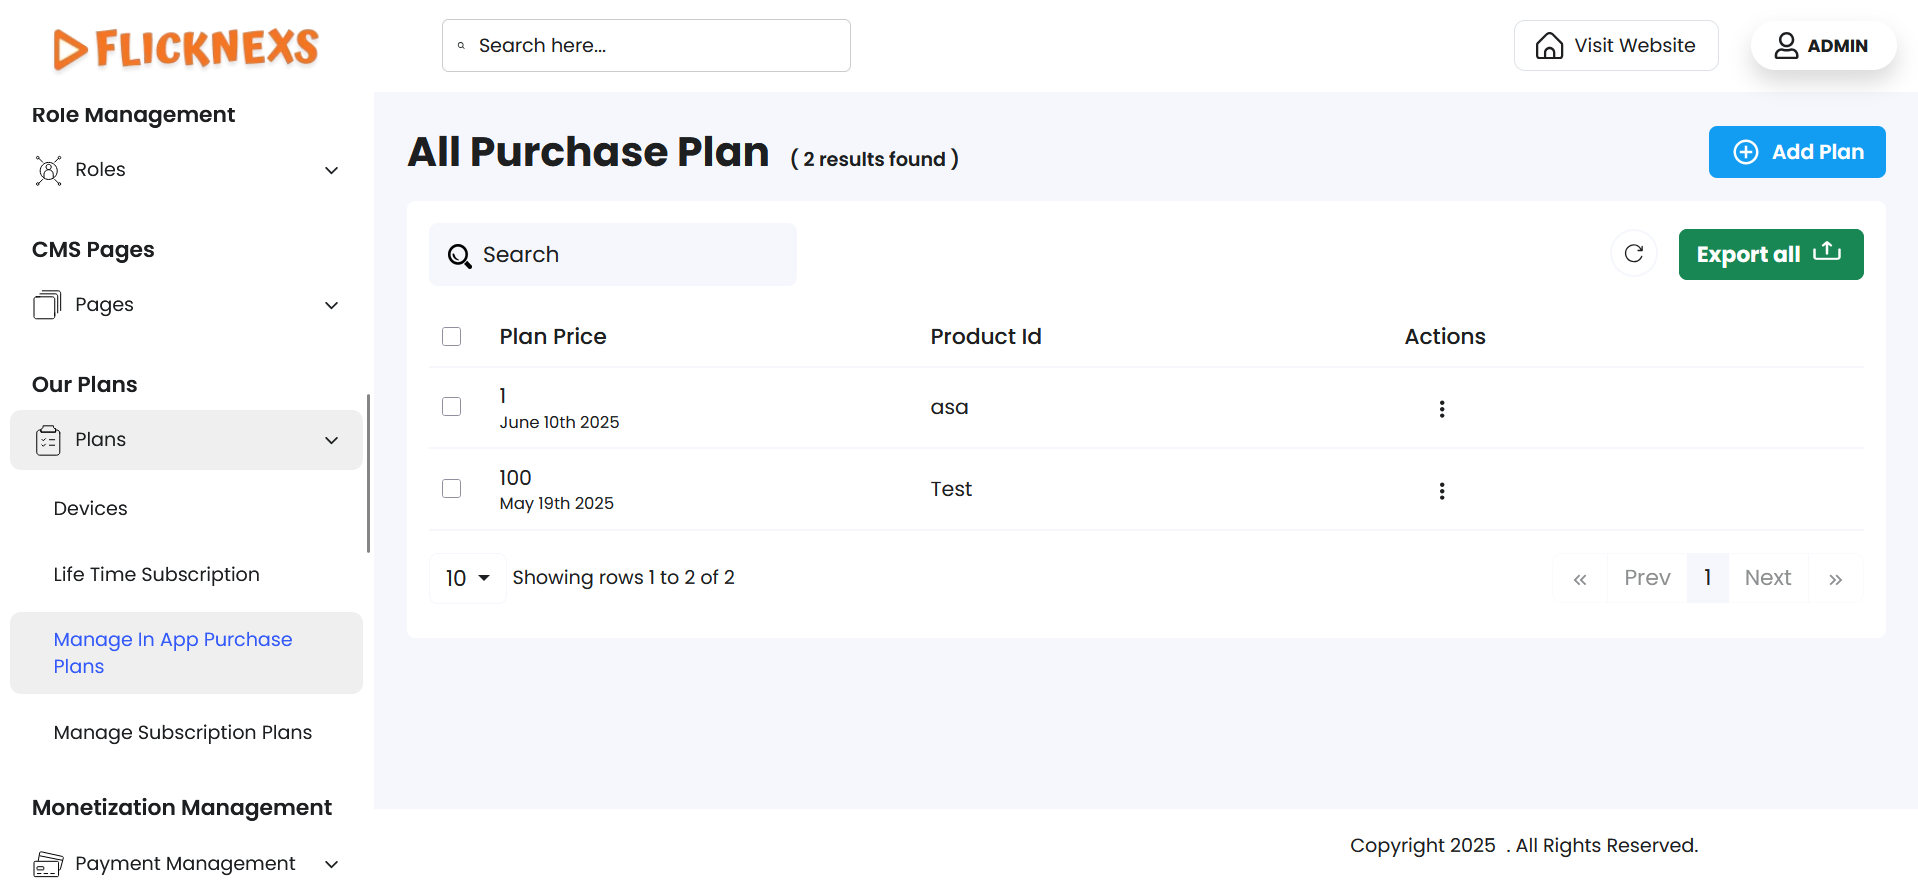
You will find a section labeled ‘All Purchase Plans’ to allow you to manage your in-app purchase plans.
To create a table of in-app purchase plans with unlimited fields follow these steps:
- Navigate to the top right corner and click on the ‘Add Plan’ option.
- A section labeled ‘Add In-App Purchase Plan’ will open with ‘Plan Price’ and ‘Product ID’ form fields. If you omit entering the details in the fields, an error message ‘Plan Price cannot be empty’ and ‘Product ID cannot be empty’ will appear as these are mandatory fields.
- An option labeled ‘Status Settings’ will appear adjacent to the above form fields. Under this section, you can use the toggle switch ‘Enable this Plan’ to control the availability of the plan to users.
- After updating, click on ‘Save Purchase’.
- A toast notification ‘In-app Purchase Data Stored Successfully’ will appear to confirm the addition.
- Return to the main plans list page by clicking on ‘Back’.
Below the ‘Add Plan’ option, you will find a table with three column headers. This table displays all your plans with options to manage each one. These are mentioned below:
- Plan Price: Price of the in-app purchase plan.
- Product ID: Unique Identifier of the in-app purchase plan.
- Actions: You will find ‘Edit’ and ‘Delete’ options.
- Under ‘Edit’, you can perform the following functions:
NOTE: The same fields will be available in both the ‘Add Plan’ and ‘Edit’ sections. While ‘Add Plan’ is used to create new plans, the ‘Edit’ section allows you to update existing ones.
- Update the ‘Plan Price’ and ‘Product ID’ in their respective fields. If you omit the details, an error message ‘Plan Price cannot be empty’ and ‘Product ID cannot be empty’ will appear.
- You will find a section called ‘Status Settings’, under which a toggle switch ‘Enable this Plan’ will be present. Toggling will determine if you choose to make the particular plan available to users.
- After editing, if you click on ‘Update Plan’, a toast notification ‘In-app Purchase Data Stored Successfully’ will appear to confirm the update.
- Return to the main plans list page by clicking on ‘Back’.
- Under ‘Delete’, you can either confirm deletion or choose to retain the field.
- A pop-up named ‘Confirm Deletion’ will appear.
- It will ask, “Are you sure you want to delete this item?”
- You can choose to click ‘Cancel’ or ‘Delete’ based on your preference.
- A toast notification ‘In-app Purchase Deleted Successfully’ will appear to confirm the deletion.
You can also delete a row or multiple rows by clicking on the checkboxes in each row individually or collectively.
- To simplify your workflow, there is a ‘Search’ button at the top left corner of the table. You can enter specific variables to filter the data, and the matching data will appear accordingly.
- In case the page is not reflecting the updated data, you can use the ‘Reload’ button to refresh and display the information. You can find it by navigating to the top-right corner.
- For the purpose of record-keeping, reporting, backups, or sharing data outside the system, you can export all fields directly by clicking on ‘Export All’ by navigating to the top right corner of the table. You will find the following format options:
- CSV
- XLSX
Download in your preferred format.
Manage Subscription Plans

A section labeled ‘All Subscriptions’ will open to allow you to update all your subscription plans that you offer to the users.
To create a table containing all your subscription plans follow the steps mentioned below:
- Locate the top right corner and click on the ‘Add Plan’ option.
- There will be five form sections displayed with each section requiring specific inputs, update your plan details in each form section accordingly.These are mentioned in detail with each field under each form section below:
- Create Page:
This form section is for updating the basic plan configuration. It has the following fields:
- Plan Name: Update the name of your plan.
NOTE: If you omit entering, an error message ‘Plan Name cannot be empty’ will appear as this is a mandatory field.
- Billing Interval: Specifies the frequency of subscription billing and provides a dropdown list to select the required interval.
NOTE: If you omit entering, an error message ‘Billing Interval cannot be empty’ will appear as this is a mandatory field.
- Billing Type: Defines if the plan amount is refundable or non-refundable. Since this is a subscription model, only ‘Non’-Refundable’ option will be available in the dropdown menu.
NOTE: If you omit entering, an error message ‘Billing Type cannot be empty’ will appear as this is a mandatory field.
- Plan Content: Enter additional information about the plan such as offers, special features, terms, or promotional details.
- Plan Description:
It provides details about your subscription plan’s pricing and content delivery. Here are the fields it requires:
- Price: Specify the subscription cost in the spinner input field by typing or incrementing/decrementing with the arrows.
NOTE: If you omit entering, an error message ‘Price cannot be empty’ will appear as this is a mandatory field.
- Plan Trial Days: Specify the number of free trial days in the spinner input field by typing or incrementing/decrementing with the arrows.
- Video Quality: Specify the streaming resolution available in this plan.
NOTE: If you omit entering, an error message ‘Video quality cannot be empty’ will appear as this is a mandatory field.
- IOS Product ID: Identifier for the plan in the iOS App Store.
- IOS Plan Price: Specify the price of the plan specifically for iOS users in the spinner input field by typing or incrementing/decrementing with the arrows.
- Status Settings
It defines the plan’s overall active state and feature availability. There will be three toggle switches, namely:
- Enable this Page Ad: Turn ads for this plan page on or off.
- Enable this Plan Trial: Allow or disable the free trial for this plan.
- Active Status: The configured plans remain stored in the platform database but will not be available to users until you activate them by toggling on this button. Toggling off will keep the plans stored but prevent users from subscribing.
Toggle the switches to manually control the plan’s ads, trial, and activation.
- Payment Status
The section indicates that the plan has a recurring payment cycle.
- Devices
The section defines the devices permitted to access the plan’s content. The devices that appear are:
- Laptop/Desktop
- Mobile
- TV
Toggling the switch on will display the number input field, where you can enter the maximum number of devices allowed to access the player for each type of device.
Create Plan
Click on ‘Create Plan’ which can be found in the bottom right and top right corners of the page to update the addition of a new plan. A toast notification ‘Subscription Plan Added Successfully’ will appear to confirm the addition of your new plan. If you create a subscription plan that already exists, an error toast ‘Plan name already exists’ will appear.
Back
Return to the main plans list page by clicking on ‘Back’.
You will find a table with the following fields to display the details of all your subscription plans. They are mentioned below:
- S.NO: Unique sequential number assigned to each plan.
- PLAN NAME: Name of the plan for identification.
- INTERVAL: Billing frequency of the subscription plan.
- PRICE: Price of the subscription plan.
- ACTIONS: ‘Edit’ and ‘Delete’ are the options.
- Under ‘Edit’, you will find the same fields available in ‘Add Plan’. While ‘Add Plan’ is used to create new plans, the ‘Edit’ section allows you to update existing ones.
- Under ‘Delete’, you can either confirm deletion or choose to retain the field.
- A pop-up named ‘Confirm Deletion’ will appear.
- It will ask, “Are you sure you want to delete this item?”
- You can choose to click ‘Cancel’ or ‘Delete’ based on your preference.
- A toast notification ‘Subscription Plan Deleted Successfully’ will appear to confirm the deletion.
- To simplify your workflow, there is a ‘Search’ button at the top left corner of the table. You can enter specific variables to filter the data, and the matching data will appear accordingly.
- In case the page is not reflecting the updated data, you can use the ‘Reload’ button to refresh and display the information. You can find it by navigating to the top-right corner.
- For the purpose of record-keeping, reporting, backups, or sharing data outside the system, you can export all fields directly by clicking on ‘Export All’ by navigating to the top right corner of the table. You will find the following format options:
- CSV
- XLSX
Download in your preferred format.
Pagination controls
- Rows Per Page Dropdown
- Use the dropdown menu (showing options – 5, 10, All) to set the number of subscription records displayed per page.
- Selecting ‘All’ will display all available rows on a single page.
- Showing Rows Information
It indicates the range of records currently being viewed out of the total number of results.
- Pagination Buttons
Use the ‘Prev’ and ‘Next’ buttons to navigate backward or forward through pages of results, if there are multiple pages.